Ytaj
 You feel an arcane presence...
This page or section may contain significant spoilers for Drehmal: Apotheosis. Read the additional messages below for specific spoiler information.
This article contains significant spoilers for the 75% completion event and its associated late-game areas.
Unless you have FINISHED the 75% Completion Sequence, ALL THE WAY THROUGH TO THE "Apotheosis" ADVANCEMENT, we strongly advise that you DO NOT continue to read this article, as this will interfere with your ability to discover crucial aspects of the map for yourself.
Description
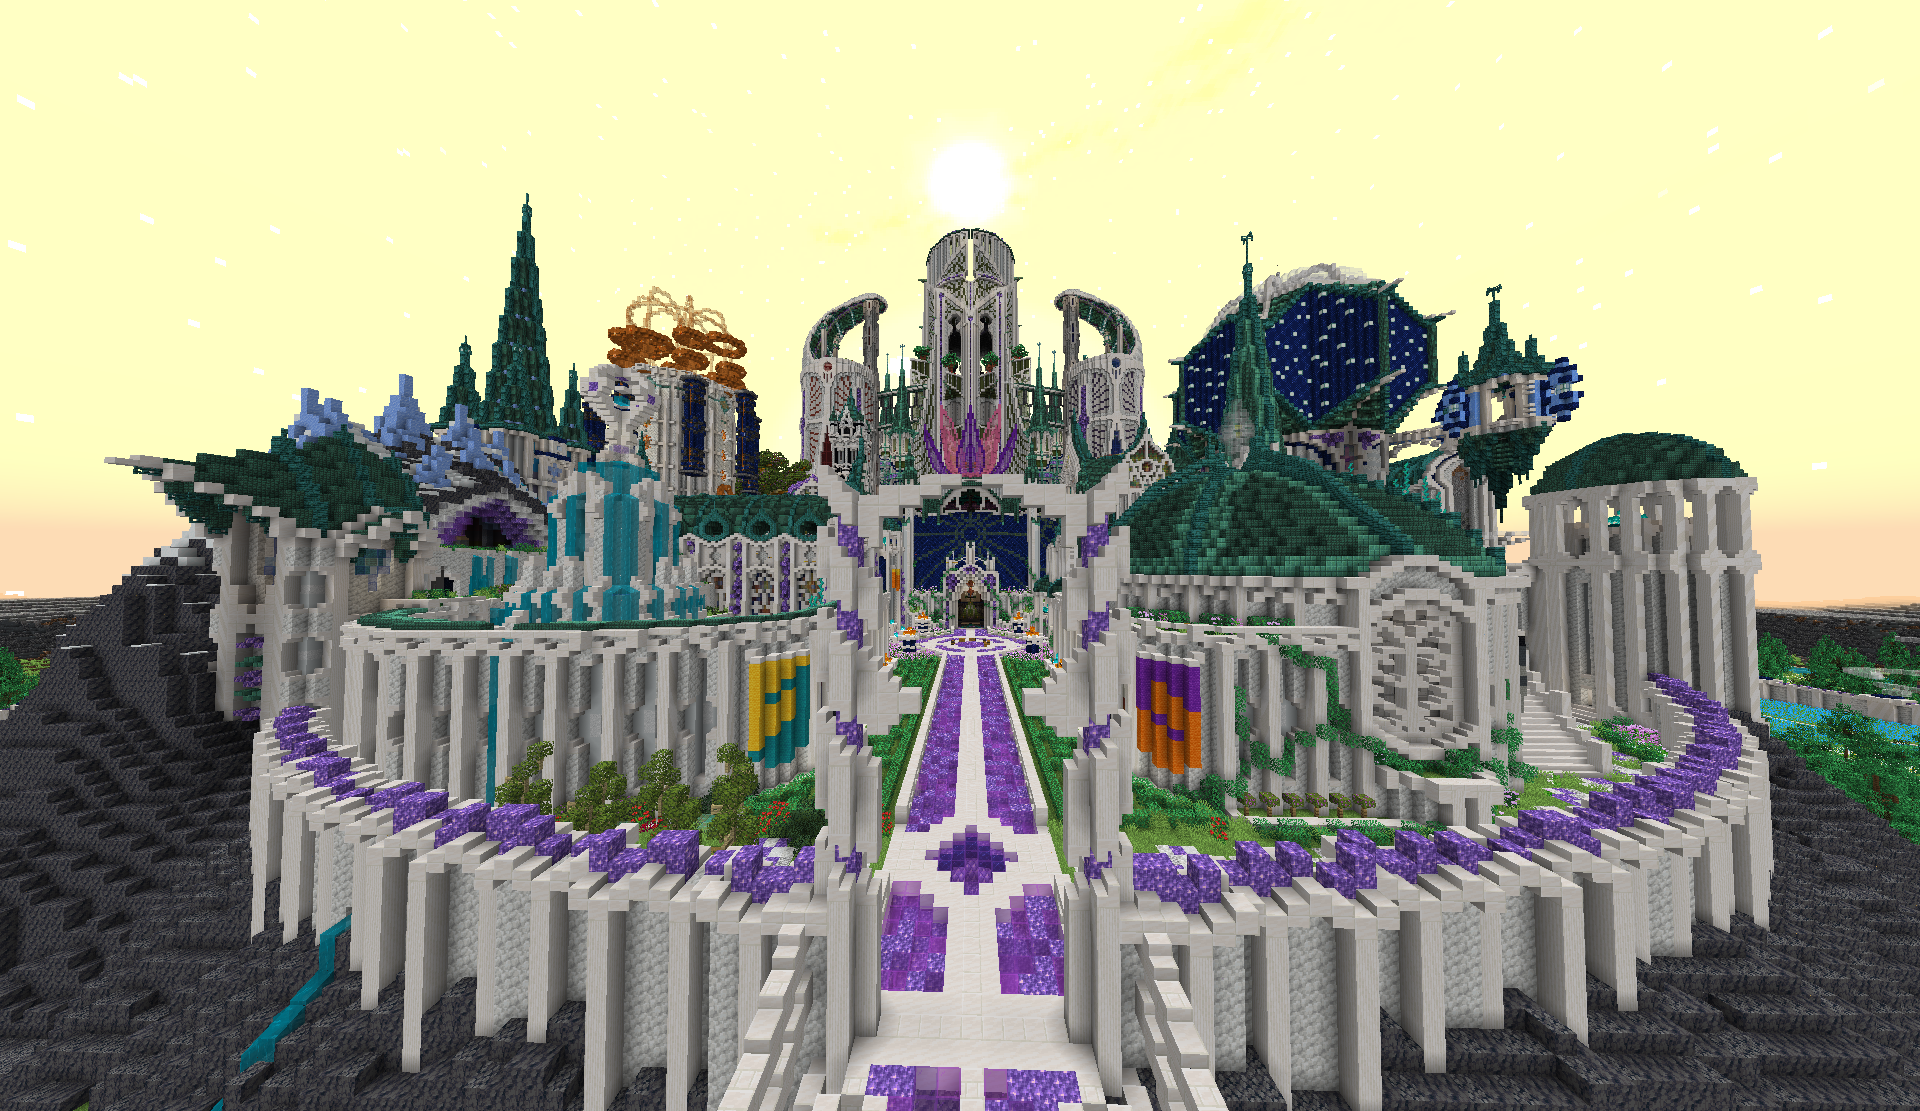
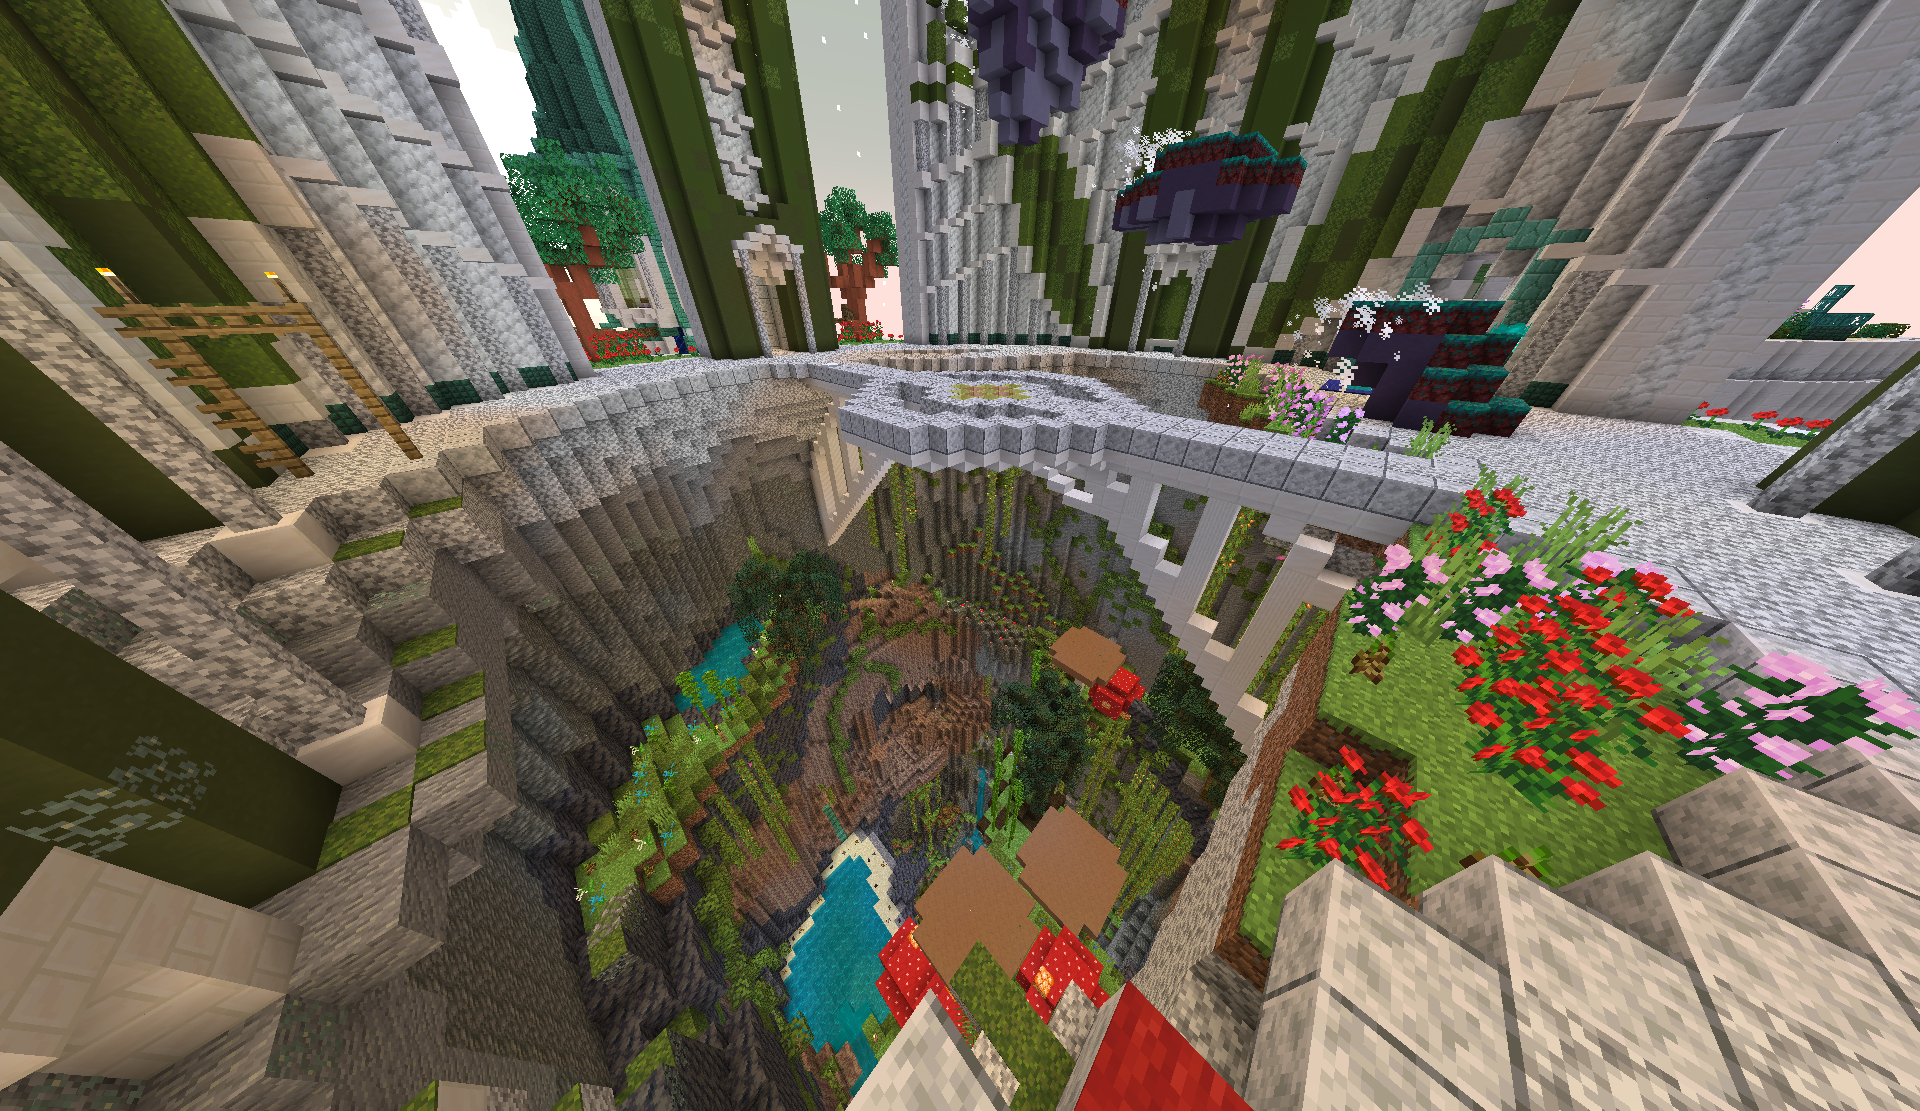
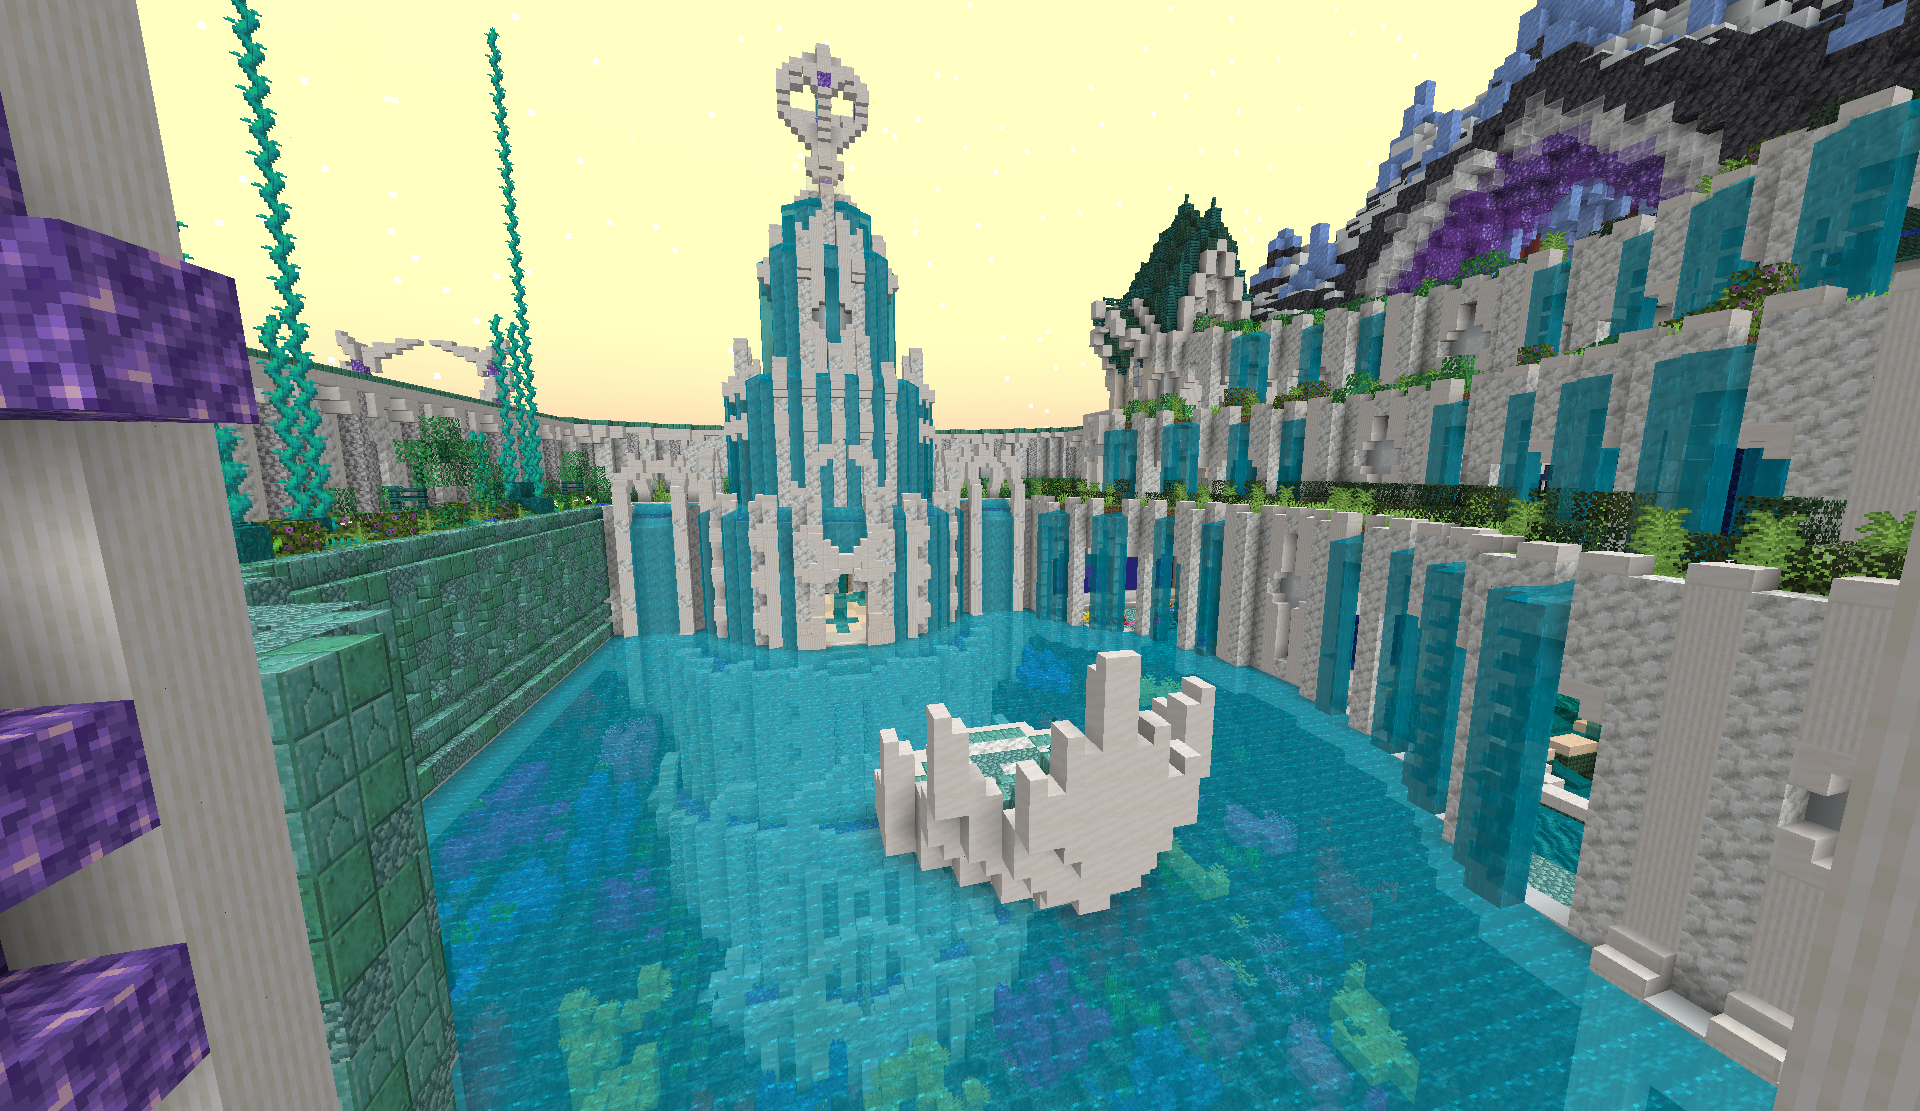
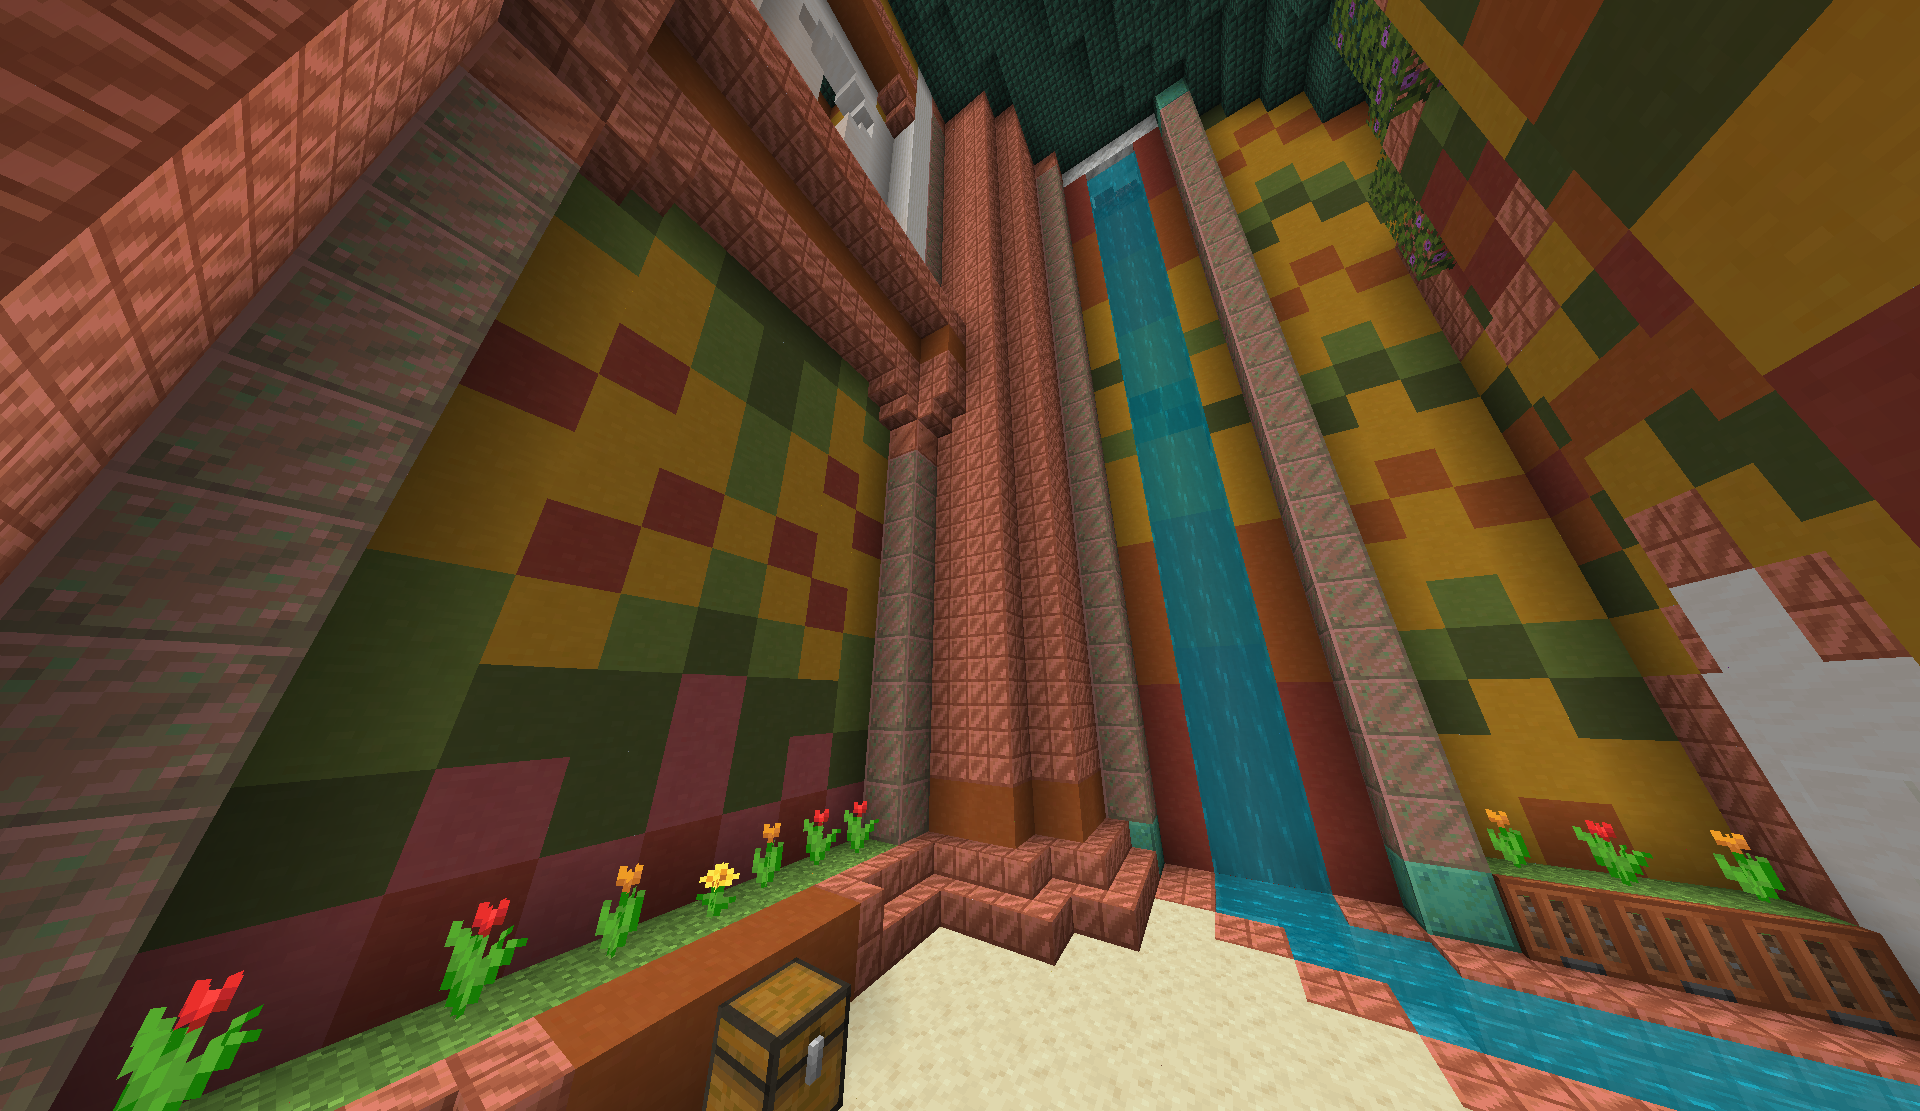
Ytaj (pronounced yih-tie or yee-tie) is the 15th region of Lo'Dahr. Distinct from the other regions, which are the domains of one of the many Aspects, Ytaj is a massive palace complex, which is heralded as the sacred meeting place of all the gods of the realm of Drehmal. This area is the most intricate build in the map of Drehmal, containing a vast array of grandiose white buildings, meeting halls, shrines, and living quarters of the gods themselves. It is located in the far north of Lo'Dahr's habitable area, extending out beyond the moon's otherwise roughly square boundaries.
Ytaj borders Vayniklah's Domain to the west, Moen's Domain to the south, Taihgel's Domain to the southeast, and Lahrs' Domain to the east. It is primarily accessed through a massive bridge that extends due north from Moen's Domain.
| Minecraft Biome | Old Growth Spruce Taiga |
| Water Color | Light Blue |
| Sky Color | Yellow/Orange |
Geography
The city/palace portion of Ytaj, or Ytaj proper, is circular, but the overall region takes on more of an upside-down pear shape, owing to the massive bridge that extends south between Ytaj proper and Moen's Domain. The palace is surrounded by a larger ring of gardens and statues, themselves enclosed by a larger wall. The entire landform is surrounded by a moat, fed from the west by the river in Vayniklah's Domain.
The primary point of access is a massive white and purple bridge which runs north/south from the palace to Moen's Domain, stretching for over 500 blocks. A lake is found underneath one portion of this bridge, contained entirely within the island.
Design
Ytaj's aesthetic pulls on heavy use of white, purple, and blue, with all buildings in the area made primarily out of some combination of quartz, calcite, diorite, amethyst, and infused amethyst.
Individual rooms in Ytaj heavily reference color schemes related to specific Aspects or Deities, as most of the rooms in Ytaj are dedicated to one specific god. The colors of the four Elders—yellow for Khive, blue for Dahr, red for Taihgel, and purple for Rihelma—are very prominently featured, both in the design of banners and symbols around the area and in items tied to Ytaj.
Gameplay
There are no enemies that naturally spawn in Ytaj.
There are, however, many unique gameplay elements in this area.
Traders
Precocious Kinah
Precocious Kinah is an ascended cat, who serves as a protector of the palace and a merchant to the player. She is located at the very front of Ytaj's main eastern hallway, sitting upon a small pillar. Kinah sells multiple Trinkets, and deals primarily in ![]() Divine Baubles, a kind of custom currency that is found only in Ytaj. Divine Baubles can be found as loot throughout the palace complex, and can also be purchased (for a relatively high price) from Kinah.
Divine Baubles, a kind of custom currency that is found only in Ytaj. Divine Baubles can be found as loot throughout the palace complex, and can also be purchased (for a relatively high price) from Kinah.
Coordinates: (-30, 29, -1569)
Precocious Kinah Trades
| Price | Item |
|---|---|
| 32 Divine Baubles | Call of the Council |
| 5 Divine Baubles | Aurastaff of Permafrost |
| 3 Divine Baubles | Khivian Scroll of Sanctuary |
| 1 Divine Bauble | 2 Arcane Bottles (Bottle of Experience) |
| 12 Amethyst Shards 1 Diamond | 1 Divine Bauble |
| 12 Amethyst Shards 1 Celestial Chondrule (Netherite Scrap) | 3 Divine Baubles |
| 12 Amethyst Shards 2 Gold Ingots | 1 Relic Vessel |
A full list of all 111-115 (1) known Divine Bauble locations is found below, organized roughly by geographic location, starting in the southwest and working clockwise.
- Prior to v2.2.2, there were a total of 111 Divine Baubles, but 4 more were added in this update. Additional 2.2.2-only Bauble locations are listed at the end of the table.
Divine Bauble Locations
| Coordinates | Location |
|---|---|
| (-27, 29, -1568) | In an item frame, at Precocious Kinah's feet. This is the only known Divine Bauble in an item frame. |
| (-138, 29, -1502) | Inside a narrow field of lilacs in the southwestern corner of Ytaj, just inside the wall. |
| (-82, 28, -1499) | Under a leaf block in the southwestern hedges. |
| (-93, 37, -1543) | Inside the prismarine pool that feeds the water in Dahr's area from the northeast. |
| (-128, 5, -1538) | Inside a magenta bubble coral structure on the western wall of the underwater portion of Dahr's area. |
| (-115, 6, -1606) | In the seat of the underwater throne behind Dahr's shrine. |
| (-110, 10, -1519) | Behind a chiseled quartz block, in the underwater portion of the tower containing Dahroehl's room. |
| (-110, 61, -1504) | In the water at the top of Dahroehl's room/tower. |
| (-158, 29, -1528) | In the southwestern hallway leading to Dahr's and Loe's shrines. |
| (-149, 53, -1504) | Outside the northern wall of the stairway up to Loe's room. |
| (-165, 71, -1531) | At the top of the river which flows from the glacier on top of Loe's room. |
| (-171, 78, -1552) | Northeast of the giant ice spike at the top of Loeleyhn's room. |
| (-182, 53, -1548) | On the upper level of Loeleyhn's room. |
| (-175, 27, -1548) | Below a chiseled quartz block in the center of Loeleyhn's room. |
| (-109, 57, -1561) | High up in the main western hall, in the southeastern corner of the upper level. |
| (-108, 29, -1599) | Inside of the black/yellow tree in a western courtyard. |
| (-124, 29, -1584) | In the rose bushes by the black and yellow tree in the west. |
| (-102, 56, -1586) | Near an Orderflame brazier above the black/yellow tree, accessible from the upper level of the main western hall. |
| (-135, 46, -1556) | In the southwest, just outside/above a southern window of the main western hallway. |
| (-107, 46, -1610) | In a small garden patch, sandwiched between the Prismatic Council Chamber and the black/yellow tree in the west. |
| (-168, 33, -1569) | Behind the fountain in the main western hall. |
| (-171, 47, -1569) | Behind the amethyst pile above the fountain in the main western hall. |
| (-163, 73, -1569) | Behind a chiseled quartz block on the top western face of the main western hall. |
| (-158, 34, -1590) | Inside the left (southern) blue concrete/copper vase in the western hallway. |
| (-130, 30, -1630) | Hidden behind a painting on the ground floor of the library room. |
| (-138, 66, -1626) | On a bookshelf at the top of the library room. |
| (-141, 48, -1624) | Behind three soul flames above the entrance to the library room. |
| (-125, 99, -1642) | At the top of the parkour tower in western Ytaj. |
| (-185, 110, -1612) | At the top of the warp ring puzzle in Khive’s tower. |
| (-185, 120, -1612) | On top of Khive's tower, beneath the orange stained glass flowing to/from the center. |
| (-155, 57, -1622) | Underneath a glazed yellow terracotta block at the base of an odd tree from Khive's Domain, just outside of Khive's room. |
| (-138, 29, -1656) | On a mushroom in Muhs' room. |
| (-163, 38, -1640) | Under flowering azalea leaves in an intersection between Mael's room and the library room, next to an orange/red/yellow mural. |
| (-180, 78, -1656) | In the top of the honey tree at Vayniklah's shrine. |
| (-147, 103, -1690) | At the top of the tower over Mael's secondary devotion shrine, beneath a chiseled taihryte block. |
| (-134, 38, -1690) | At the bottom level of Mael's tower, on the east side. |
| (-87, 86, -1641) | In a patch of blue orchids at the western base of the large multicolored flower atop the Prismatic Council Chamber. |
| (-69, 67, -1646) | Inside the chandelier hanging from the ceiling of the Prismatic Council Chamber, beneath a chiseled slate block. NOTE: This is the only location that contains two Divine Baubles. |
| (-69, 94, -1643) | Inside the massive multicolored flower on the top of the Prismatic Council Chamber. |
| (-69, 56, -1595) | At the top of the main (southern) entrance to the Prismatic Council Chamber. |
| (-106, 34, -1686) | In the southwest portion of the Tower of Drehmal's pond, on a wall above the edge of the water. |
| (-138, 30, -1715) | On a miniature Island of Dawn in the Tower of Drehmal's pond, just northwest of the tower. |
| (-117, 31, -1732) | Next to a brazier at the water/ground level of the Tower of Drehmal, northwest of the tower. |
| (-75, 43, -1761) | Inside a tall mini-mountain at the water level, due north of the Tower of Drehmal. |
| (-45, 31, -1770) | Inside of a geode, situated along the path of a stream draining out of the Tower of Drehmal pond to the north-northeast. |
| (-37, 32, -1694) | Inside an ice spike in the southeast portion of the Tower of Drehmal pond. |
| (4, 31, -1718) | On a miniature Island of Dusk in the Tower of Drehmal's pond, northeast of the tower and due north of Virtuo's tower. |
| (-105, 114, -1682) | In a smaller tower due southwest of the Tower of Drehmal, accessible by climbing a path of white stained glass blocks in the rough shape of clouds. |
| (-30, 114, -1679) | In the smaller sapling/flower tower due southeast of the Tower of Drehmal. |
| (-69, 168, -1778) | In the smaller tower north of the Tower of Drehmal, accessible from the elevator platform that links to the top of the Mael/Virtuo towers. |
| (-83, 45, -1738) | Behind the very first small waterfall in the Tower of Drehmal climb. |
| (-80, 58, -1734) | At the top of the very first small waterfall in the Tower of Drehmal climb. |
| (-64, 143, -1700) | Inside the Tower of Drehmal, on a platform above/to the right of the post-vine jump area. |
| (-78, 150, -1696) | In an amethyst geode in the Tower of Drehmal, accessed by heading down from the wall path just before reaching the elevator platform level. |
| (-80, 95, -1691) | In the south-southwest side room of the Tower of Drehmal, accessed through an underwater tunnel in the pond surrounded by ores in item frames. |
| (-58, 95, -1691) | Inside the south-southeast side room of the Tower of Drehmal, only accessible from a chain outside of the tower. |
| (-100, 75, -1705) | At the bottom of the west-southwest magma side room of the Tower of Drehmal, accessed by dropping down at the oak fence/torch near the elevator platform. |
| (-96, 140, -1708) | At the top of the west-southwest magma side room of the Tower of Drehmal, accessed by dropping down at the oak fence/torch near the elevator platform. |
| (-40, 108, -1706) | In the east-southeast side room of the Tower of Drehmal, accessed through a small tunnel just below the vines players must jump to. |
| (-36, 75, -1702) | In the east-southeast side room of the Tower of Drehmal, accessed through a small tunnel from inside where the player would have to climb on trees to progress. |
| (-95, 145, -1727) | At the top of the waterfall in the west-northwest side room of the Tower of Drehmal, accessed through a 1-block flooded calcite tunnel. |
| (-102, 74, -1734) | At the bottom of the waterfall in the west-northwest side room of the Tower of Drehmal, accessed through a 1-block flooded calcite tunnel. |
| (-38, 74, -1733) | At the bottom of the aquatic east-northeast side room of the Tower of Drehmal. |
| (-39, 153, -1729) | At the top of the waterfall in the aquatic east-northeast side room of the Tower of Drehmal. |
| (-57, 95, -1745) | In the north-northeast side room of the Tower of Drehmal, accessed through a dripstone cave. |
| (14, 27, -1697) | Beneath an amethyst tile block in a geode cave, in the northeast. |
| (9, 51, -1696) | In Virtuo's shrine room, behind a chiseled quartz block inside the northern pool wall. |
| (9, 94, -1671) | In the upper fountain in Virtuo's room. |
| (9, 140, -1708) | Inside the fish tank, above Virtuo's shrine. |
| (15, 85, -1635) | On top of the southeastern wall in Taihgel's room. |
| (26, 105, -1655) | On the roof of Taihgel's room, just east of the stained glass ceiling. |
| (49, 69, -1655) | Under the central black terracotta block in the ground mural on the balcony of Taihgel's room. |
| (38, 28, -1685) | Beneath the center of a street lamp with a single Orderflame at the top, north of Lailoehn's room. |
| (9, 31, -1670) | In the north end of Lai's room, under an upright polished basalt block. |
| (33, 38, -1650) | Beneath the orange lamp structure in the hall between Lai and Lailoehn's rooms. |
| (-22, 50, -1622) | In a tunnel behind a 2x2 tunnel in the western side of the stairway out of Lai's room, also accessible from a ladder above. |
| (27, 47, -1628) | In a taihryte cave behind a 2x2 painting in the eastern stairway by Lai's room, also accessible through a hole in the water stream above. |
| (-12, 66, -1626) | Inside a miniature volcanic caldera, just southwest of Taihgel's room. |
| (20, 58, -1600) | Inside a small blackstone hill in the Crimson Forest-esque area in the Southeastern Ytaj intersection. |
| (-5, 42, -1587) | Behind a polished slate block on a basalt mountain in eastern Ytaj, above a small lava lake. |
| (-32, 55, -1606) | Beneath a chiseled quartz block in the floor of a small gazebo surrounded by wheat, just southeast of the Prismatic Council Chamber. |
| (9, 54, -1610) | Beneath a chiseled quartz block in the fountain at the intersection outside Lai and Lahrs' rooms. |
| (9, 48, -1606) | At the top of a water stream in the wall just outside of Lahrs' room. |
| (56, 31, -1647) | Behind a chiseled blackstone block at the northern end of Lahrs' room, along the top row of seats. |
| (57, 21, -1642) | Tucked between the front row of seats and the wall at the north end of Lahrs' room. |
| (50, 43, -1612) | On the central projector/spotlight apparatus at the top of Lahrs' room. |
| (57, 21, -1582) | Tucked between the front row of seats and the wall at the south end of Lahrs' room. |
| (51, 88, -1613) | At the top of the mountain in Nahyn's room. |
| (76, 66, -1612) | Just outside of the open eastern window of Nahyn's room. |
| (55, 50, -1573) | Hidden underwater in Koh's room, through a 1-block underwater tunnel. |
| (61, 57, -1573) | Just outside the eastern wall of Koh's room, accessible by following a white stained glass path. |
| (-42, 59, -1569) | Above the entrance to the main eastern hall, visible through a slab-thick gap. |
| (-39, 29, -1548) | In the corner of the gardens at the eastern entrance, hidden behind leaves. |
| (-11, 29, -1579) | At the back of the left (northern) bamboo patch behind Precocious Kinah in the main eastern hall. |
| (-4, 42, -1561) | Inside the right (southern) red taihryte vase/container at the top of the stairs behind Precocious Kinah. |
| (11, 32, -1573) | On a shelf in the eastern Tehrmari kitchen. |
| (51, 29, -1572) | In what appears to be a condemned Talon room in the eastern wing of Ytaj, sharing a chest with the Ostracizing Belt artifact. |
| (17, 43, -1588) | On the ground floor of Rihelma's room, behind a black concrete powder block on the northern wall. |
| (9, 55, -1541) | Beneath an Orderflame campfire atop a mini Aldregakar outside Rihelma's room. |
| (43, 79, -1543) | Behind the half-wall in Rihalae's "room". |
| (19, 21, -1540) | Behind Voynahla's skull and shrine. |
| (-20, 30, -1510) | Inside of a hidden passageway between Voynahla's room (marked by a chiseled slate block) and the southeastern gardens. |
| (-4, 28, -1523) | In the southeastern gardens, within a patch of white tulips beneath a staircase. |
| (28, 44, -1540) | In a double chest in a hidden room in the southeast, which also contains the Worn Ironreed Rod artifact. |
| (31, 28, -1552) | Underneath the grass block beneath the wall mural with a dandelion, in the room below the Worn Ironreed Rod room. |
| (25, 34, -1545) | In a secret amethyst room behind a 4x4 painting just up the stairs from the Runic Blacksmith. |
| (29, 31, -1515) | Behind a mural of the Elders in southeast Ytaj, with an access point near the area's Runic Blacksmith. |
| (30, 52, -1513) | Behind a brazier in the far southeast of Ytaj. |
| (-19, 33, -1510) | Beneath the central block of one of the sign tablets in Palaesida's room. |
| (-49, 45, -1526) | Behind a chiseled quartz block on the western, desert-themed balcony of Palaesida's room. |
| (-46, 44, -1502) | On the southwestern balcony of Palaesida's room. |
| 2.2.2 Bauble Locations | |
| (-192, 47, -1684) | In a small gazebo just northwest of Vayniklah's tree. |
| (-147, 101, -1703) | At the top of the tower over Maelihs' shrine. |
| (-13, 131, -1718) | In a smaller tower northwest of Virtuo's tower. This chest contains two Divine Baubles. |
Benefactor Zabuyah
Benefactor Zabuyah is a Tehrmari trader found in the main eastern hall of Ytaj, in a room just behind Precocious Kinah and to the right. Zabuyah sells books (the merchant directly sells trapped chests, but each chest simply contains a book of the same name), which serve as hints toward the locations of Devotion shrines on the Overworld. There are 11 of these books, with alliterative titles that tell the player a hint as to the general area of each shrine. Each book costs 12 Amethyst Shards.
Coordinates: (-5, 29, -1562)
Full transcripts of the 11 respective books can be found at their pages:
- Devotion on Drehmal: Dahr's Deserters
- Devotion on Drehmal: Drehmal's Docents
- Devotion on Drehmal: Khive's Kin
- Devotion on Drehmal: Lai's Lights
- Devotion on Drehmal: Loe's Loss
- Devotion on Drehmal: Maelihs's Might
- Devotion on Drehmal: Rihelma's Ritualists
- Devotion on Drehmal: Taihgel's Tales
- Devotion on Drehmal: Vayniklah's Vegetarians
- Devotion on Drehmal: Virtuo's Vitality
- Devotion on Drehmal: Voynahla's Vow-keepers
Runic Blacksmith
A Runic Blacksmith is found in southeastern Ytaj, in a small yard behind Rihelma's room. This Runic Blacksmith sells three artisan items, all themed after the La'Tehrmari subdivisions—the Talon, Wingmakers, and Scalebound priests.
Coordinates: (35, 29, -1535)
Secondary Devotion Shrines
Each of the 11 Deities and Aspects who have a Devotion shrine (the three Deities and eight Major Aspects) has a secondary shrine somewhere in Ytaj, where they can be given offerings just like their primary shrine on Drehmal. Devotion progress is global, so if you have already maxed out your devotion to a certain Aspect, giving additional offerings at Ytaj will not do anything. Conversely, if you are unable to find a shrine on Drehmal, you can use the Ytaj one instead.
For coordinates of secondary Devotion shrines, see the corresponding Deity or Aspect's "Room" section in the Points of Interest portion of this article.
Dialogue Interactions
There are two entirely optional, but extensive dialogue interactions to be found in Ytaj, both in one of the tallest towers in the northern side of the palace.
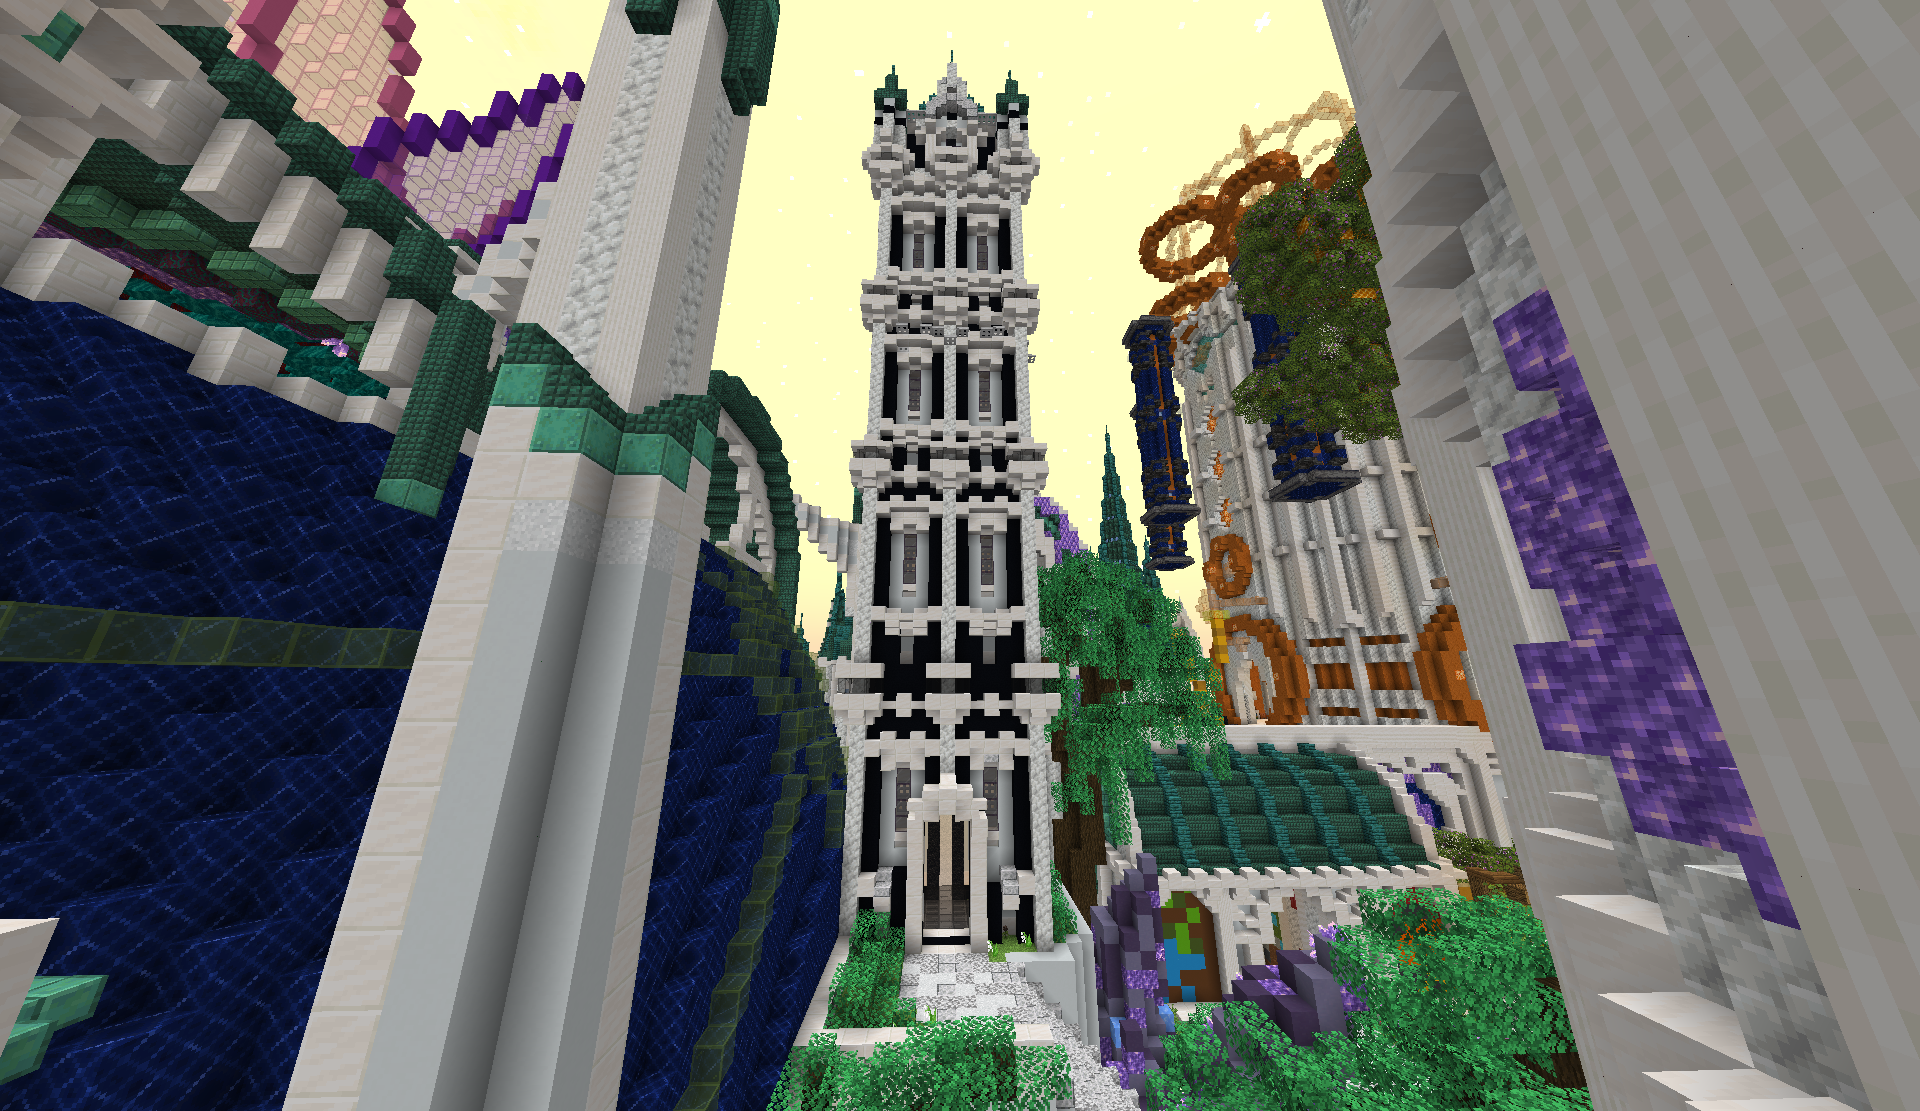
Tower of Drehmal
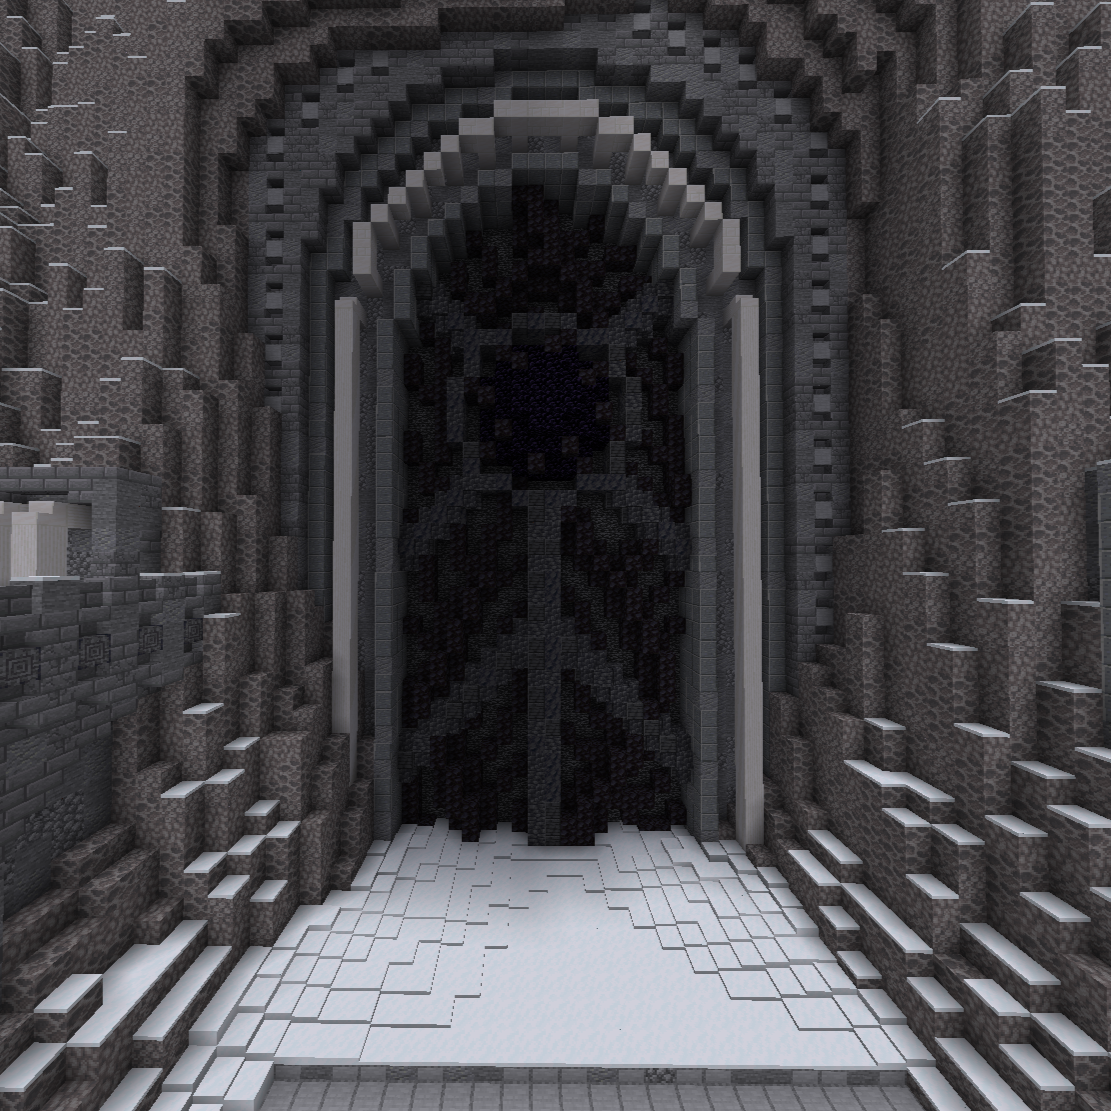
The Tower of Drehmal is the tallest tower in Ytaj, located at the northern end of the region and accessed at the ground level either through one of the side wings or directly from the Prismatic Council Chamber. The Soletta is located in the base of this tower, and behind the Soletta, one will find a small gate which reads "Tower of Drehmal, Begin Ascent^". Beginning the climb up this tower will initiate a dialogue sequence, known officially as "Dreams of the Serpent", or simply the "Dream Dialogue".
The first two lines of the Dream Dialogue.
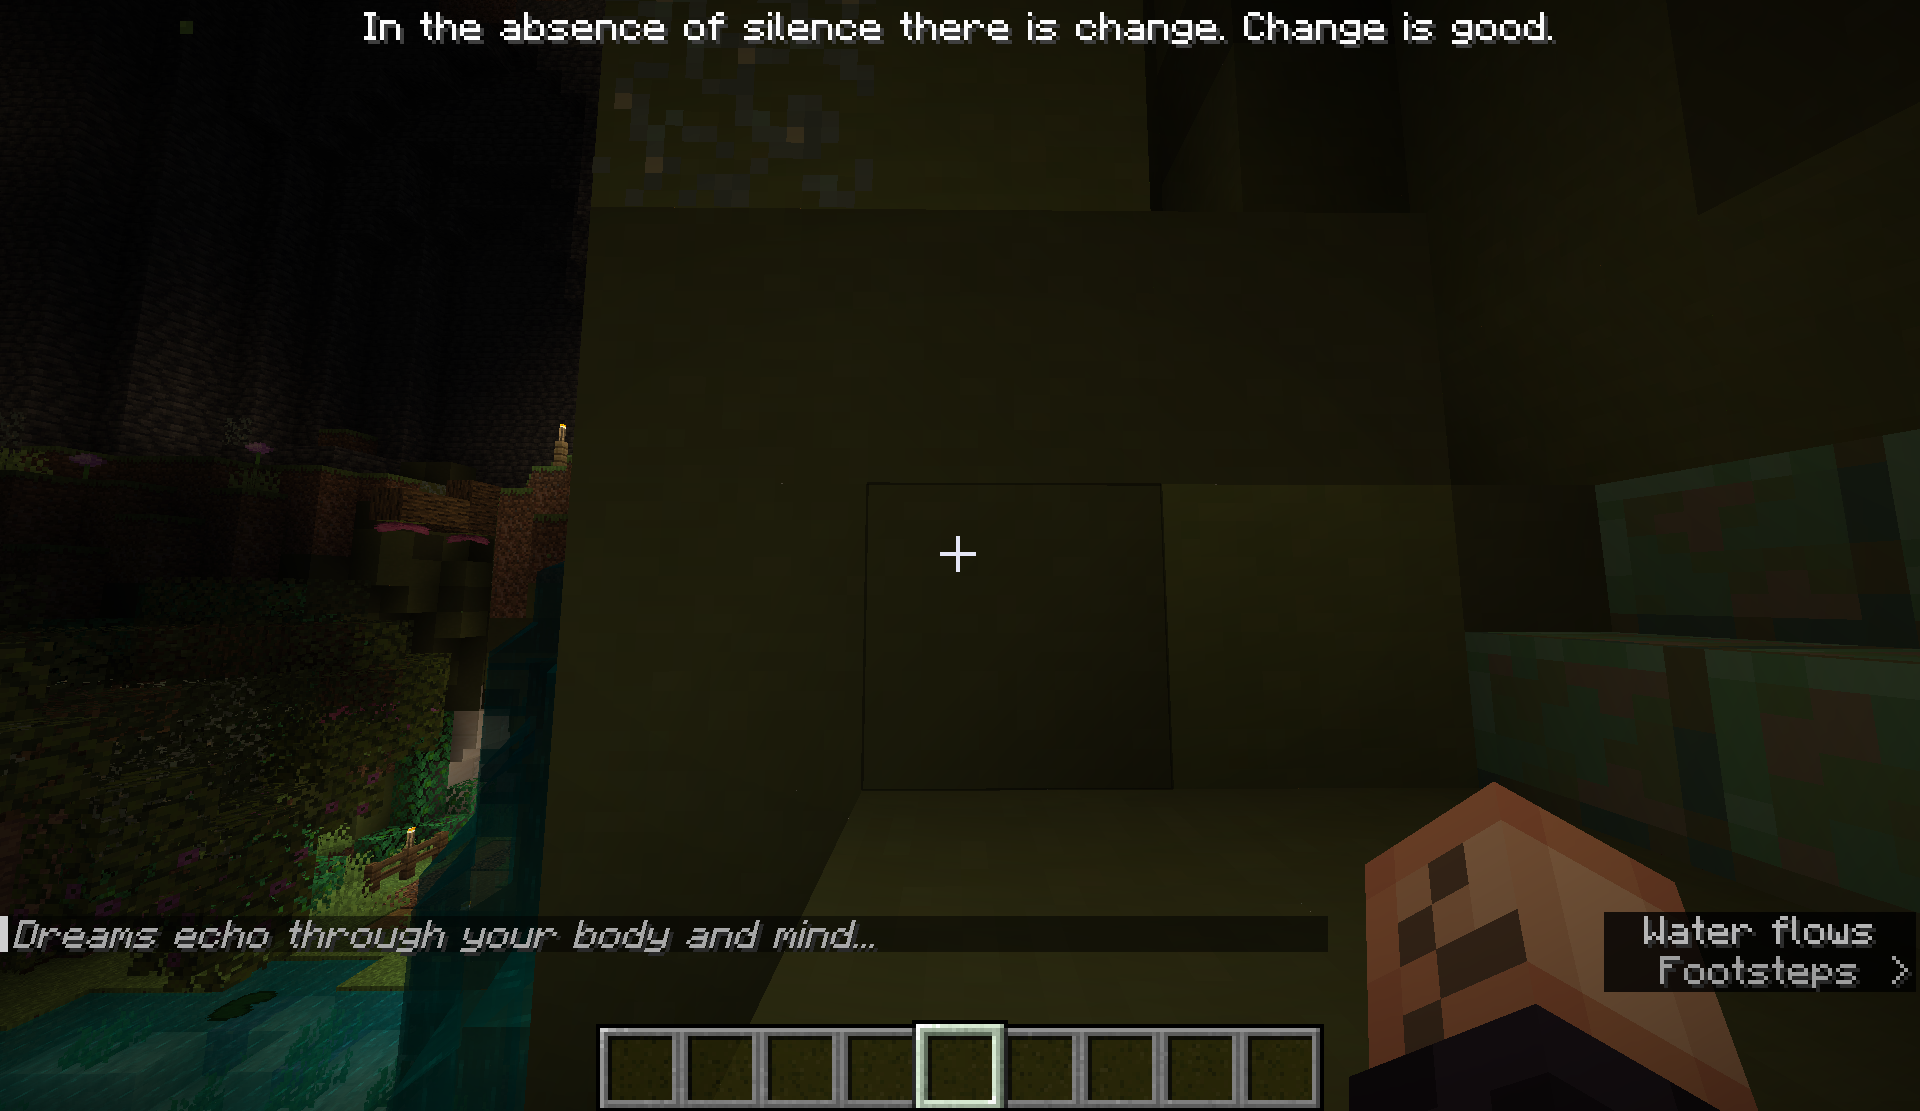
The Dream Dialogue is presented differently from the rest of the text in Drehmal, with an alternating combination of text cues in the chat and lines spoken directly by Drehmal at the top of the screen. This sequence lasts for approximately 9-10 minutes, and will pause if the player leaves the bounds of the tower, later resuming if that player returns to the tower. The dream only occurs once per player normally, but it can be viewed again by using the /function players:misc/dream_dia/reset command.
Dream Dialogue Content
The Dream Dialogue appears to depict the player actively partaking in Drehmal's dream, while being simultaneously addressed by the Realmbinder, who gives a verbose monologue about their ancestry and the fundamental nature of entropy and change. The text cues in chat indicate that the player begins to feel as if they are Drehmal, born of the Primal Tree and immensely powerful, before snapping back to reality as Drehmal consciously shifts the direction of their dream. They end the sequence by dreaming about their hypothetical awakening, returning to live among the people they created, finding fulfillment in their company once again until the inevitable end.
A full transcript of this sequence can be found here.
The full dialogue sequence can be seen without fully climbing the tower, but climbing to the top will bring the player to Drehmal's secondary shrine. The ascent requires players to perform some slightly difficult traversal—jumping between platforms, swimming up waterfalls, and climbing some vines. About 2/3 of the way up, players will come to a solid platform, which branches off to the other two tallest towers in Ytaj, southwest and southeast of this tower, respectively. An empty shaft to the north can be dropped down safely, bringing players to a hidden chamber right next to the beginning of the climb, with a block that can be broken to create a shortcut. This shaft serves as an elevator, allowing easy return up to the platform without having to navigate the entirety of the terrain again. Drehmal's shrine at the top is accessed by touching the particles on the area's floating islands, which give the player 4 seconds of Levitation II.
Tower of Maelihs
From the elevator platform at the Tower of Drehmal, two carpeted paths lead out to other towers, with a red one leading to the southwest and a blue one to the southeast. Predictably, these two paths lead to towers dedicated to Maelihs and Virtuo respectively, the two other Deities. Virtuo's tower to the southeast contains her private chambers in Ytaj, including her shield and a lore book written by the Goddess herself that explains her current whereabouts. Mael's tower, to the southwest, however, contains something even more interesting: the Burnt Lord himself.

Maelihs, sitting in his throne in Ytaj.
In the western tower—Maelihs' tower—Mael himself is found sitting in his throne, idly lounging and occasionally tossing a knife into the air. He speaks to the player through the in-game chat, and has a full dialogue tree, which has a complete transcription here. Special dialogue lines can be heard if the player first meets Mael with full devotion to him, or if they approach him at any time while holding Malevolentia.
History
It is unknown exactly how old Ytaj is, but it does appear to have served as the center for the Aspects' affairs on Lo'Dahr since at least the mid-Second Avihm. Ytaj likely originated no earlier than early Av2, as it prominently features towers specifically dedicated to the Deities, who did not exist in Av1. Ytaj could have plausibly been built as a direct result of the Aspects largely withdrawing from Drehmari affairs on Drehmal, as they seem to have had a minimal presence on the disc since at least mid-late Av2, and would have needed a new home.
Ytaj was a central location in the events of the Divine Schism, which saw the Aspects split into two warring factions, the Palaesidans and Anti-Palaesidans, named for Palaesida, the Aspect of Storms, whose actions arguably set the entire Schism in motion, and whose death brought about its end. Ytaj was captured by Palaesida and his allies in the First Battle of Ytaj near the beginning of the conflict, and held for years until the Second Battle of Ytaj. During the Second Battle, Anti-Palaesidan forces led by Rihelma and Oriann re-captured the palace, and Palaesida was slain by Maen at the leaders' ceasefire negotiation.
After the Schism, which resulted in the deaths of Noha, Palaesida, and (indirectly) Voynahla, the Aspects mostly became reclusive, fearing that they too could lose their lives if they dared to show their physical forms. As a result, astral projection to Ytaj became the primary means of communication between the Aspects, and today, as we learn from Mael, only a few Aspects—including Dahr, Khive, Nahyn, and Dahroehl—still visit physically on a regular basis.
At some point, Yriel, the servant of the Aspects, was sent into Ytaj to murder a large faction of the Talon, effectively the La'Tehrmari police/guard force. The Talon had become a corrupt, incredibly oppressive force on Lo'Dahr, particularly prejudiced against the Ro'Tehrmari, and the Aspects, while unable to interfere directly, decided to act against them. Yriel, using their signature weapon, single-handedly slayed the majority of the Talon in Ytaj, greatly breaking the faction's grasp on the moon.
The Prismatic Council appears to be the official name for a gathering of all the Aspects and Deities, with their meetings taking place in the grandiose Prismatic Council chamber near the center of Ytaj. Several important meetings are known to have occurred here, particularly towards the end of the Third Avihm, when Khive summoned Mael and Virtuo to Ytaj in order to fully explain their origins, as well as Virtuo's final interaction with the Aspects before departing for Eastern Xivrhynt.
Today, Ytaj appears much less densely inhabited than it was at its peak, with only a handful of Tehrmari servants, Maelihs, and Precocious Kinah currently living in the palace.
Layout (Points of Interest)
Ytaj is technically a full region, but unlike the other regions, nearly everything in Ytaj could be considered a point of interest. Therefore, this section serves as a more in-depth description of Ytaj's layout, touching on almost everything in the area.
Entrance
The entrance to Ytaj, just past the bridge, consists of 18 murals, 3 blocks wide and 10 blocks tall (9 along the western and eastern walls, respectively). These murals each represent one of the Aspects, with the exception of Verrhys and the four Elders, who are featured even more prominently throughout the palace. Wool banners at the front of these two walls represent two Elder Aspects each.
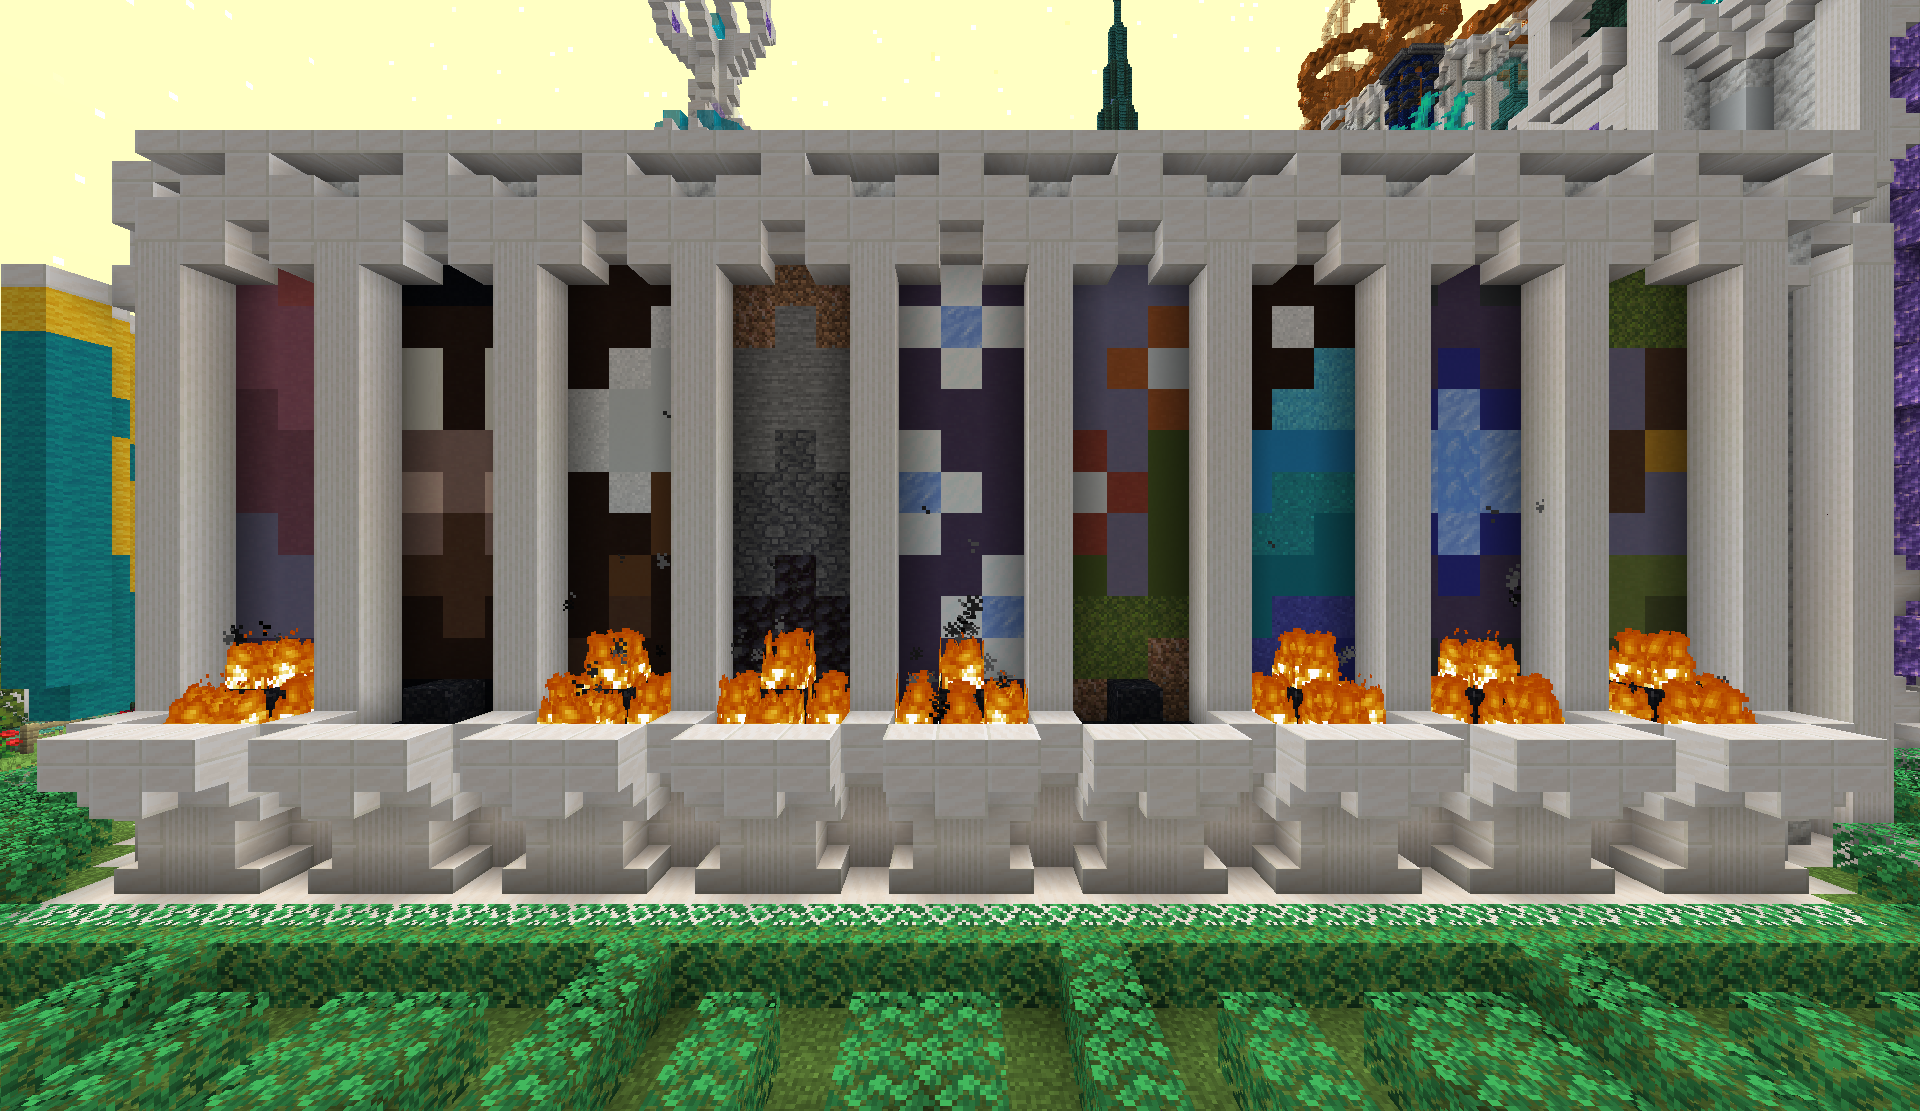
The western mural wall.
On the west, a banner of yellow and blue sits at the front, representing Khive and Dahr, whose rooms are found in western Ytaj. From right to left (north to south), these murals represent the following Aspects:
- Vayniklah, depicting a tree.
- Loe, representing cold.
- Dahroehl, depicting a river.
- Noha, depicting flowers.
- Loeleyhn, depicting snowflakes.
- Koh, depicting different types of stone.
- Mari, possibly depicting paper and pen.1
- Muhs, depicting a wolf-like beast face.
- Moen, showing Moen's signature colors.
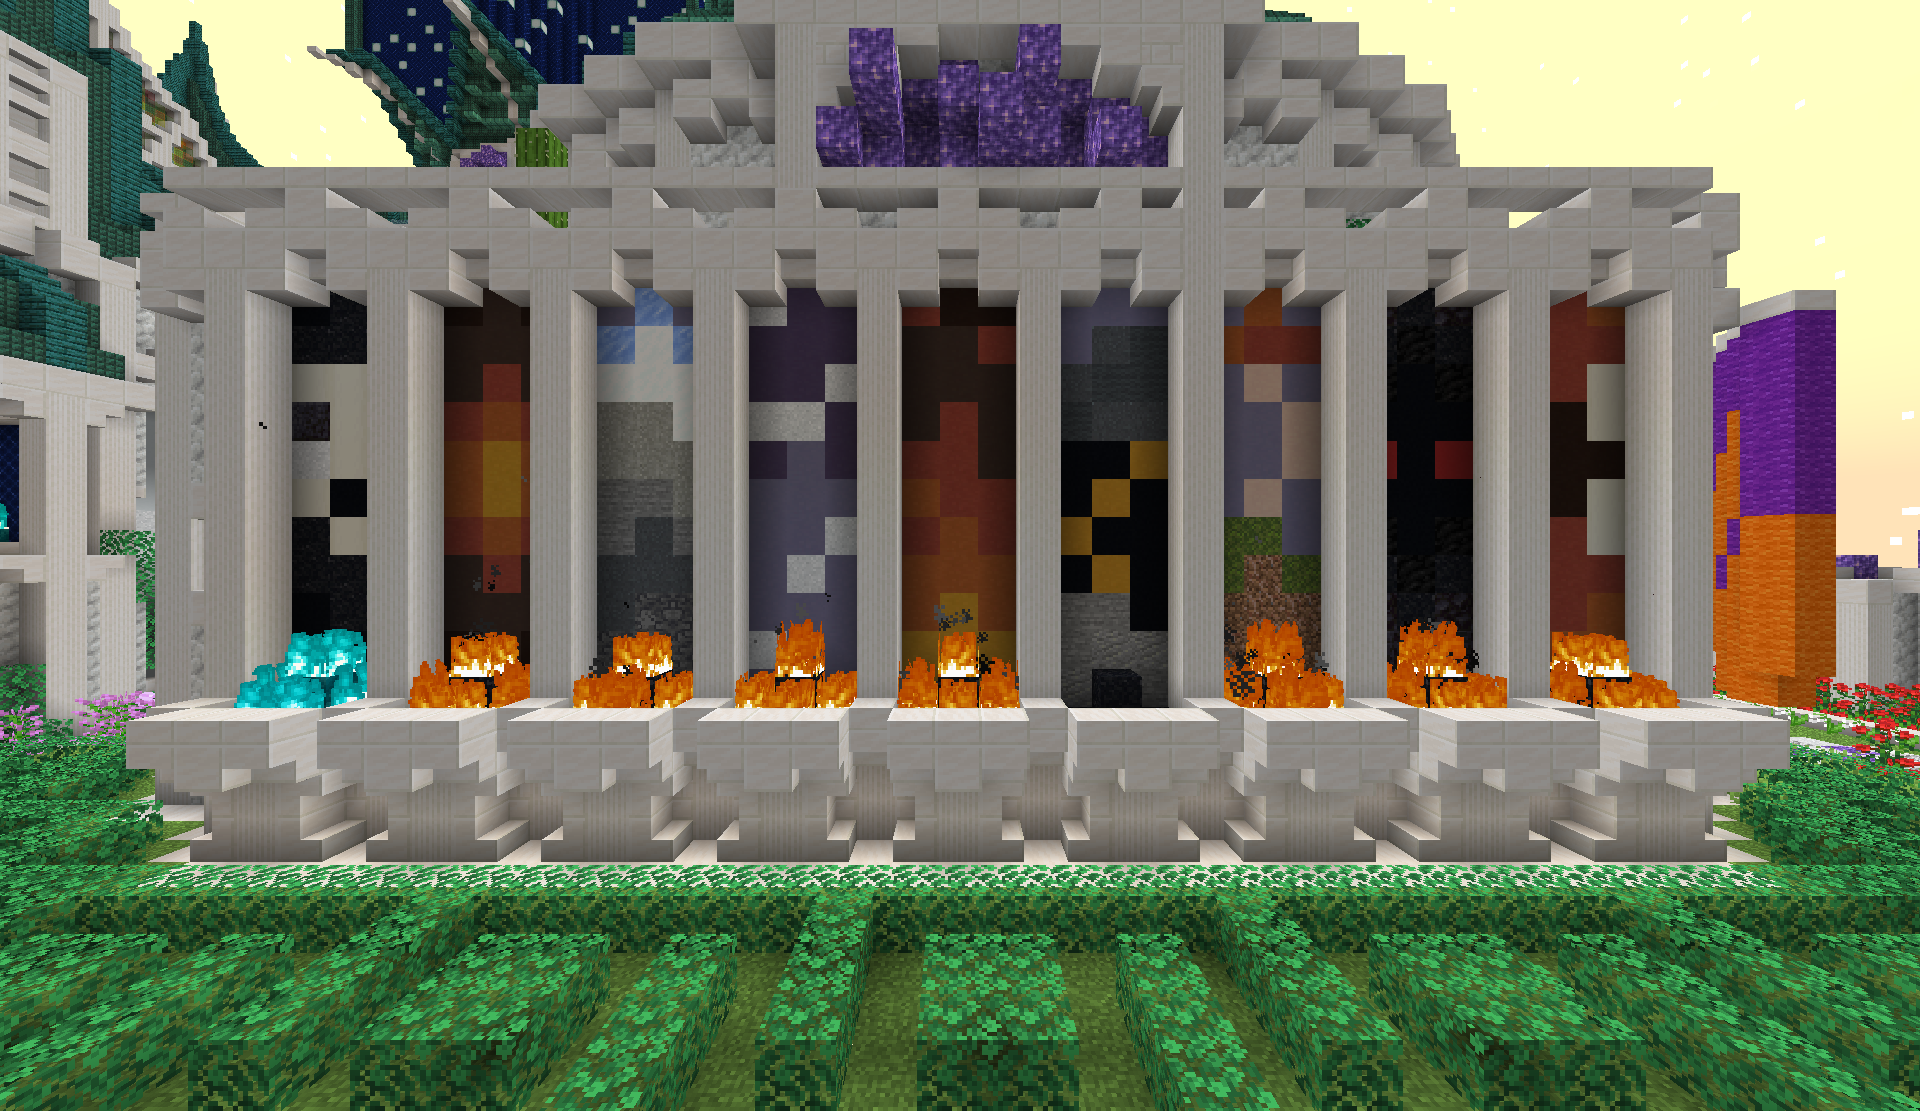
The eastern mural wall.
On the east, a banner of purple and orange sits at the front, representing Rihelma and Taihgel, whose rooms are found in eastern Ytaj. From left to right (north to south), these murals represent the following Aspects:
- Voynahla, depicting a white mask or skull on a field of black.
- Lai, representing heat.
- Nahyn, depicting a snowy mountain.
- Rihalae, representing a wind gust.
- Lailoehn, depicting a flame.
- Palaesida, depicting a lightning strike during a storm.
- Lahrs, depicting a mushroom.
- Tethlaen, depicting two red eyes in a field of black.
- Maen, with an unclear image.
Most Aspects have a flame burning in front of their murals. Three Aspects do not have a flame: Noha, Palaesida, and Muhs—the three Aspects known to be dead. Voynahla's flame is Orderflame (soul flame), unlike the others, referencing the fact that he is not fully alive, but still lives in his own realm of undeath.
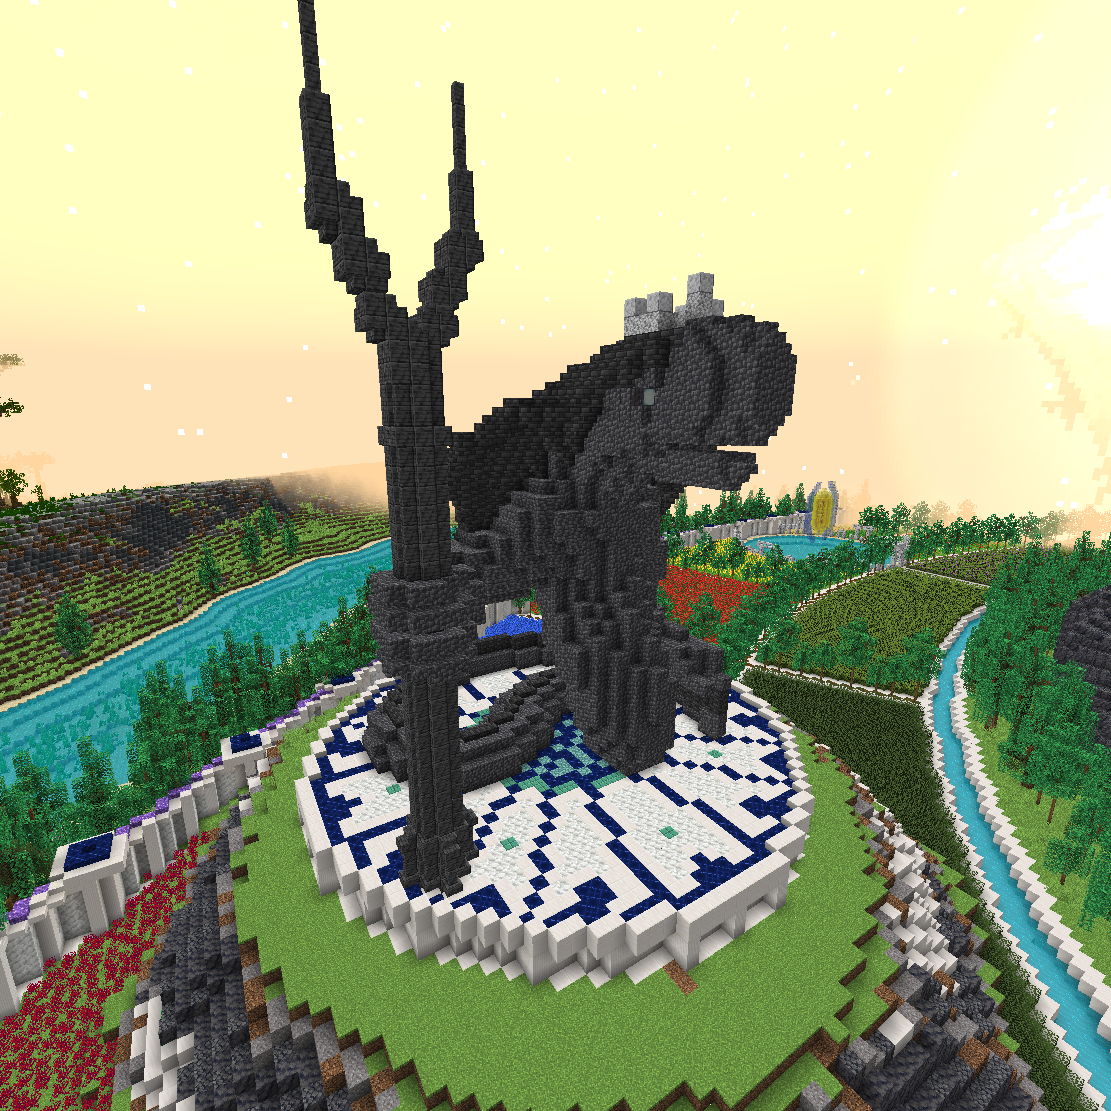
Elder Statues
In the four outer corners of Ytaj's gardens, massive slate statues of the four Elder Aspects can found, showing depictions of their physical forms.
Dahr's statue.
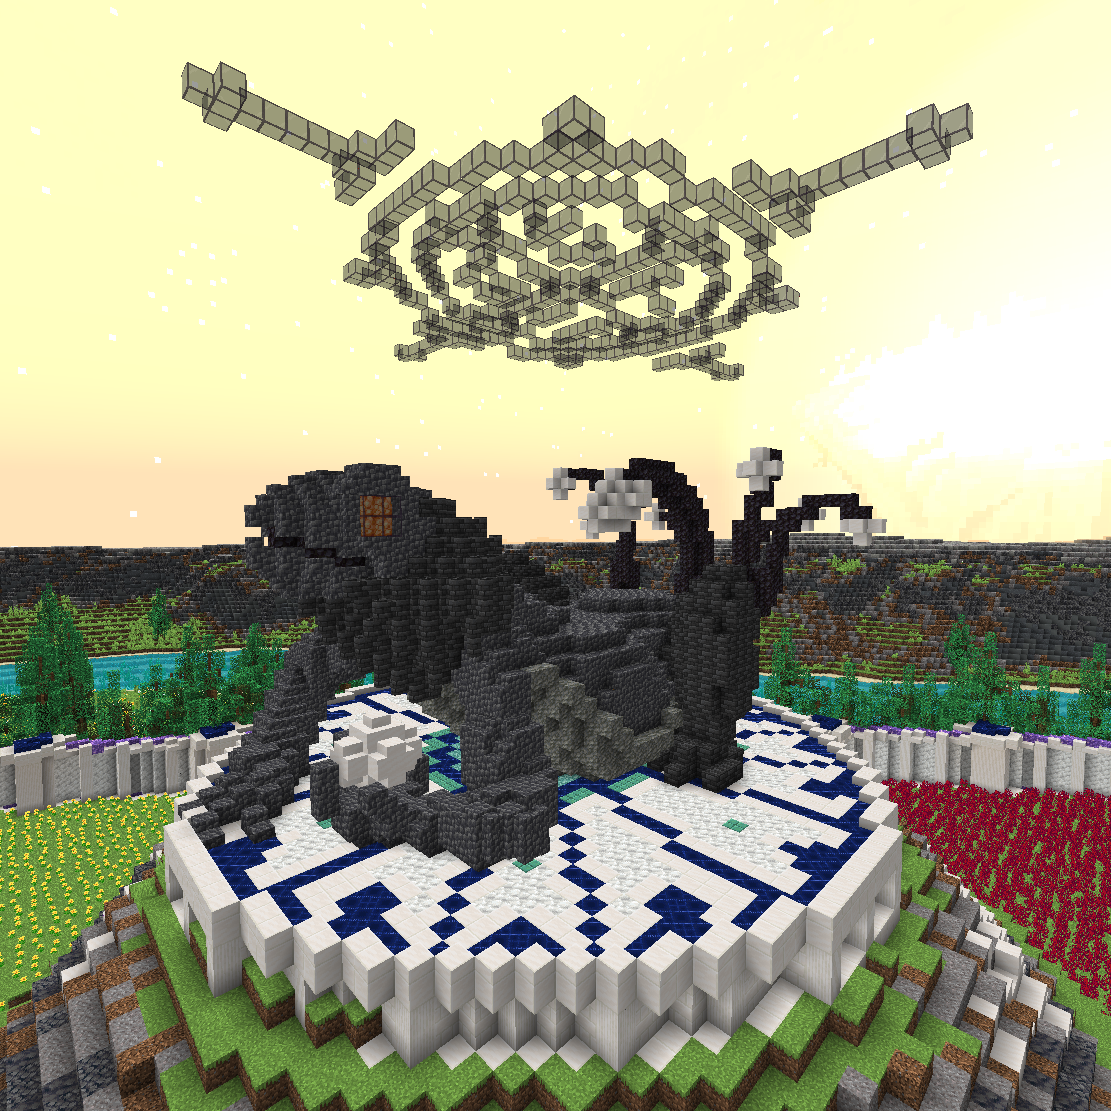
Abyssal Elder Dahr's statue is located in the southwest. Dahr's form resembles a cross between a cobra, sea serpent, and whale, with a blowhole in his diorite crown. He is shown holding a two-pronged trident ("bident"), and has eyes made of glowing sea lanterns. He points to the east, facing the statue of Rihelma.
Khive's statue.
Mystic Elder Khive's statue is located in the northwest. Khive's form resembles a bearded dragon or other lizard, with black and white flowers protruding from his back and a large stained glass rune hovering over him. He is depicted holding a magical orb of some kind with his left hand, and has flarepod (shroomlight) eyes. He faces south, toward the statue of Dahr.
Taihgel's statue.
Land-Fall Drake's statue is located in the northeast. Taihgel's form resembles a colossal tortoise, with volcanic rifts and boulders on their back. Taihgel's eyes are made of glowstone, and the face points to the south, toward Rihelma's statue.
Rihelma's statue.
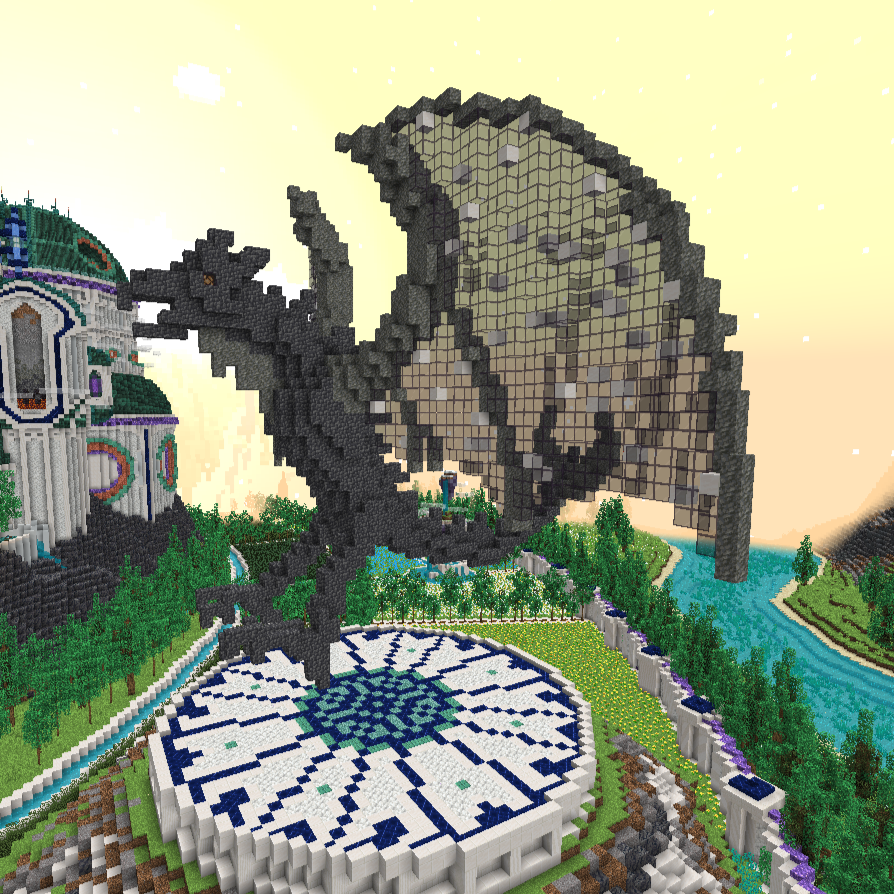
Star-Rise Drake Rihelma's statue is located in the southeast. Rihelma's form resembles a classical wyvern, a massive dragon with two legs and wide, outstretched wings dotted with white spots reminiscent of the night sky. Her eyes are redstone lamps, although they are not lit until a certain end-game milestone has been reached. She faces to the west, toward Dahr's statue.
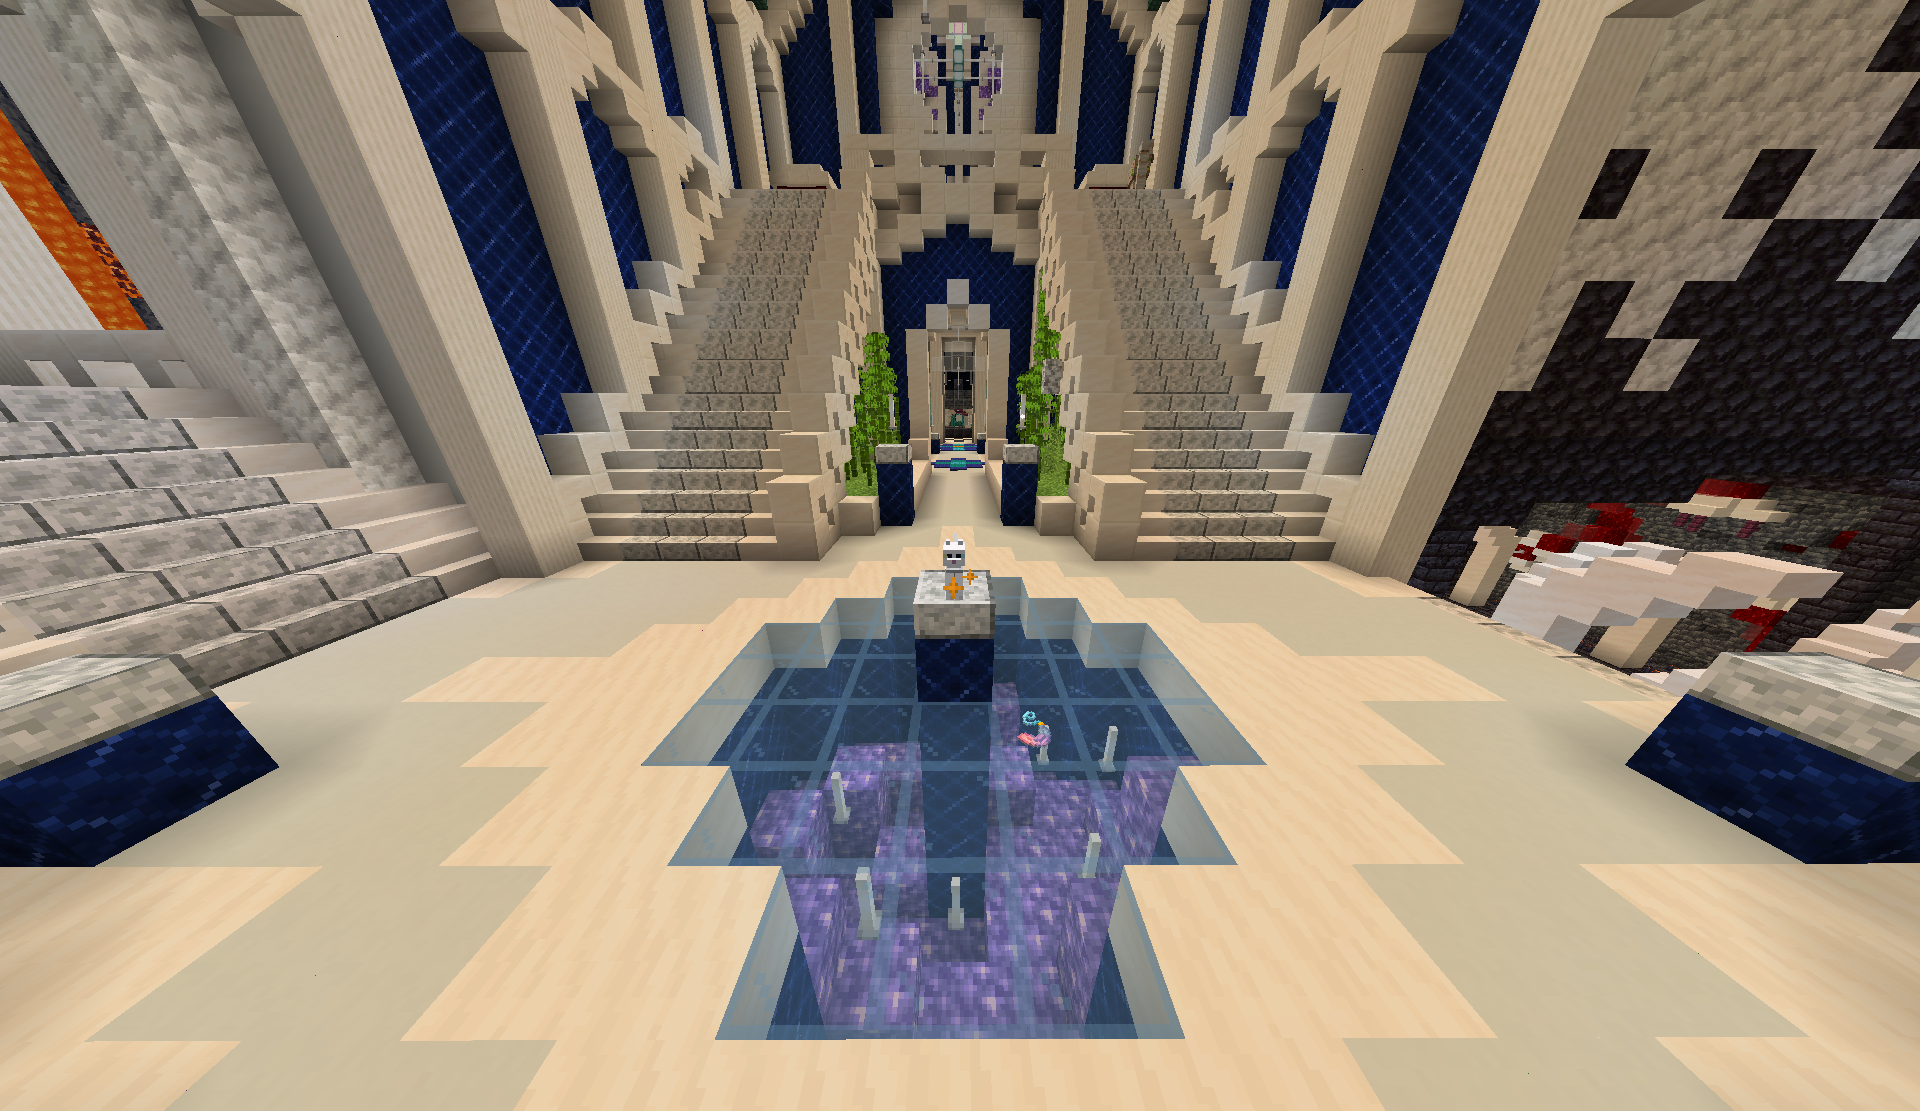
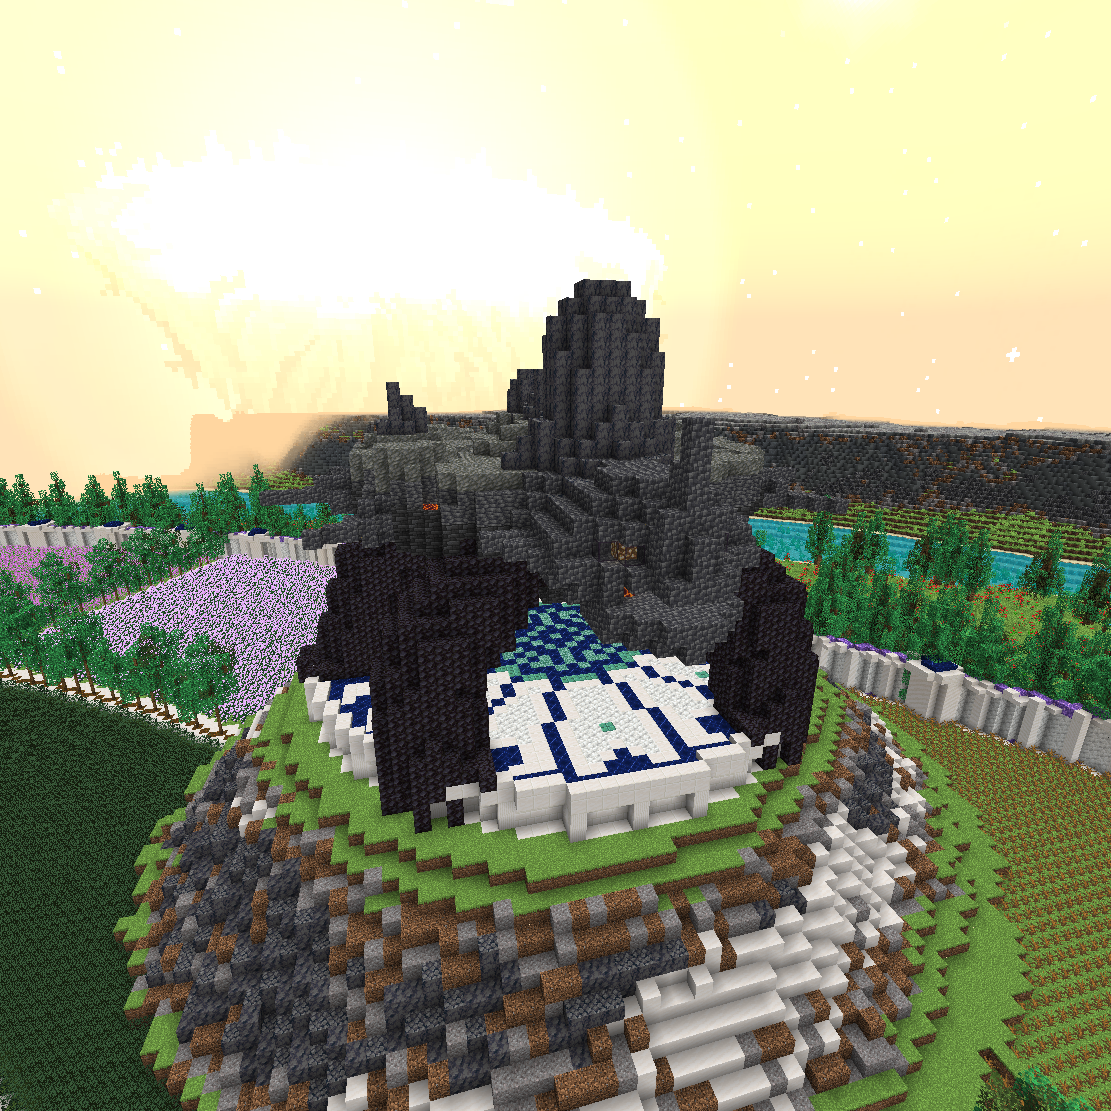
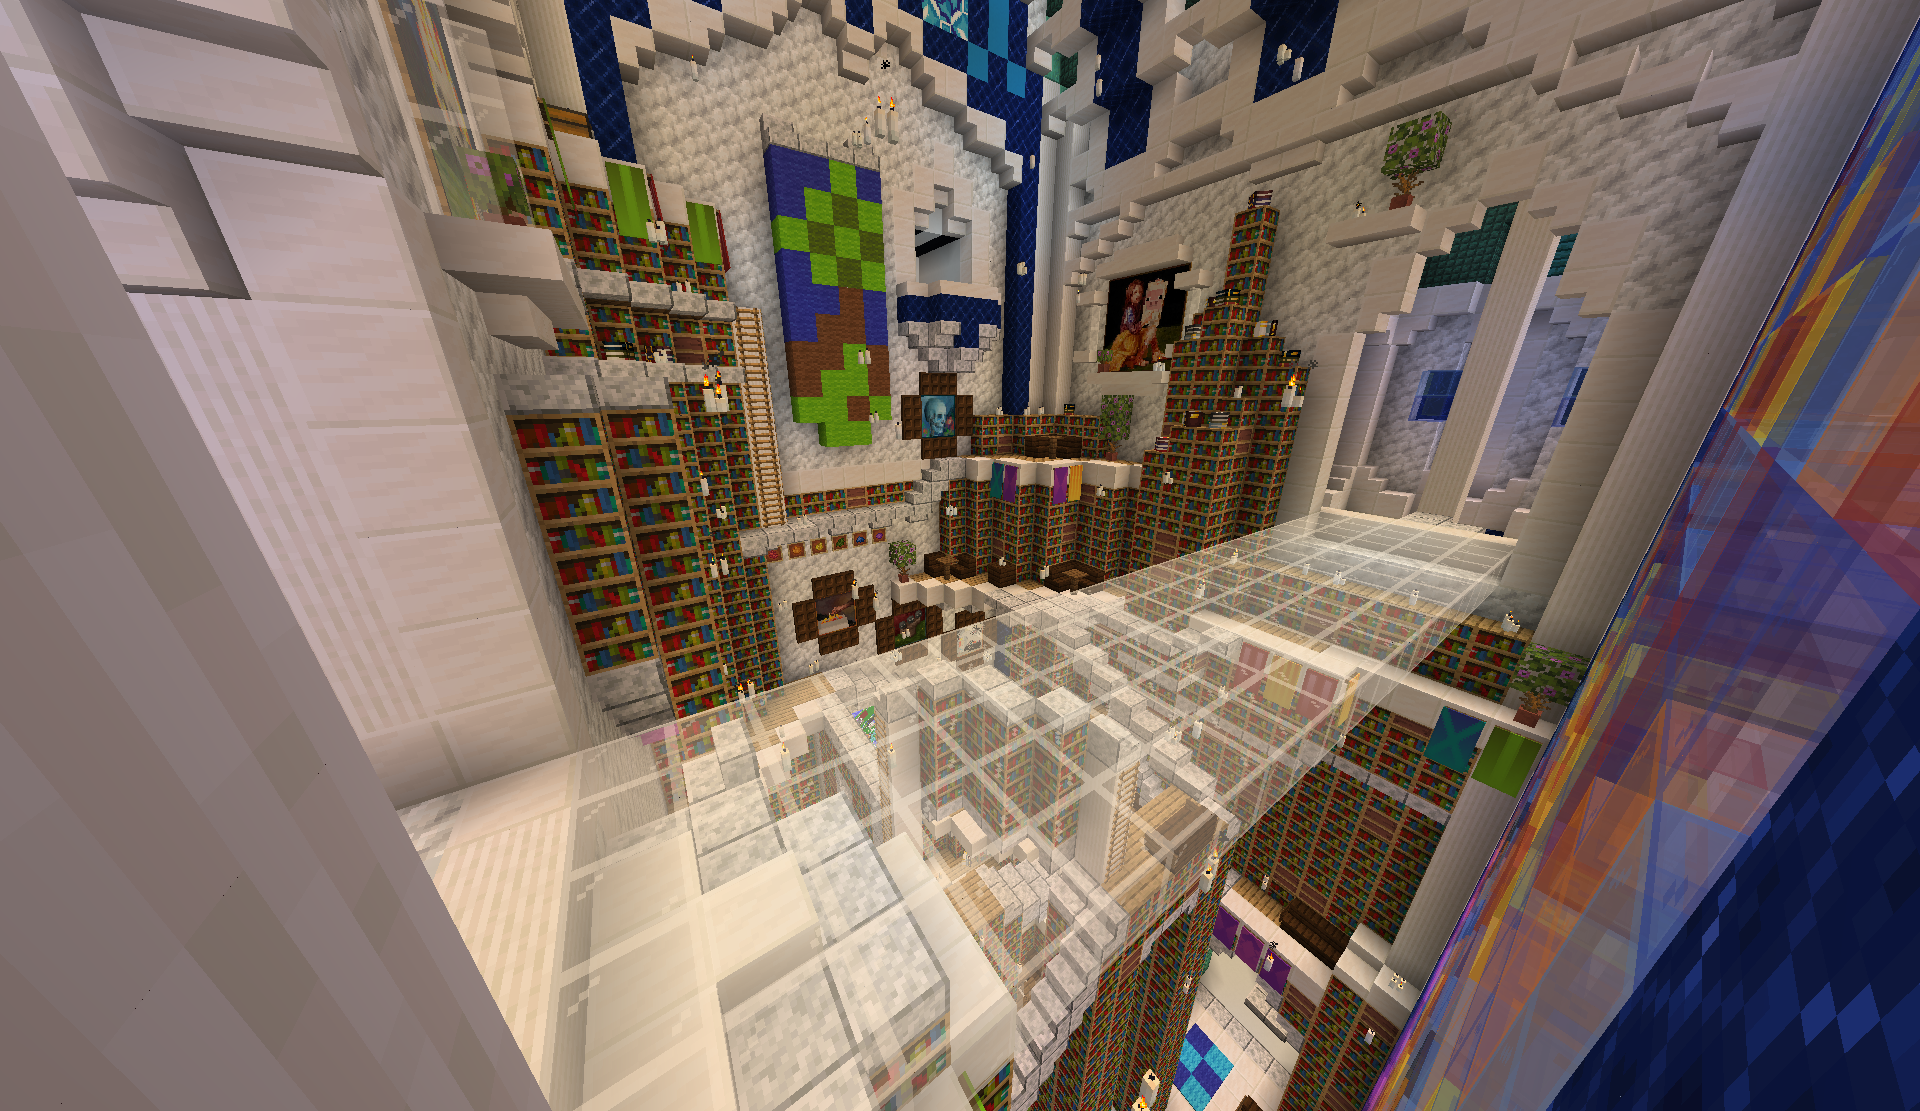
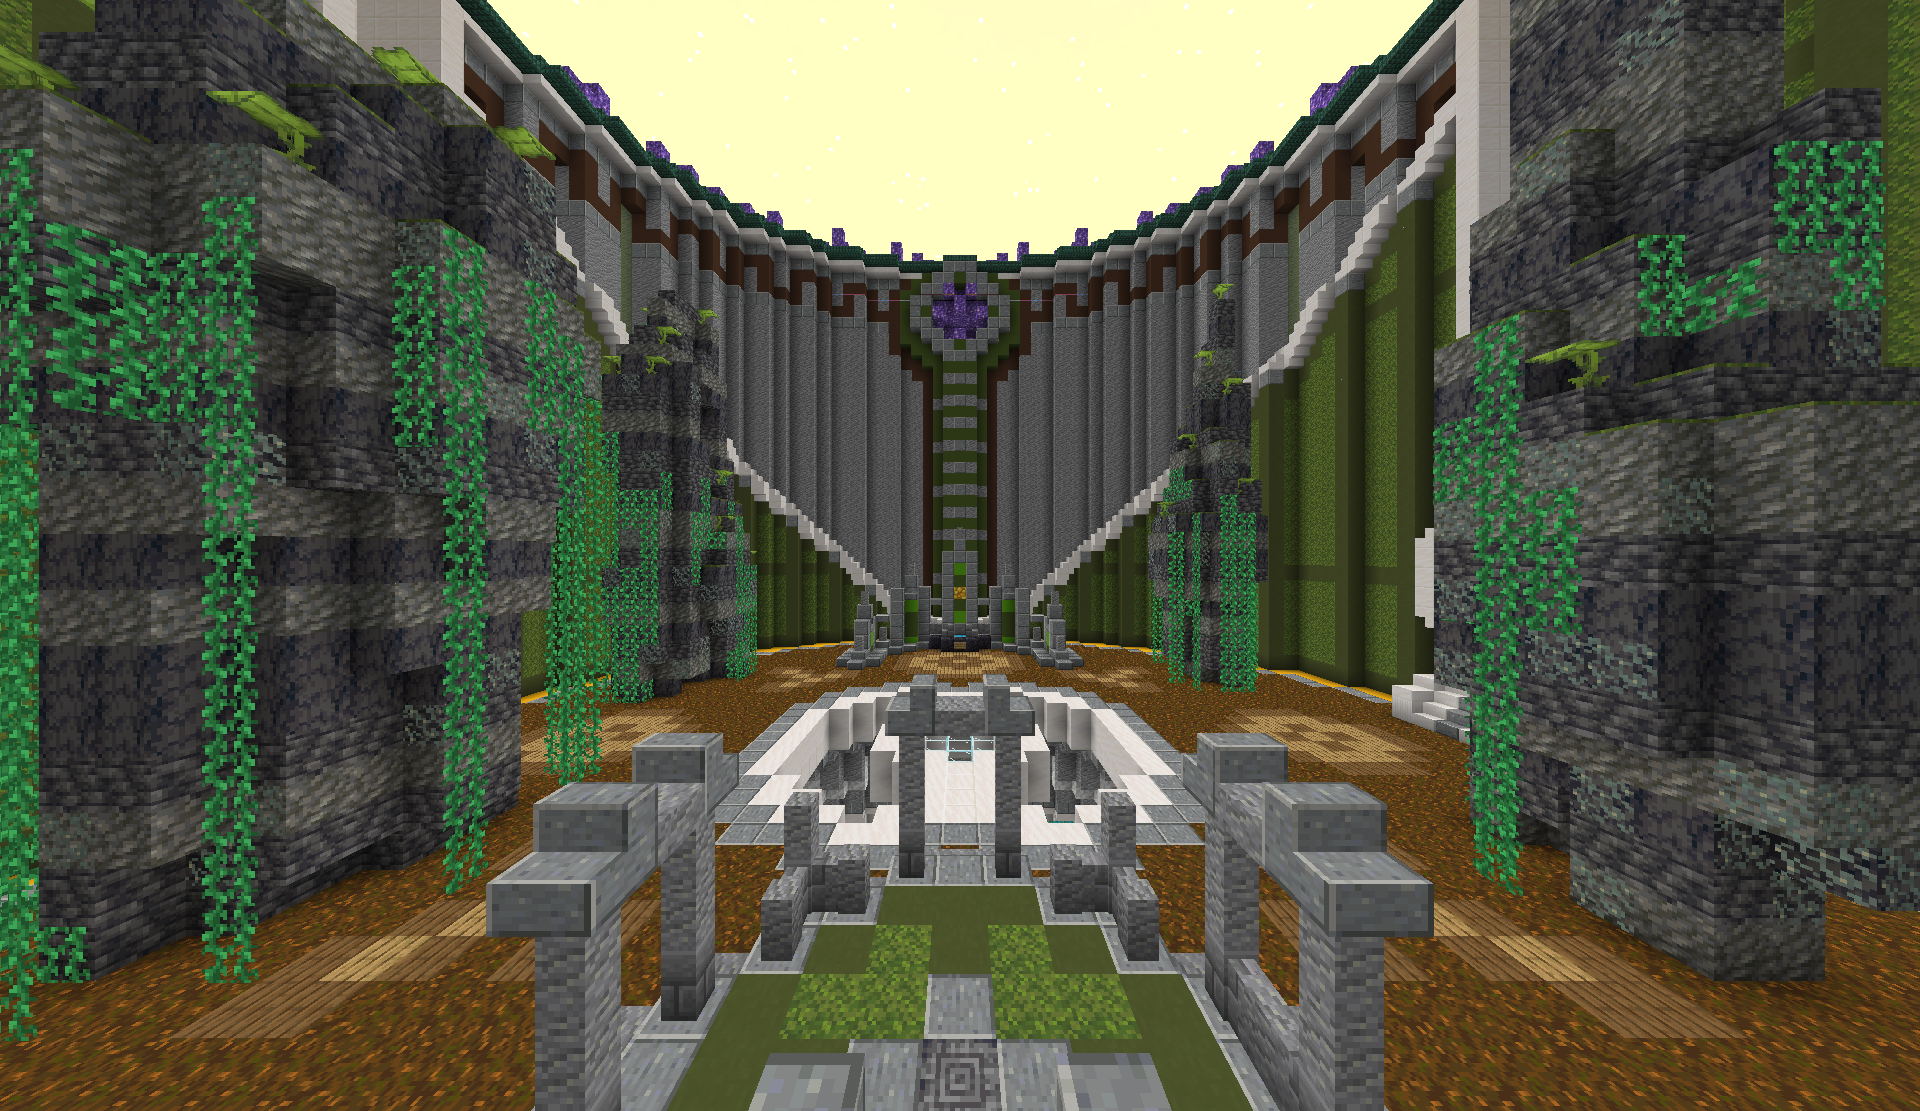
Prismatic Council Chamber
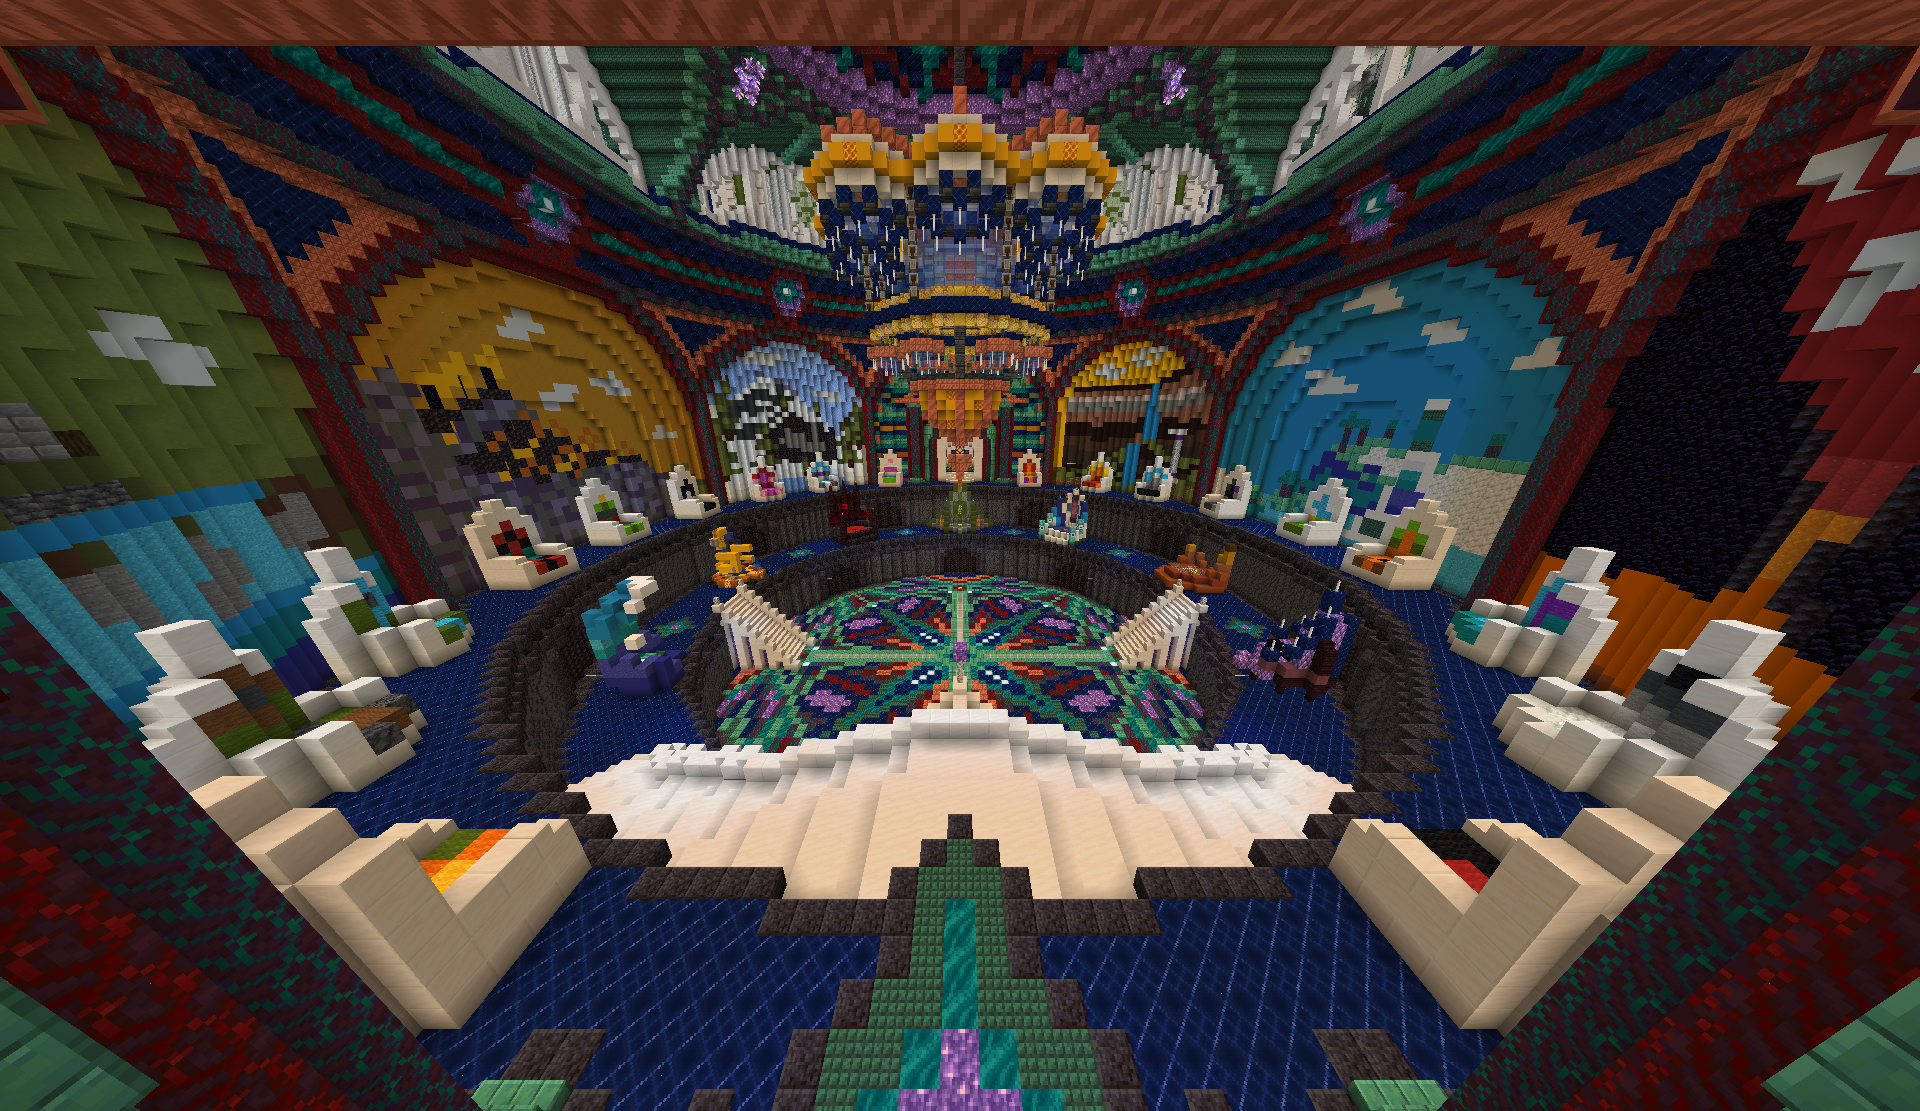
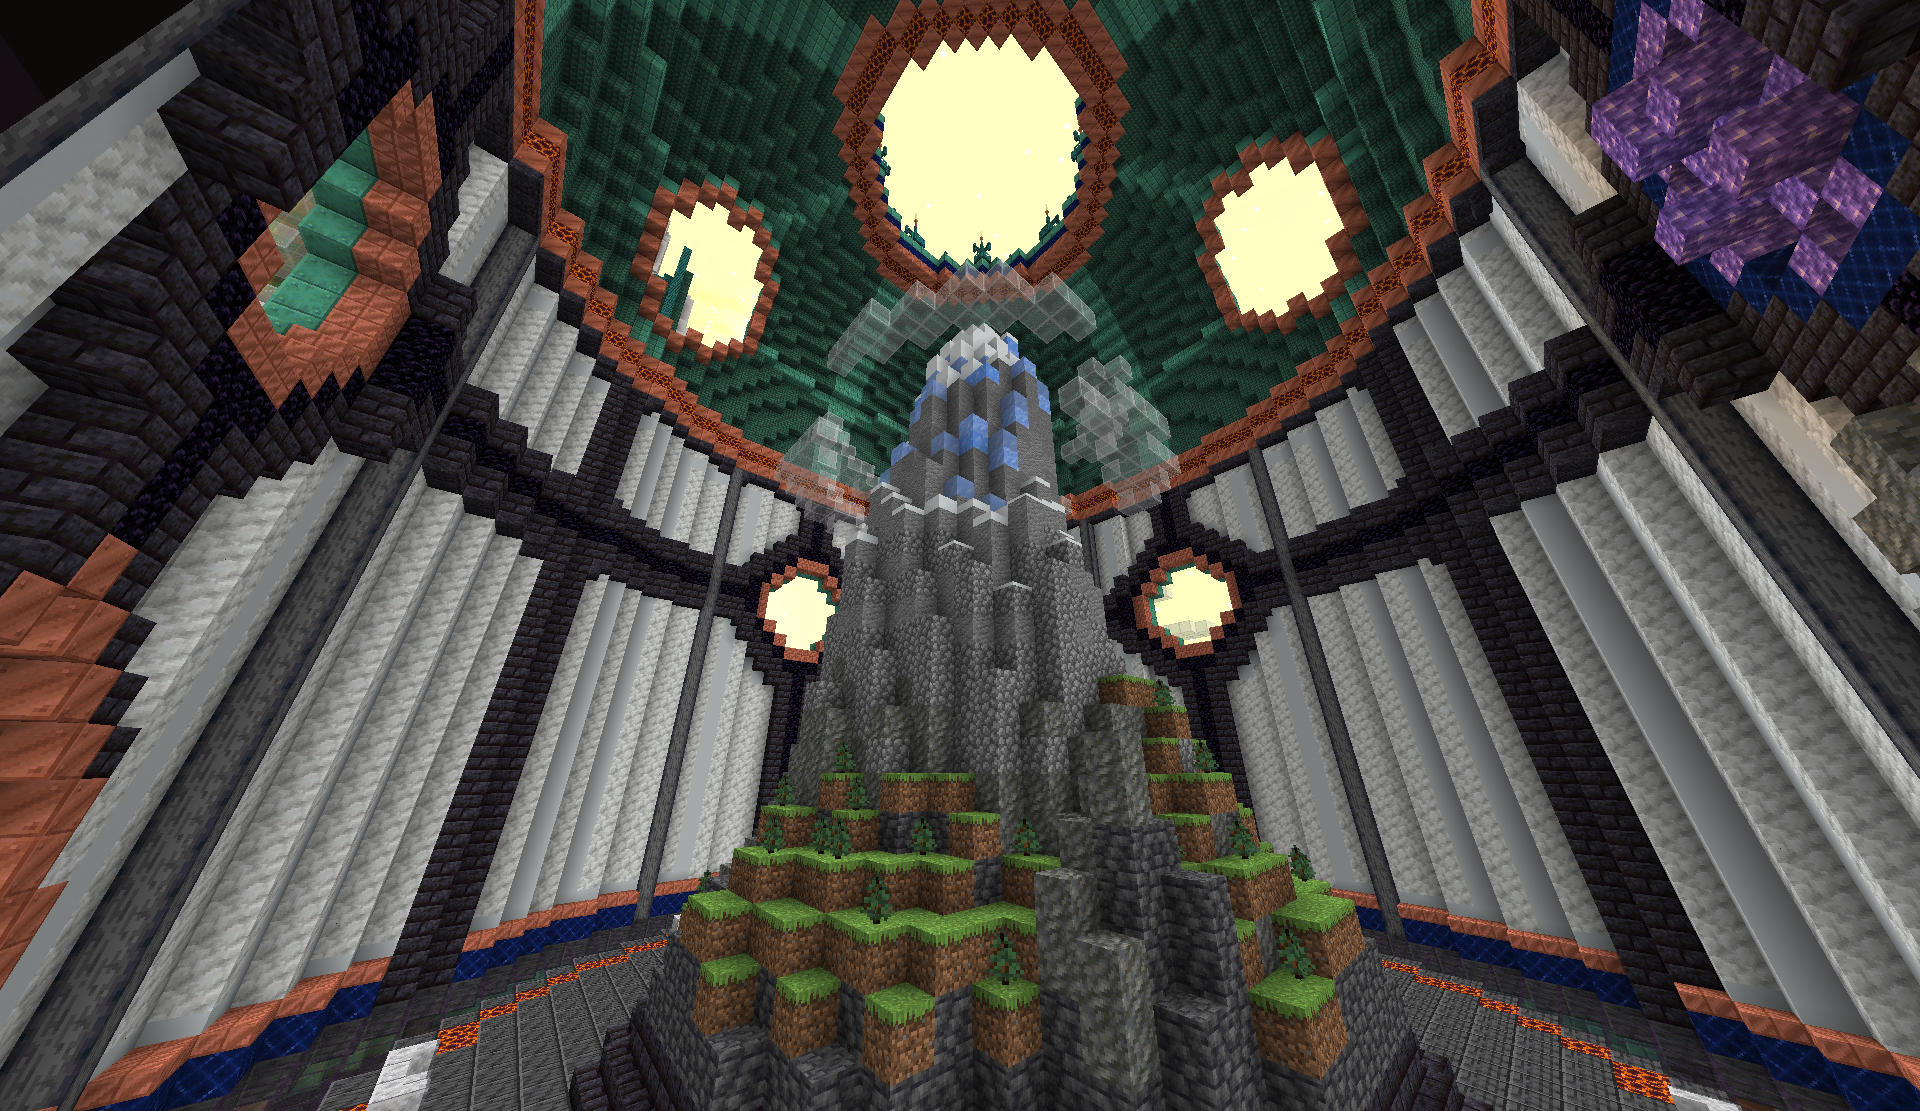
The Prismatic Council Chamber is a large, domed building located at ground level, just north of the center of Ytaj. This room features over-the-top, vibrant colors, and is contains two rings of thrones, where the Deities and Aspects would sit during full meetings of the Prismatic Council (or rather, where their astral projections would sit). The lower ring contains seats for the 3 Deities and 4 Elder Aspects. The four non-Elder Major Aspects and all of the Minor Aspects (except for Verrhys) have thrones on the upper level. This room also connects to the Soletta, and the base of the Tower of Drehmal, in the north. A massive crystal (stained glass) flower sits on the top of this building.
Coordinates: (-69, 29, -1601)
The thrones on the lower level are mostly self-explanatory, heavily utilizing blocks, shapes, and colors associated with their respective owners. Clockwise from the southwest, these thrones belong to Dahr, Khive, Maelihs, Drehmal, Virtuo, Taihgel, and Rihelma, in that order.
The thrones on the upper level, however, all share the same size and solid quartz foundation, with only a few extra colored wool blocks or other blocks on top to signify their owner. The four non-Elder Major Aspects—Lai, Loe, Vayniklah, and Voynahla—are situated on either side of the two entrances to the room, near their respective counterpart. The rest of the Aspects' thrones are not 100% known, but they can be reasonably assigned based on the direction the thrones point (with Aspects' rooms typically being far behind their thrones relative to the center of the room), as well as colors that are associated with those Aspects in banners.
Starting from the green/orange/yellow throne just west of the main southern entrance and working clockwise, the presumed Aspect thrones are as follows: Vayniklah, Muhs, Dahroehl, Maen, Mari, Tethlaen, Moen, Loeleyhn, Loe, Lai, Lailoehn, Nahyn, Koh, Noha, Lahrs, Rihalae, Palaesida, and Voynahla.
The lowest level of the chamber contains an elaborate mural on the floor, and to the south, a small staircase leads down to another room. This room contains six murals on its walls, tied to the Trials, as well as one large mural at the end, representing a genealogy tree. This is the family tree of the Aspects and Deities, and it has been the subject of significant speculation.
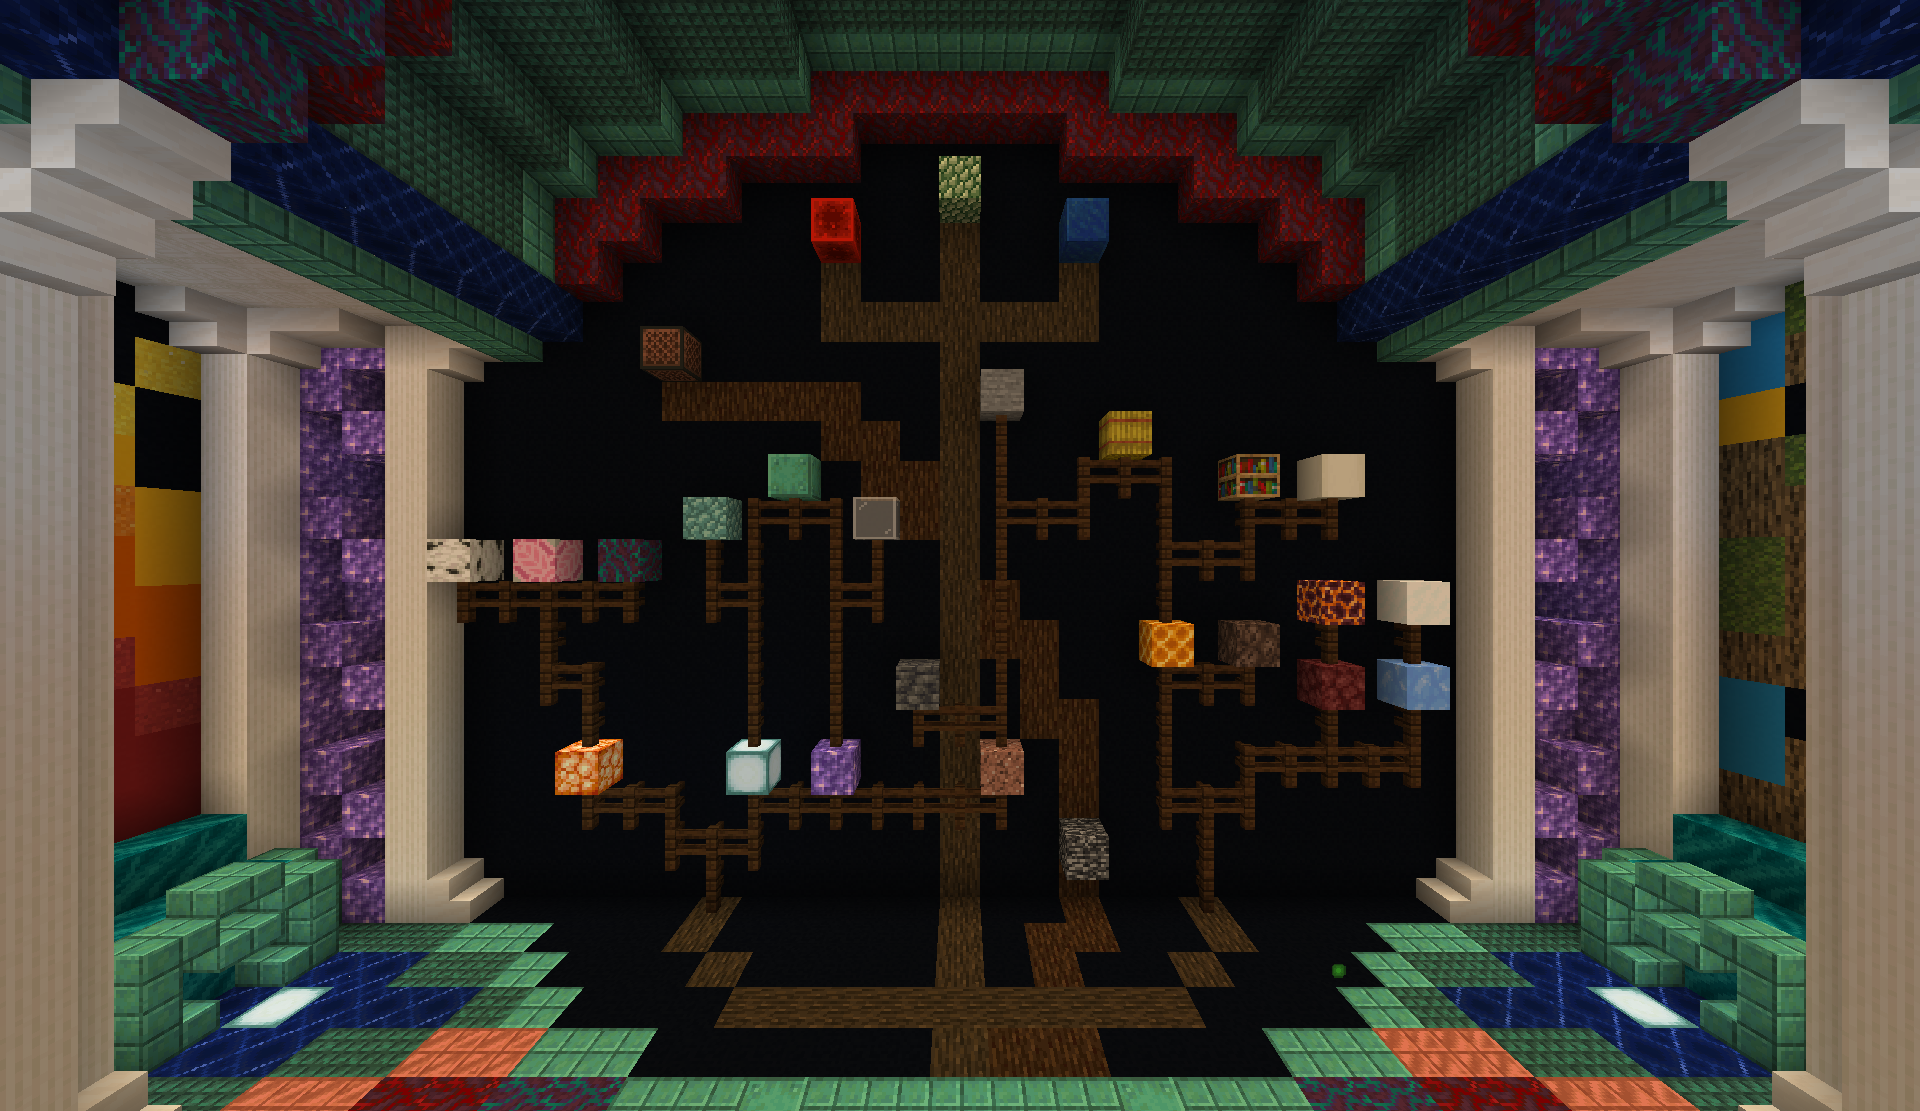
The family tree mural in Ytaj.
Annotated Family Tree
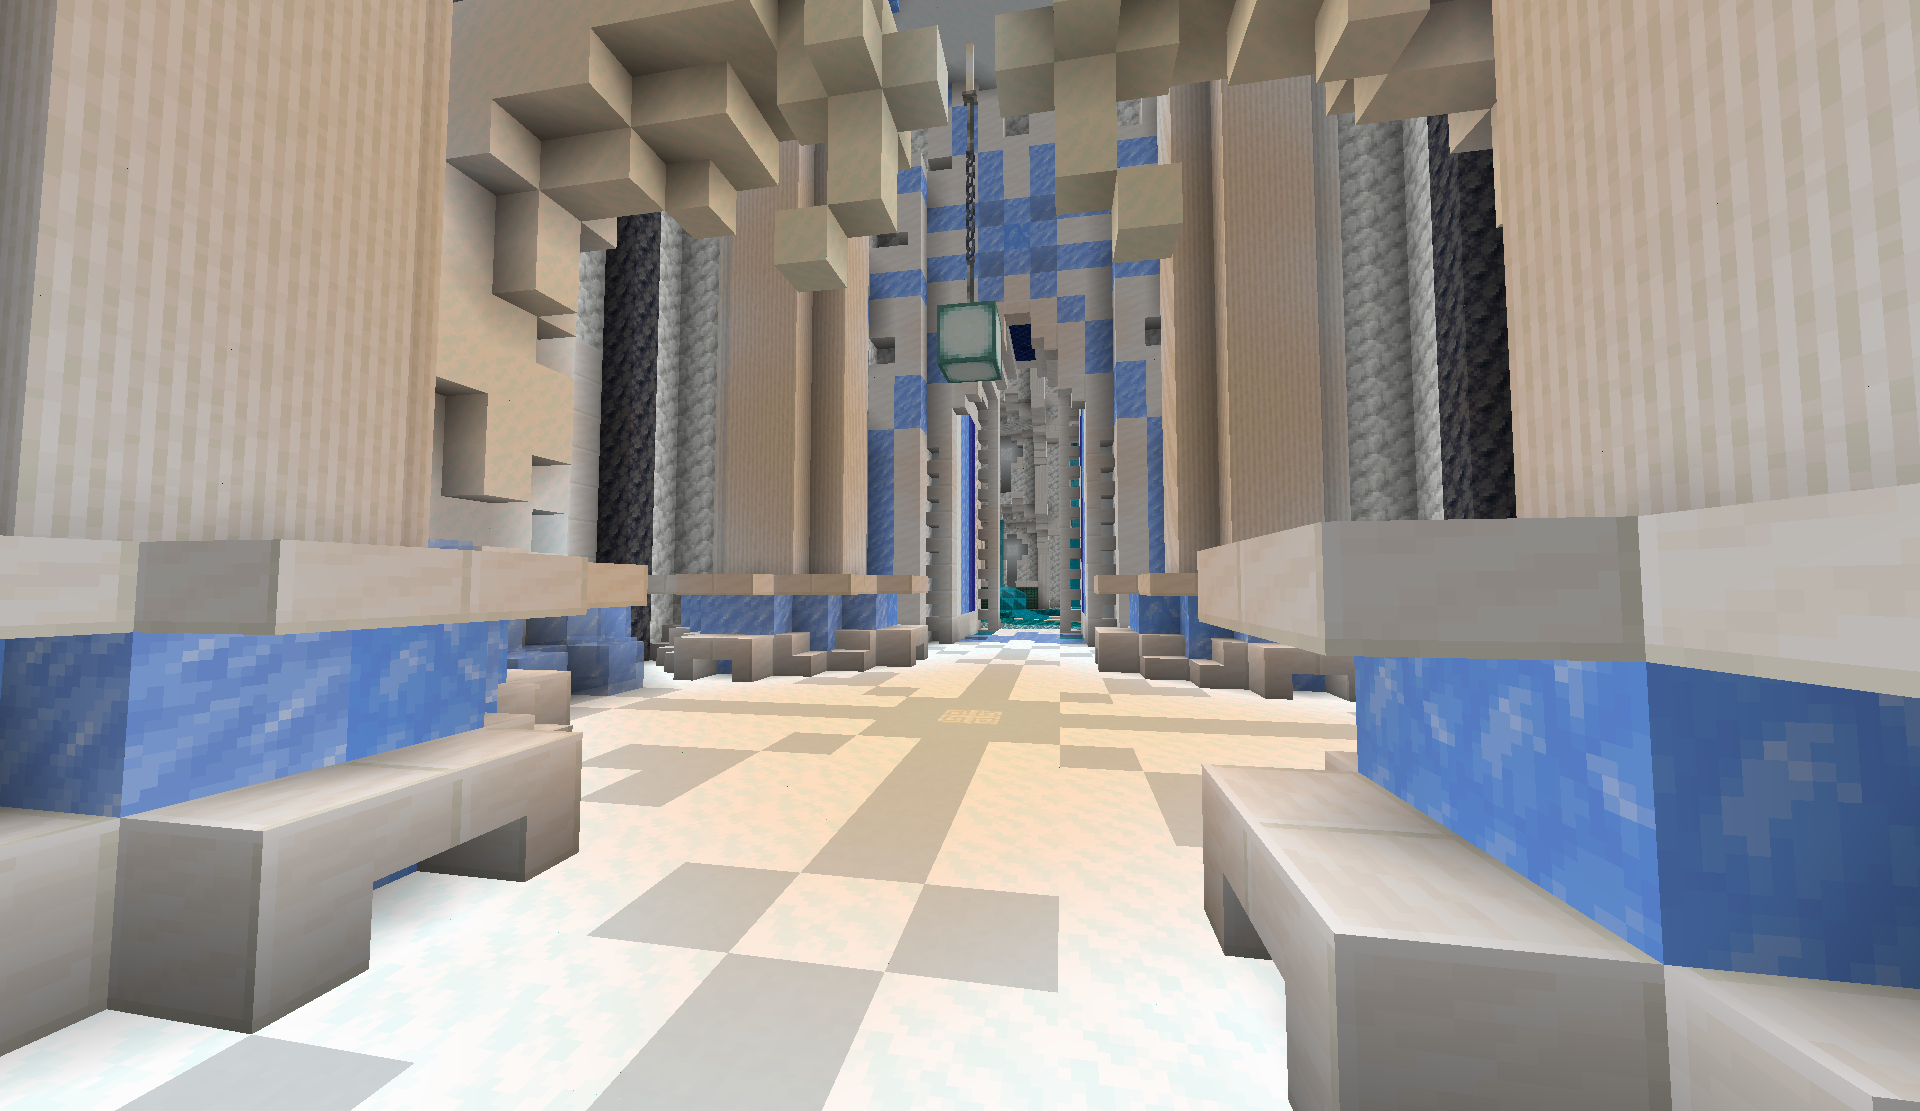
Tehrmari Quarters
Within the main eastern hall, the living quarters of the palace's Tehrmari servants are found. This area includes a kitchen for the Tehrmari inhabitants, as well as a large tower with Tehrmari bedchambers. A player head resembling a plush of Maelihs is found at the top of this tower.
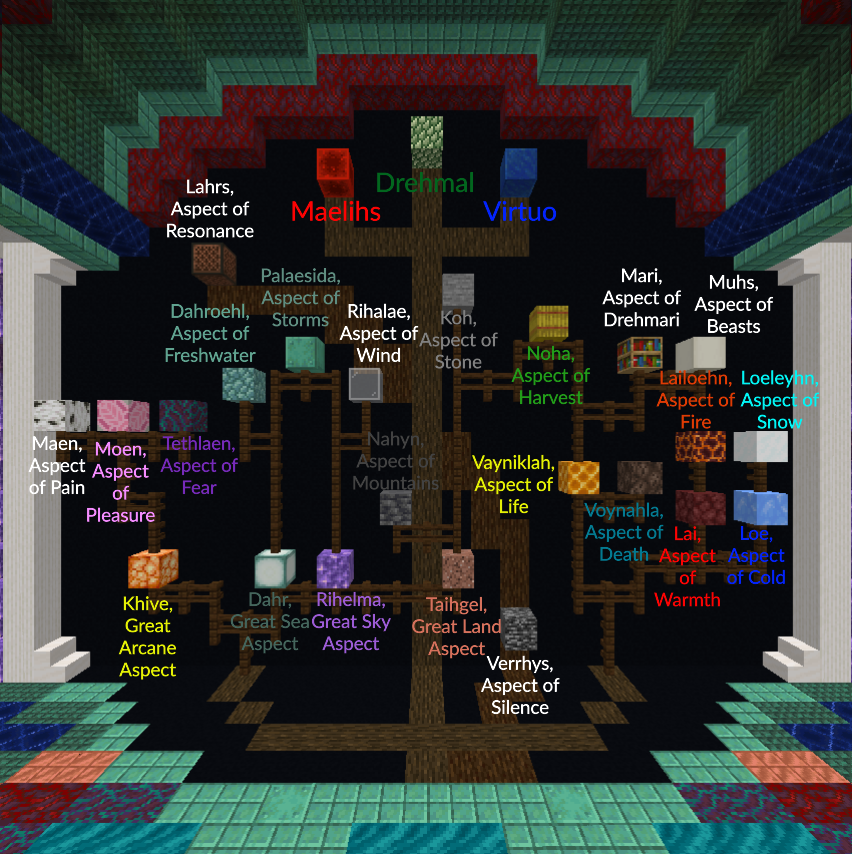
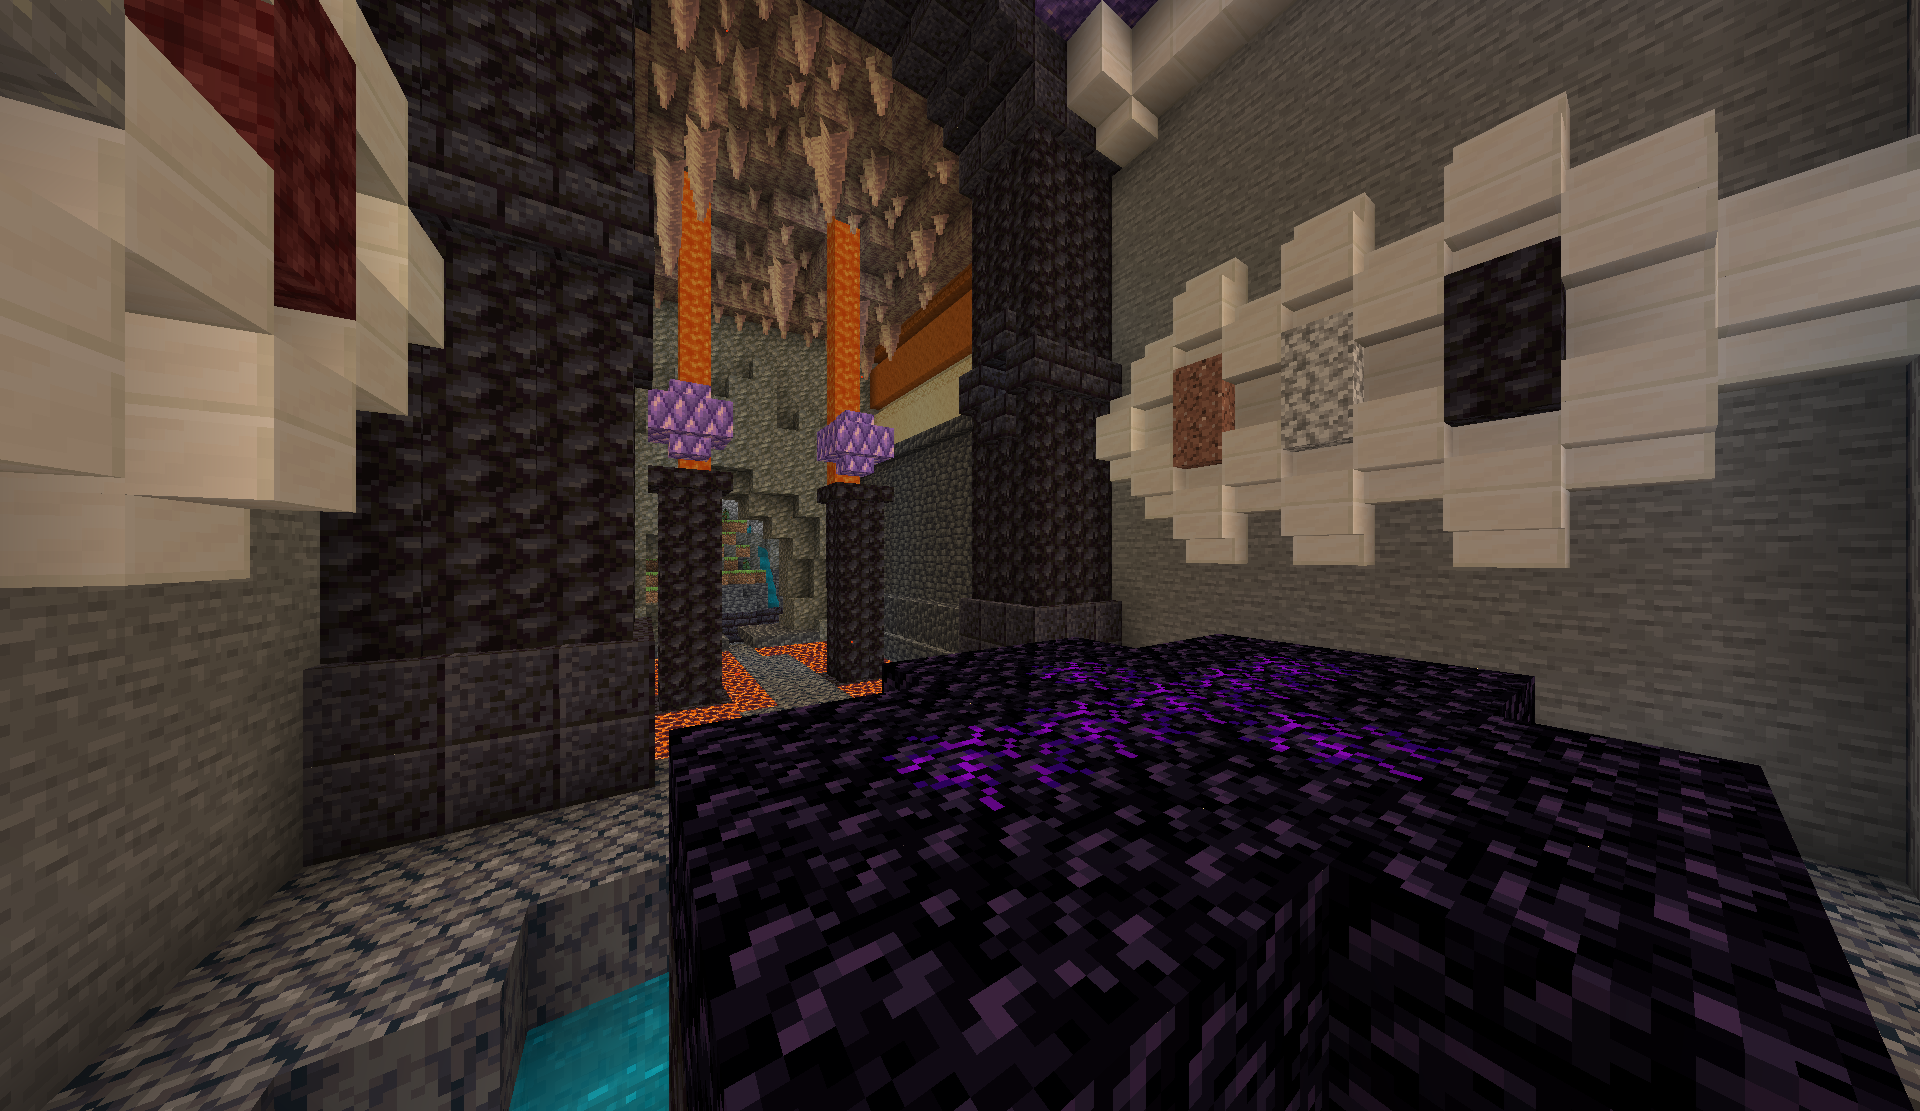
Soletta
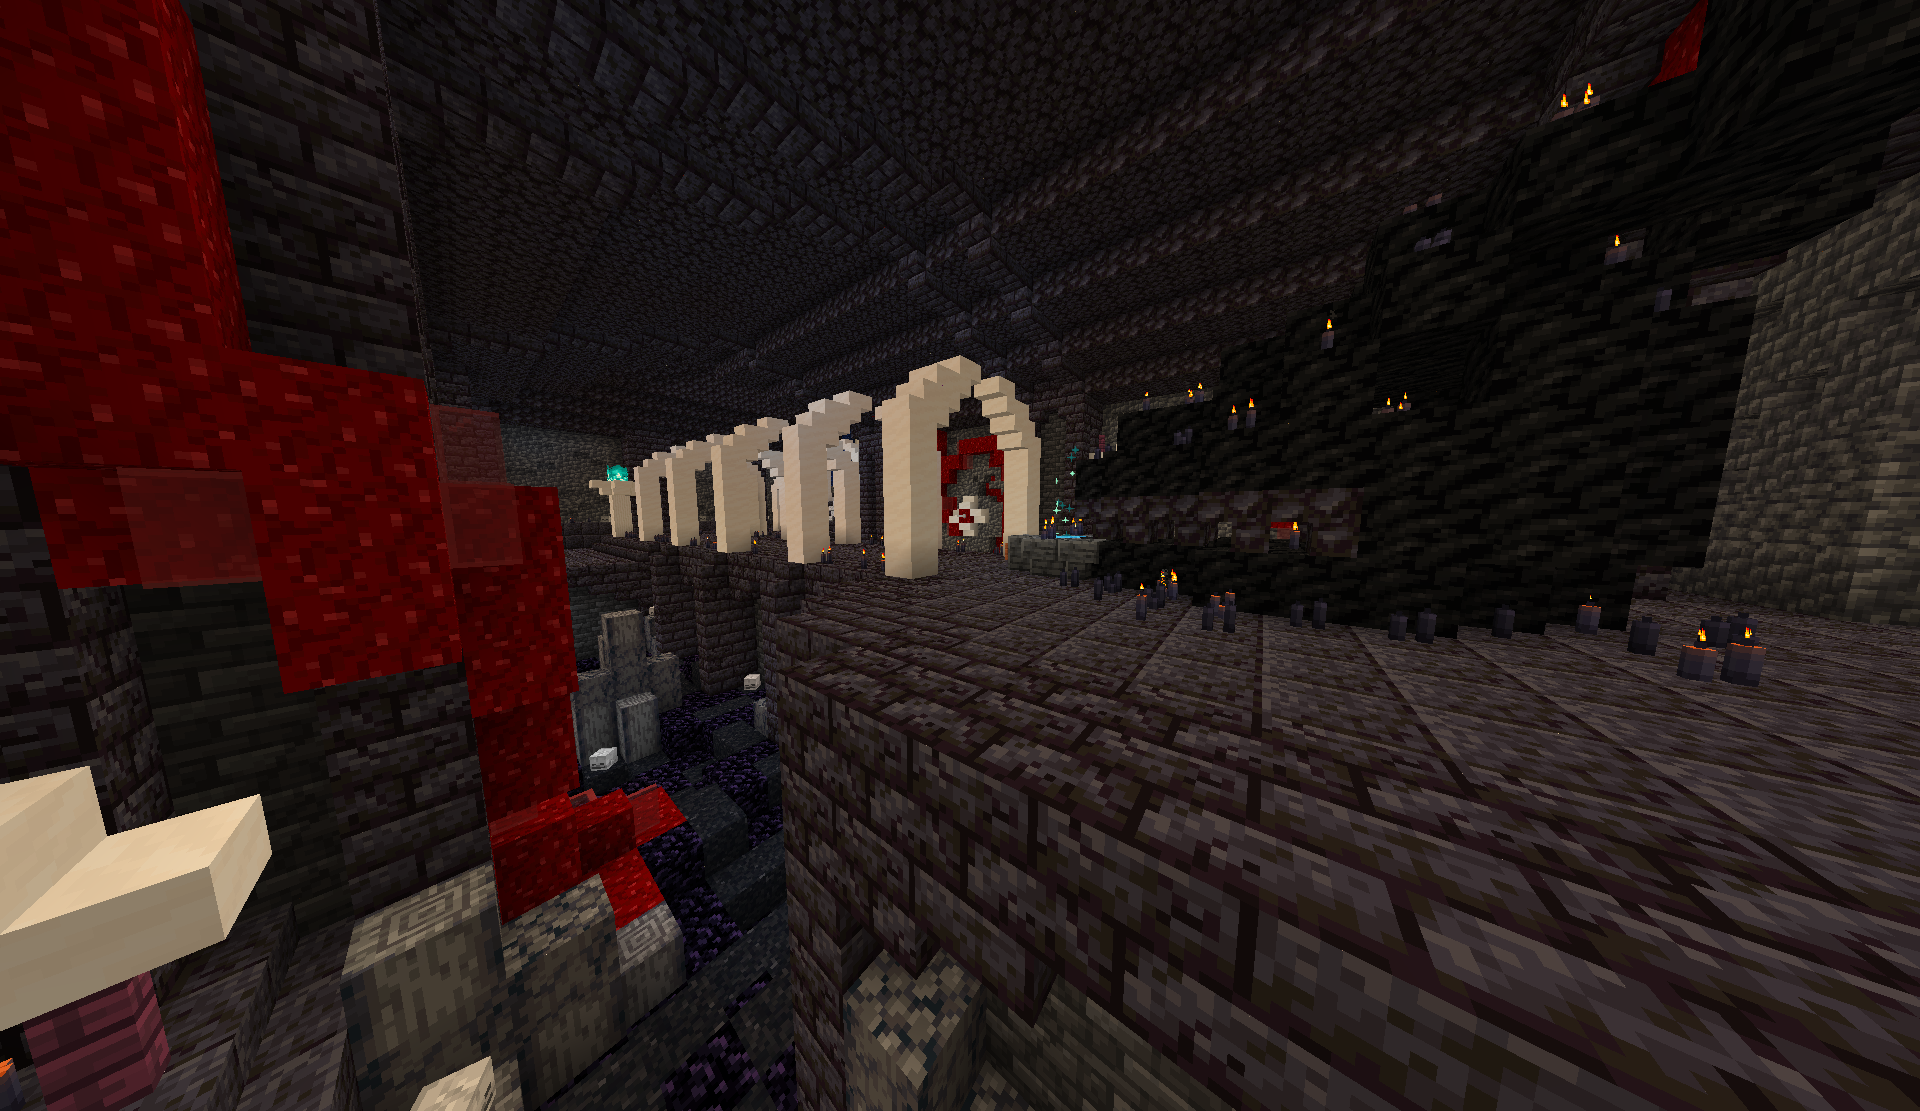
The Soletta is a mythical forge located at the base of the Tower of Drehmal, made up of a giant, closed eye resting beneath two end portal frame blocks. This is a gameplay-pertinent location, whose purpose may not be immediately apparent. The signs around its base provide a hint as to the forge's function.
Coordinates: (-69, 31, -1702)
Soletta Use Hint
The signs around the base of the Soletta contain the three Greek letters found on Fervor Stones, surrounded in [square brackets]. These square brackets can be found in the description of another type of items.
Soletta Use Solution
The Soletta is used to upgrade Mythical Weapons, using Fervor Stones. Place a Fervor Stone on the bottom end frame portal block and a Mythical on the upper block, then press the button in front of the chambers. An animation will play, in which the eye beneath opens and the chambers are filled with particles, after which point the Mythical will be upgraded. See this page for details on specific upgrades.
Aspect/Deity Rooms
In Ytaj, almost every single Aspect and Deity has their own "room"—often a literal room, but sometimes more of a general area. For Major Aspects, these rooms include secondary devotion shrines, and the three Deities each have a full tower dedicated to them.
It is possible that not all Aspects have a room, and some rooms are disputed within the community, but this wiki provides a nearly complete list of Aspect rooms/shrines. Notable exceptions include:
- Verrhys - Who may have some minor references, but should not be expected to have a room, given that they are not remembered by any of the other Aspects.
- Tethlaen - Who appears to have one reference, but not a proper room. This may also be due to the fact he disappeared at the very beginning of Av2, and Ytaj was likely built after his disappearance.
- Noha - Despite being a prominent Aspect, Noha does not appear to have any dedicated room in Ytaj.
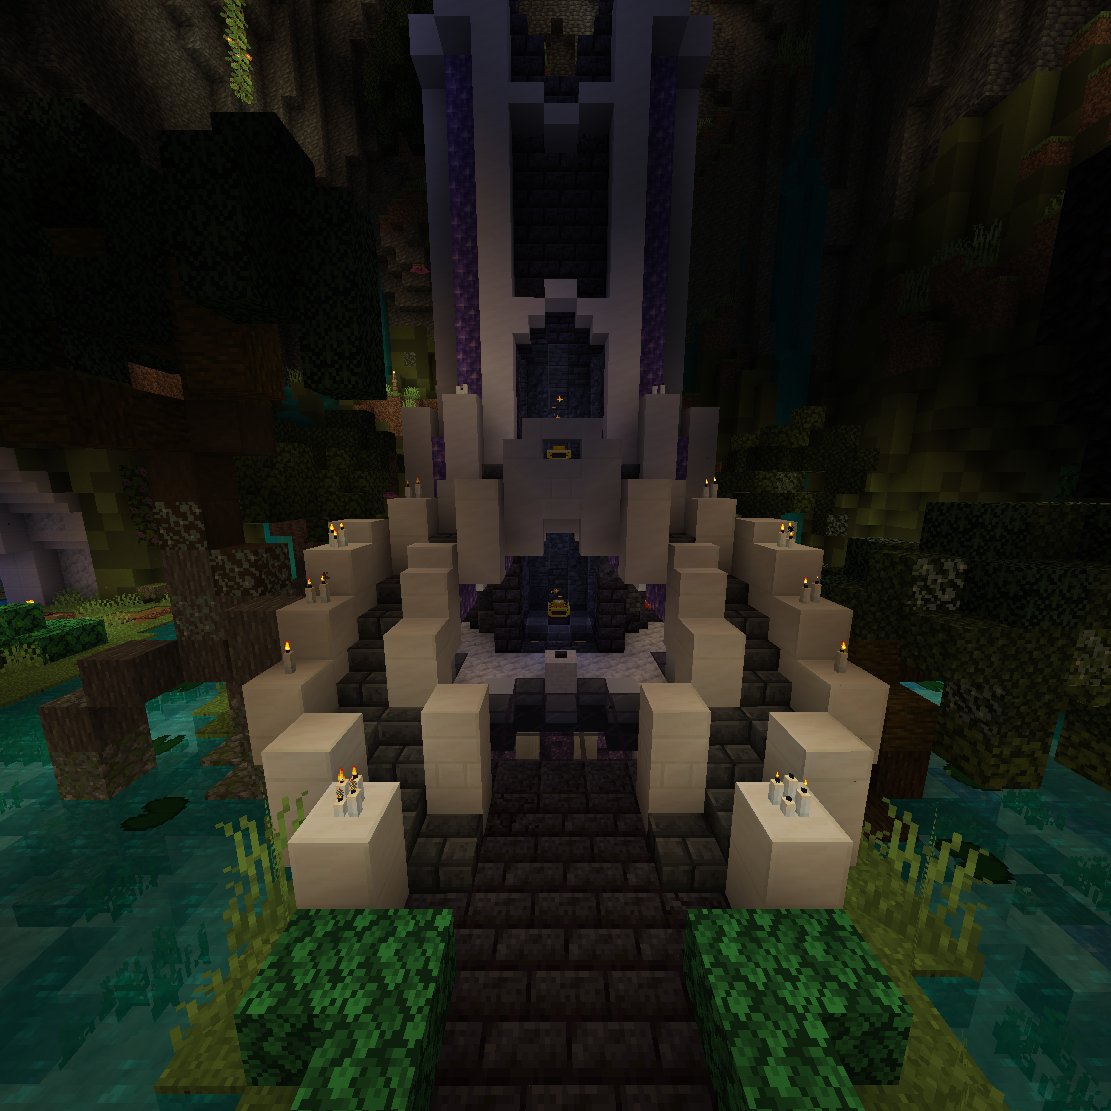
- Moen - Disputed. Moen almost certainly has a dedicated space, the small western garden pictured below, but may or may not have a full room.
The garden which may or may not be Moen's only true area in Ytaj.
This list is presented in approximate geographic order, starting from Dahr's area in the southwest and circling clockwise back around to Palaesida's Room in the southeast.
Dahr's Room
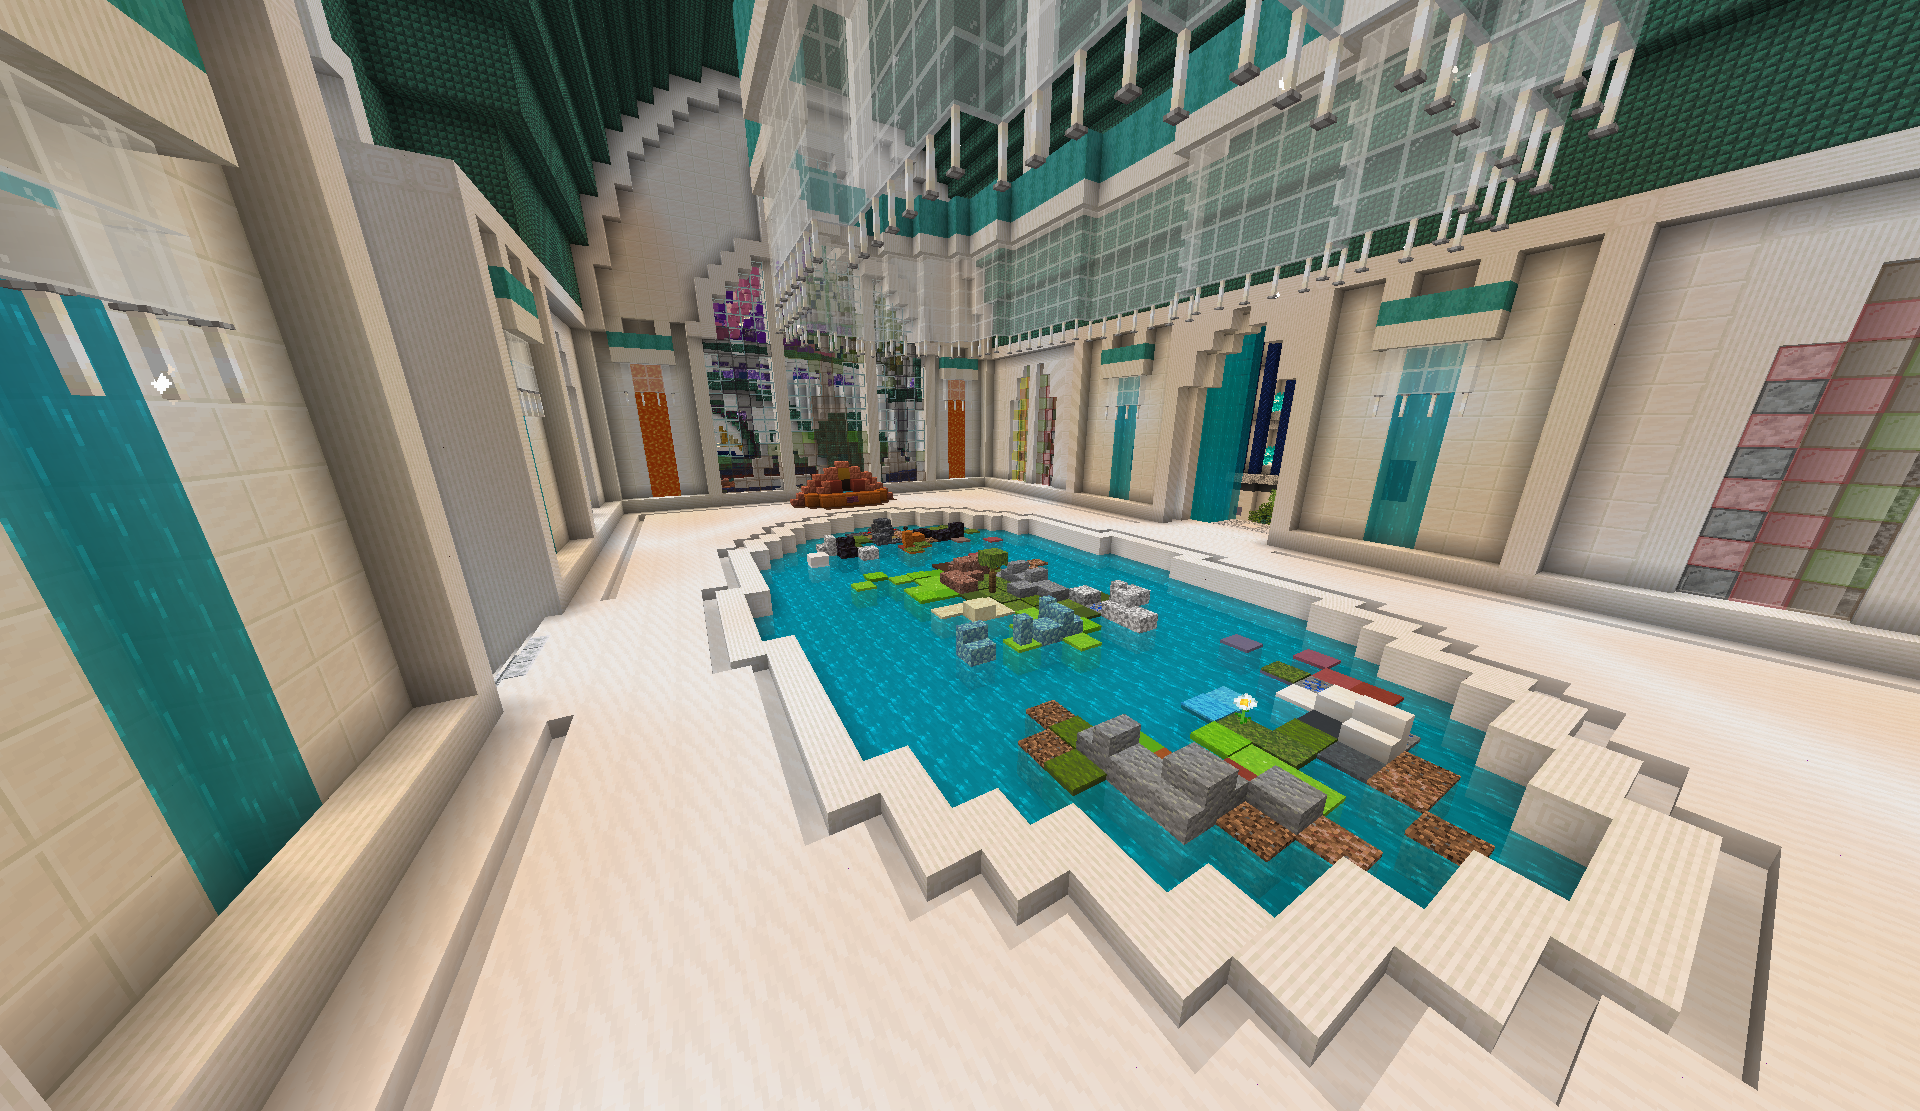
Dahr's area is a large pool in the southwest, containing a floating island with his secondary Devotion shrine at (-115, 30, -1535). Several patches of vibrantly colored coral can be found at the bottom of the pool, as well as an underwater chamber with a throne for Dahr to the north. The pond is fed by waterfalls from the surrounding area, including the glacier atop Loe's room to the west.
Dahroehl's Room
Dahroehl's "room" is a tower in the southern portion of Dahr's area, whose exterior is pictured above. The tower itself holds a few cascading fountains to represent the Aspect of Freshwater, which feed into Dahr's larger body of water at the tower's base. A small orb structure at the top of the tower holds a floating block of water.
Loe's Room
Loe's room is contained within an ice-capped amethyst geode, along the upper western wall of Dahr's area. It is accessible through a staircase that leads up from the far southern end of the western hallway. Loe's secondary devotion shrine is found here, at (-167, 53, -1528). Glacial runoff creates a stream that feeds into Dahr's pond.
Loeleyhn's Room
Loeleyhn's room is a tower just to the north of (but not directly connected to) Loe's room. It can be accessed through a doorway in the southwest hallway, or on the upper level from the grassy area outside of Loe's room. The interior of the tower is decorated with murals depicting snowflakes for the Aspect of Snow. A massive icicle hangs from the top of the tower, encasing a column of silent obsidian.
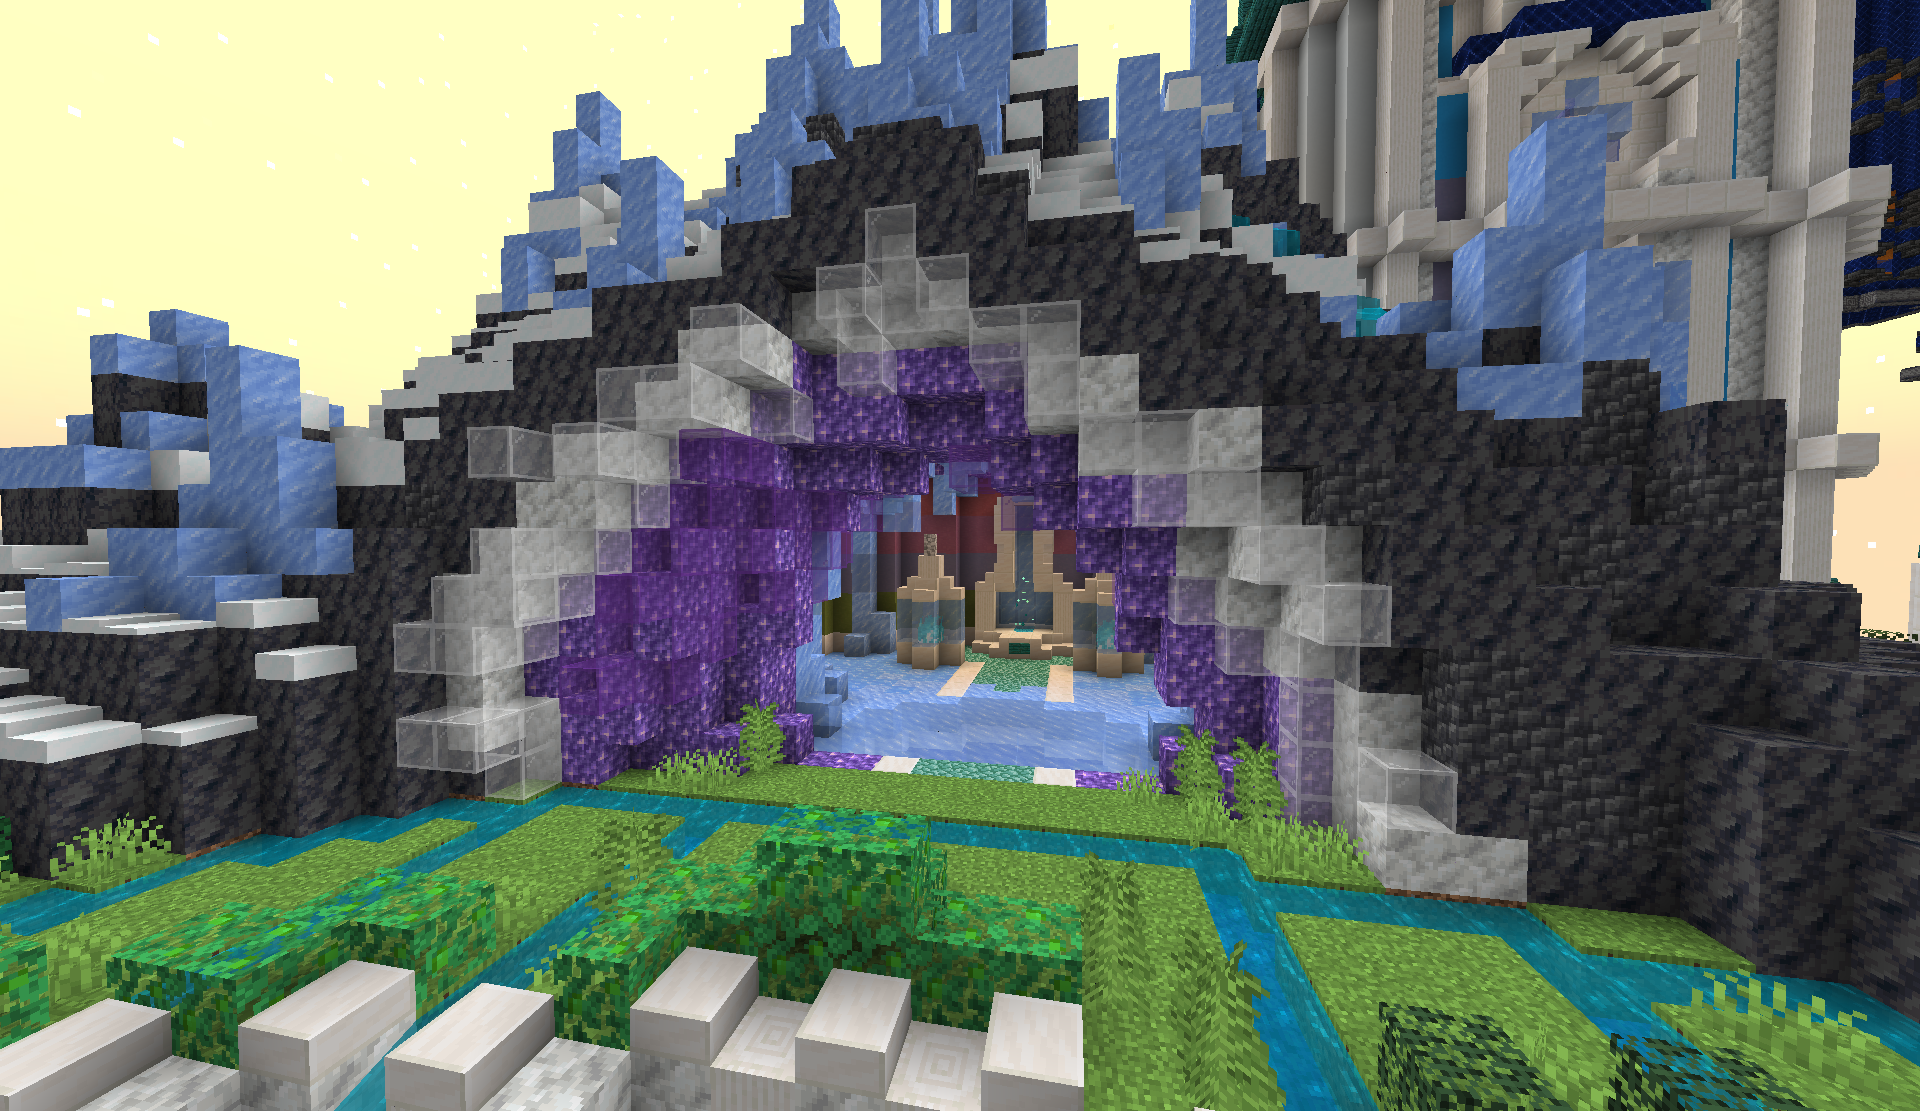
Khive's Room
Khive's room is a massive tower that makes up a significant portion of the western area of Ytaj, dotted with his signature red sandstone ring structures. Inside the tower, Khive's secondary devotion altar (-176, 56, -1612) is found, along with 4 active warp rings, which follow the same mechanic as those throughout the rest of the map. Navigating the warp rings will lead the player upwards to a hidden loot chest, containing a celestial chondrule and Divine Bauble.
Puzzle Solution
To reach the top, you will need to find the correct sequence of linked warp rings. One such sequence is as follows:
1. Enter the western ring on the bottom level, opposite the shrine. You should find yourself one level higher, at the northern gate in a group of four.
2. Cross the room to the southern ring on Level 2, and enter it. You should emerge two levels higher, in one of 8 rings.
3. Go to the connected node, then left to the other connected ring (not the one you came from). Pass through this ring.
4. You will emerge from what looks like the same place, but you will be across the room. Repeat this process (going through the ring connected to the one you emerged from, to the left) twice.
5. After three right-to-left portals, you will exit from the left side of the final portal structure. Go from left to right, and enter this final portal (on the south-southeastern wall). This portal will take you to the top.
The outside of Khive's tower is surrounded by warp rings in a stacked, layered pattern at the top, with large infused amethyst columns around its perimeter seemingly feeding some kind of energy (represented by orange stained glass) into the center (or drawing from the center).
Mari's Room takes up the bottom portion of Khive's tower.
Mari's Room
Mari's room is found underneath Khive's room. It is densely packed with decorations, curiosities, and trinkets from the Laughing Dragon's travels. A skeleton reminiscent of a pterodactyl hangs from the ceiling, possibly belonging to a Kohlohmah, massive vulture-like creatures found in Anyr'Nogur who are the namesake of the in-game Avsohmic glider, Avsohm'Kohl. Several items are found behind glass cases on the right (northern) wall, housing such items as the Frontier's Edge artifact, several custom player heads resembling various technological gadgets, a full set of dyed leather armor, a massive sword, and even a fragment of Otherstone bricks and polished blackstone, highly reminiscent of the known statue of Verrhys. The Simple Haiku book, written by Mari to his people in Sahd, is found on a lectern in this room, and a chest high up on the southern wall holds the Biography of Dragon Rider Oriann book.
Maen's Room
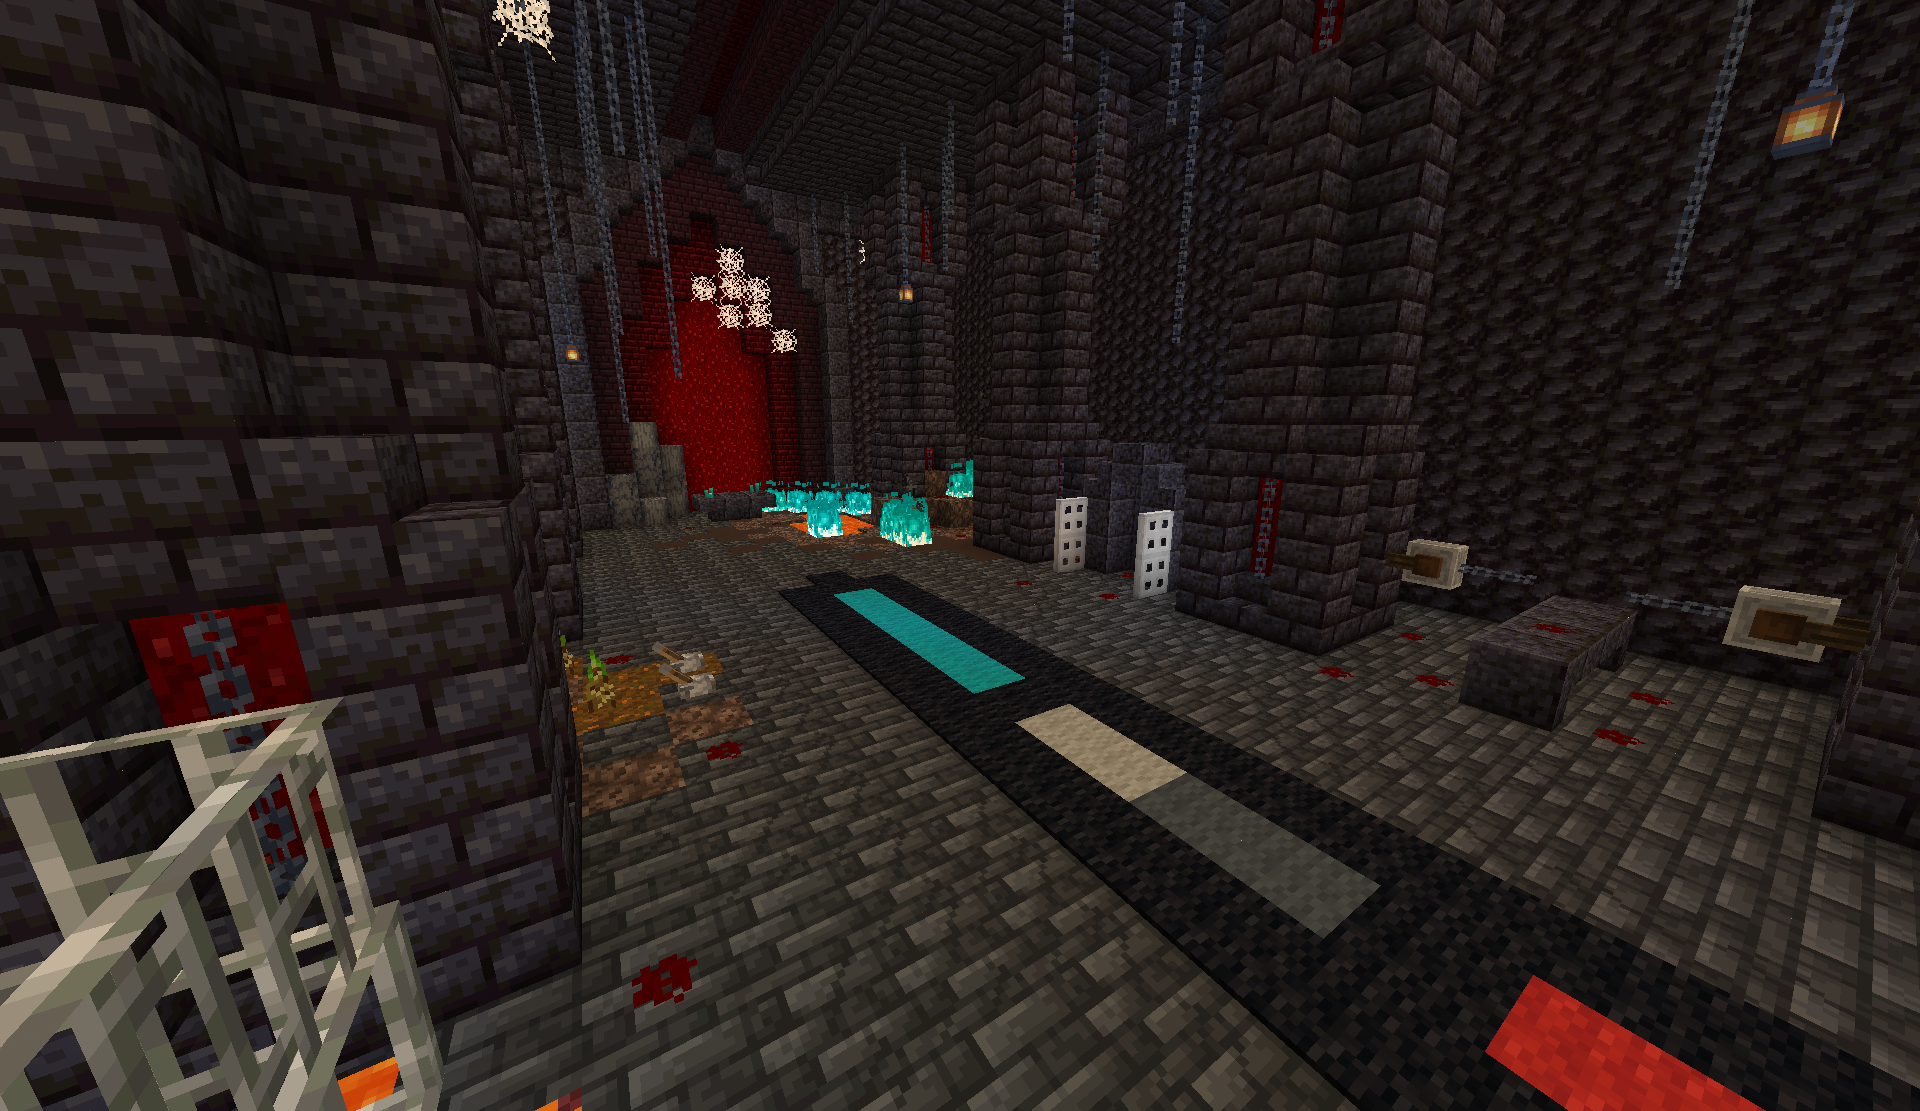
Maen's room is a chamber just to the north of Mari's room, connected to the same hallway beneath Khive's tower. It is filled with burning flames and various torture implements, reflecting the Aspect of Hate's violent nature.
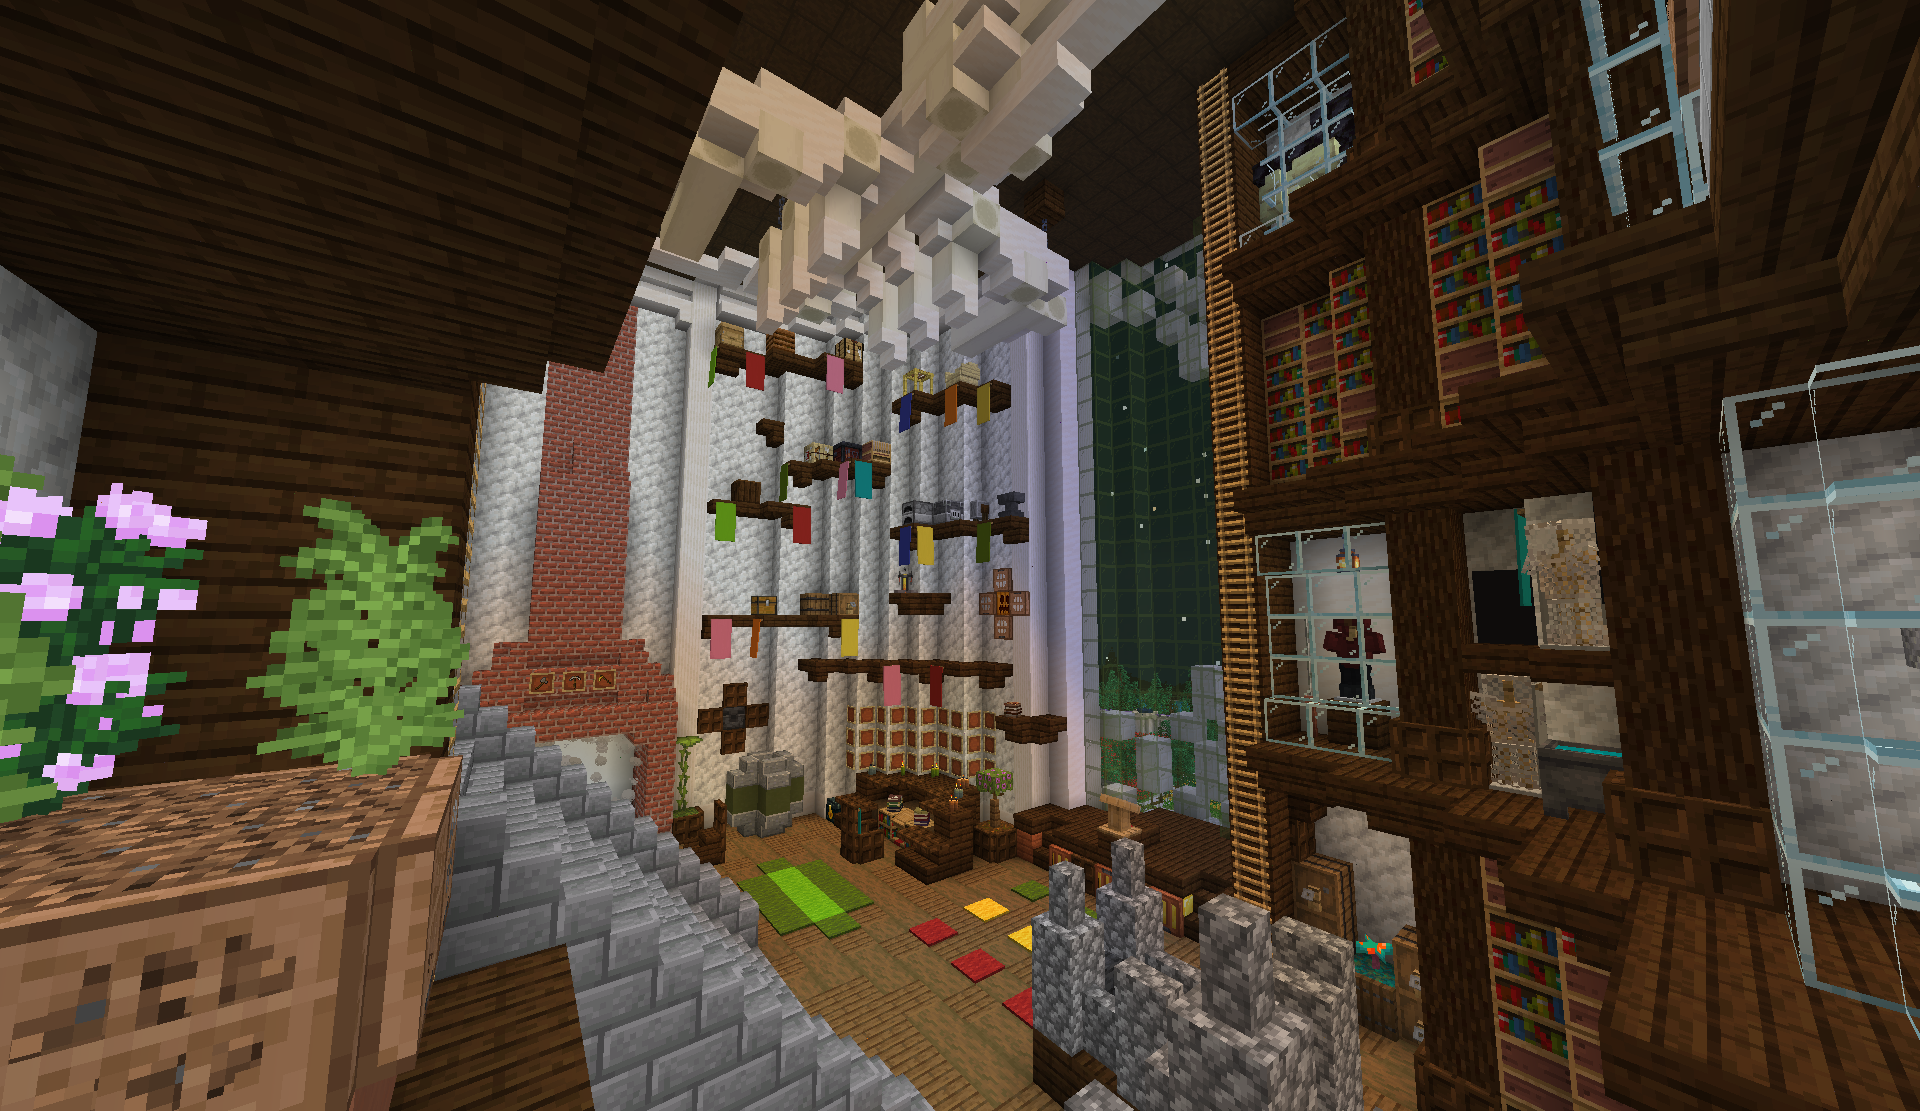
Library Room
The Ytaj library room, connecting to Khive's tower from the east, is somewhat disputed, but is likely Moen's room. This room is filled with dozens of layers of bookshelves, as well as floating white candles in the air. A path to climb up through the room does exist, in addition to a spiral staircase on the side that leads up to a glass bridge through the room, which in turn leads to Khive's tower.
A book, O Tethlaen, is found on a lectern at the bottom level of this room, expressing a hope that the Ever-Fear will one day return and praising him. This book also refers to Tethlaen as "sibling," which, if taken literally, would imply that the author of this book is one of Tethlaen's direct siblings in the Emotion Trio—either Maen or Moen. A pink, red, and magenta banner is also found hanging in this room, which matches with Moen's general color scheme elsewhere.
A 4x4 map of Ytaj, created with in-game maps, is also found in this room.
Parkour Tower
North of the library room, a black and white tower can be found, with an entrance from its northern side. The interior of the tower consists of a parkour course, which loops through the library room and also requires the player to climb around the outside of the tower at one point. A chest at the top contains a Divine Bauble and a Dragon's Breath, likely linking it to Tethlaen, although it appears to be more of a reference to the Aspect than a true room where they would have lived.
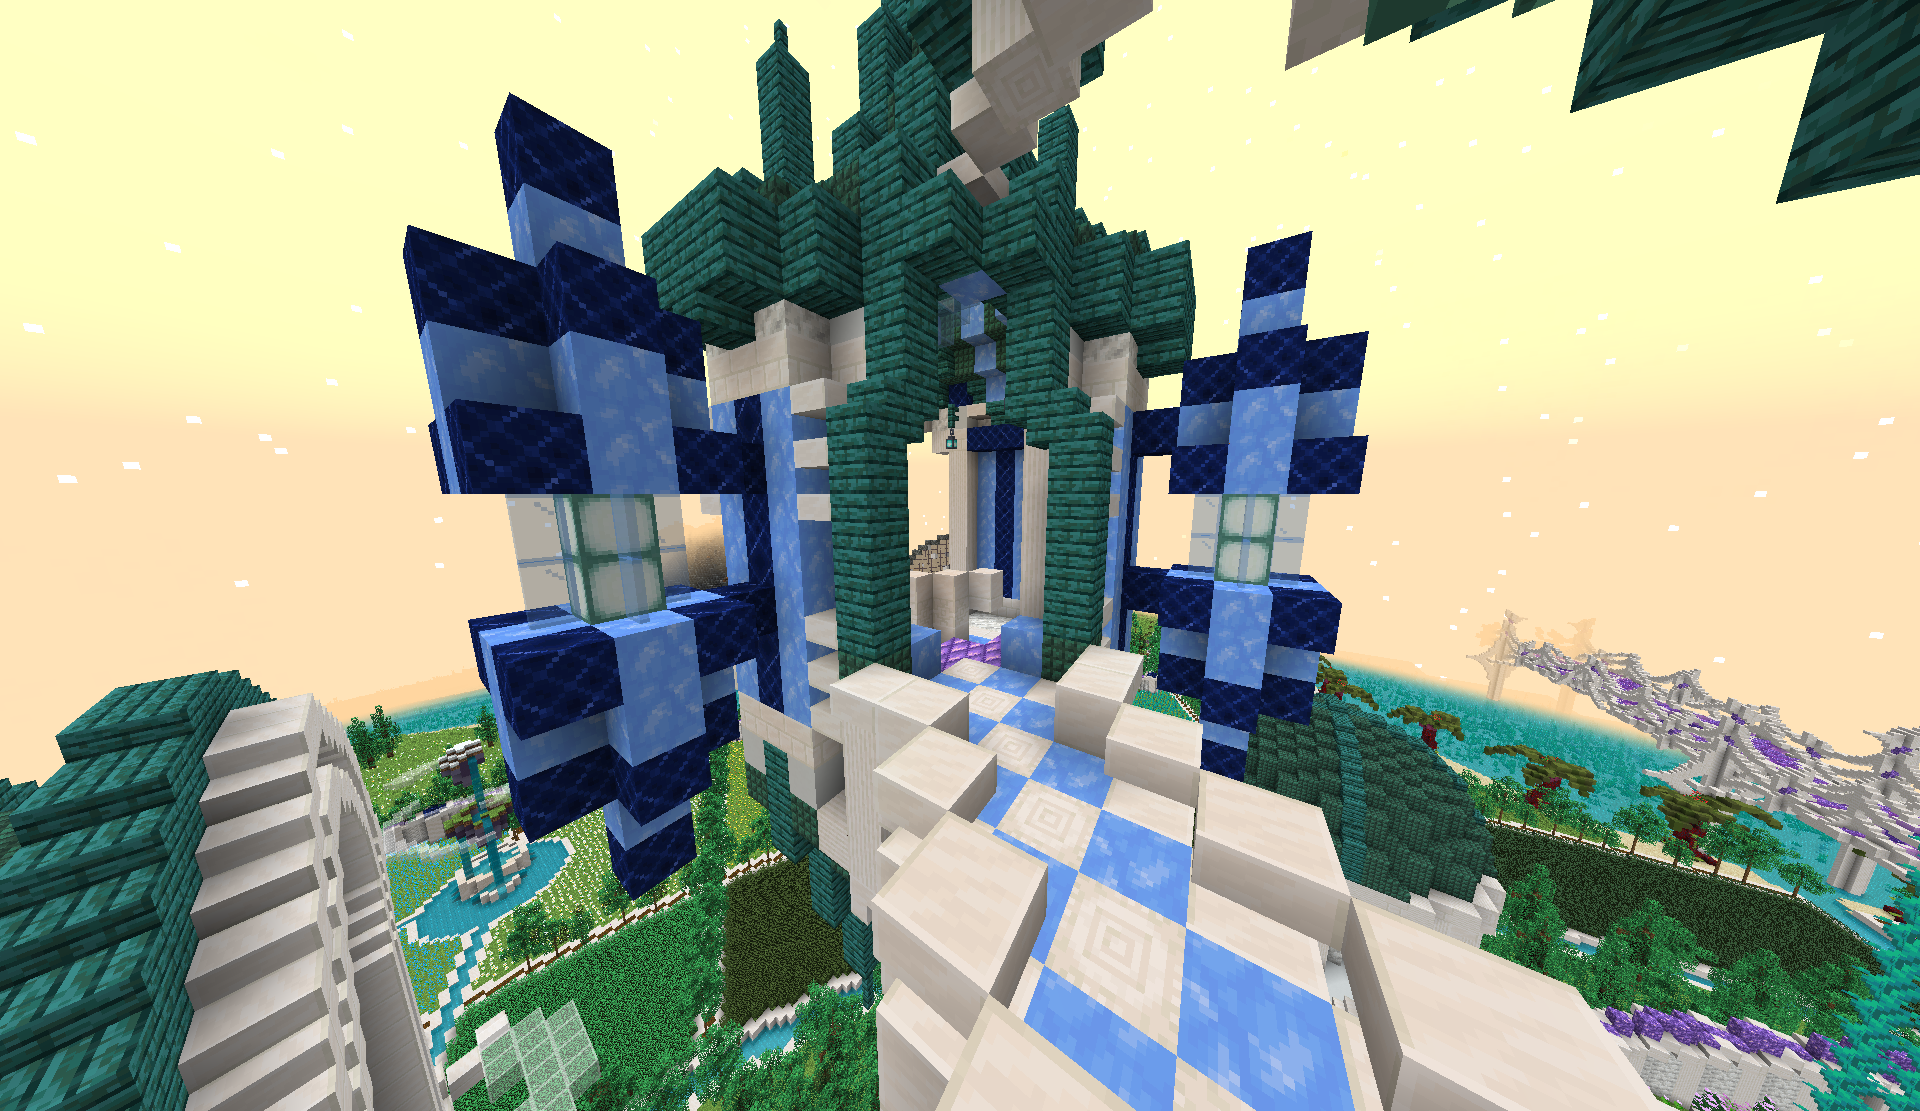
Vayniklah's Room

Vayniklah's "room" is an outdoor area just north of Khive's tower, dominated by a massive flowering tree made of stripped birch wood and yellow terracotta. Vayniklah's secondary devotion altar is located at the base of this tree, at (-183, 45, -1649).
Muhs' Room
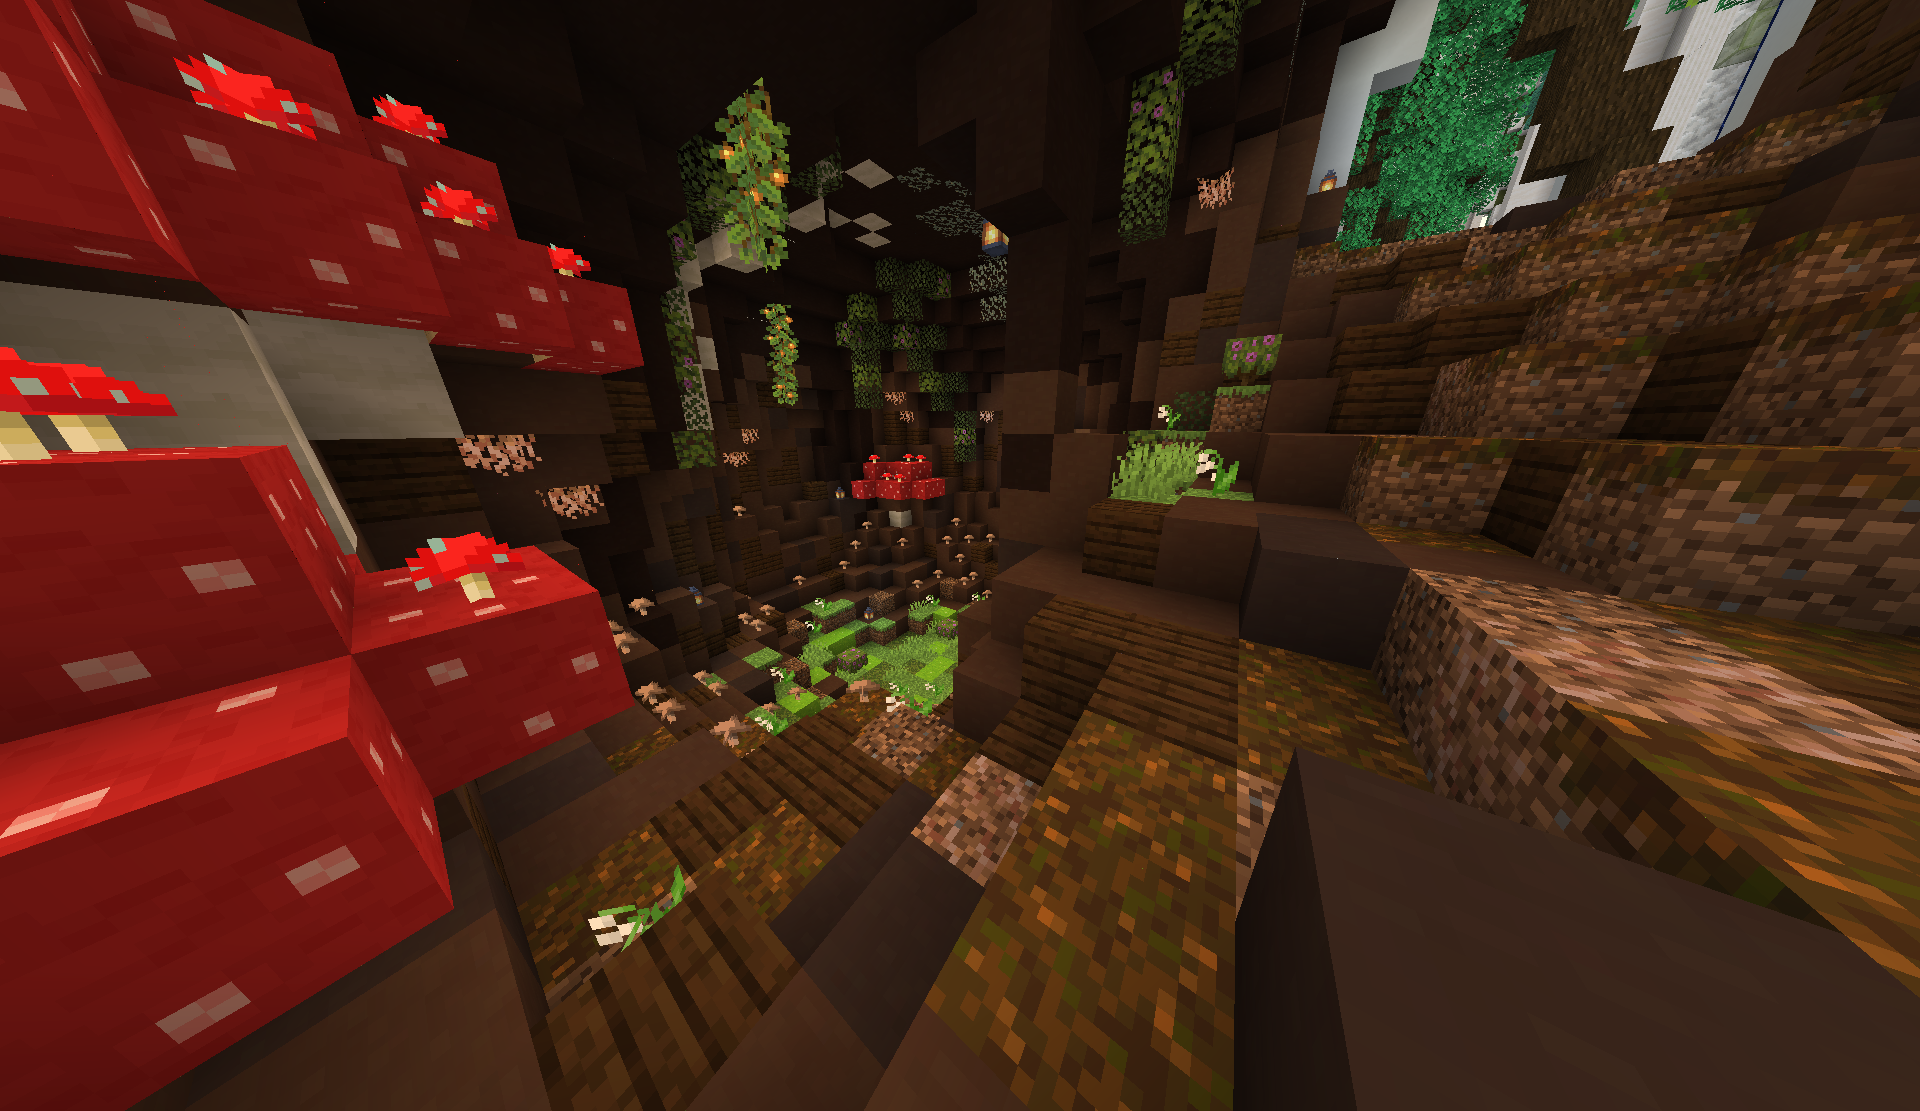
Muhs' room is a lush den located beneath the parkour tower, made up primarily of brown terracotta walls and filled with mushrooms, strongly resembling Muhs' home on Drehmal, the Underwood. There are no notable features inside the room besides a chest with a Divine Bauble and some other loot.
Maelihs
Maelihs's tower is located in the far northwest of Ytaj proper, with two discrete levels.
The bottom level is accessible from the other rooms at ground level in Ytaj's western wing, sharing an intersection with Khive and Vayniklah's areas to its south. This level contains Mael's secondary devotion altar in its base, at (-147, 35, -1688). The lower level, encompassing about 100 blocks of vertical space, also includes a large tower over the shrine, plus a spiral staircase along the walls of the tower.
The upper level, accessed from the elevator platform in the Tower of Drehmal, is where Mael himself resides, and contains his personal quarters. This includes a massive deity-sized bed, kitchen, hot tub, and throne, as well as several kegs of mead. A curved staircase leads up to a rooftop garden, full of sweet berries, rose bushes, and poppies, plus a Mael-sized chair overlooking the rest of Ytaj.
Drehmal
The Tower of Drehmal is the tallest building in Ytaj, located at the far north of the palace complex, directly behind the Prismatic Council Chamber. It contains a 130-block climb, themed around nature, during which the Dream Dialogue sequence plays out (if the player has not climbed it before). This climb will bring the player up to a platform where an elevator shortcut can be opened. From the elevator platform, the player can utilize levitation pads to reach the top of the tower, pictured above. This is where Drehmal's secondary devotion altar is found, at (-54, 219, -1718).
To the north, a pond surrounds the tower in an arc, stretching from west to east, with several small islands reminiscent of Drehmal biomes. On the tower itself, eight triangular side rooms, encased in glass and each containing a distinct mini-biome, protrude from the secondary intercardinal directions (NNW, NNE, ENE, etc.). All of these except for one can be accessed without breaking blocks, and 6 can be accessed from somewhere within the tower, during the initial climb.
Virtuo
Virtuo's tower is located in the far northeast of Ytaj proper, with two discrete levels.
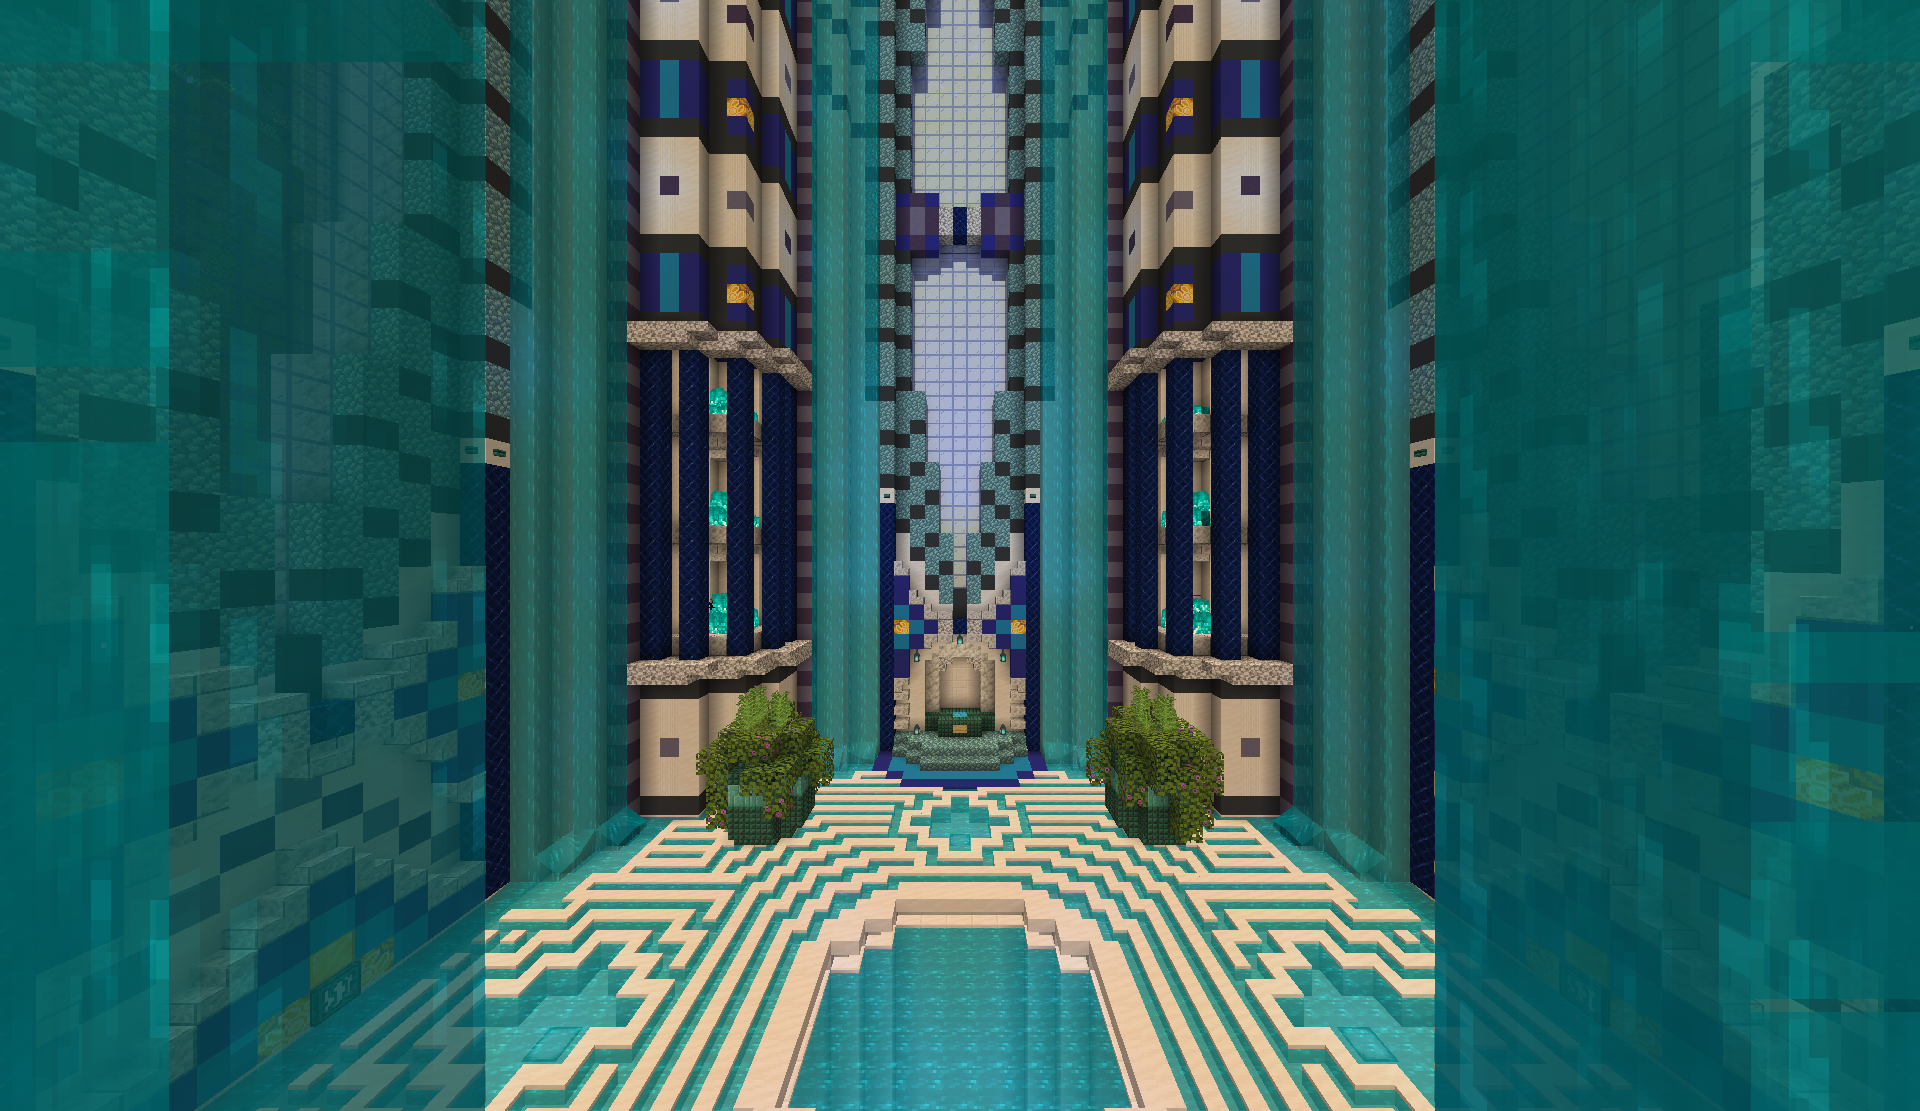
The bottom level is accessible directly from Taihgel's room in the eastern wing of Ytaj. This level holds an ornate fountain and pool, similar to the one found at the Kiln of Virtuo, as well as Virtuo's secondary devotion altar at (9, 64, -1706). The pool is filled by a series of fountains originating from a fish tank high up in the ceiling, which forms the barrier between the two levels as well.
The upper level has a very similar layout to the upper level of Mael's tower, including a deity-sized throne, bed, pool, garden, and kitchen. A desk is also found in a room next to the throne, with a lectern holding the Closed Diary, the last known writing by Virtuo before her departure for Eastern Xivrhynt. The Fortitude artifact can be found in a chest next to her bed, along with a player head resembling the Goddess.
Taihgel's Room
Taihgel's room is located in northeast Ytaj, just south of Virtuo's tower, directly above Lai's room. Taihgel's room is an expansive quartz room with elaborate stained glass windows, centered around an elliptical map. This is believed to be a map of the ancient world of Drehmal in the First Avihm, before the Felling and Drehmal's reshaping of the world drastically changed the terrain. The map features three roughly equal-sized continents, with the outer two continents containing a single flower (a chthonic/wither rose in the west and an oxeye daisy in the east) and the central continent of Primzahl containing an azalea, representing the Primal Tree.
Taihgel's secondary devotion shrine is located at the western end of this room, at (-9, 71, -1655). Behind this shrine, the windows are decorated with stained glass murals, depicting a tree in the center and two identical flowers on either side.
Lai's Room
Lai's room is located in northeast Ytaj, directly beneath Taihgel's room. The room is centered around a massive, multicolored flame (actually a sculpture made of stained glass representing a flame), similar to those found in Merijool. Lai's secondary shrine is found in the western end of this room, at (-10, 37, -1655).
Lailoehn's Room
Lailoehn's room is a direct offshoot of Lai's room, a smaller chamber to its east connected by a small staircase, and with an exit leading out to the north towards the Tower of Drehmal's pond. A small structure along the eastern wall can be interpreted as either a throne for Lailoehn, or a statue of the Aspect himself.
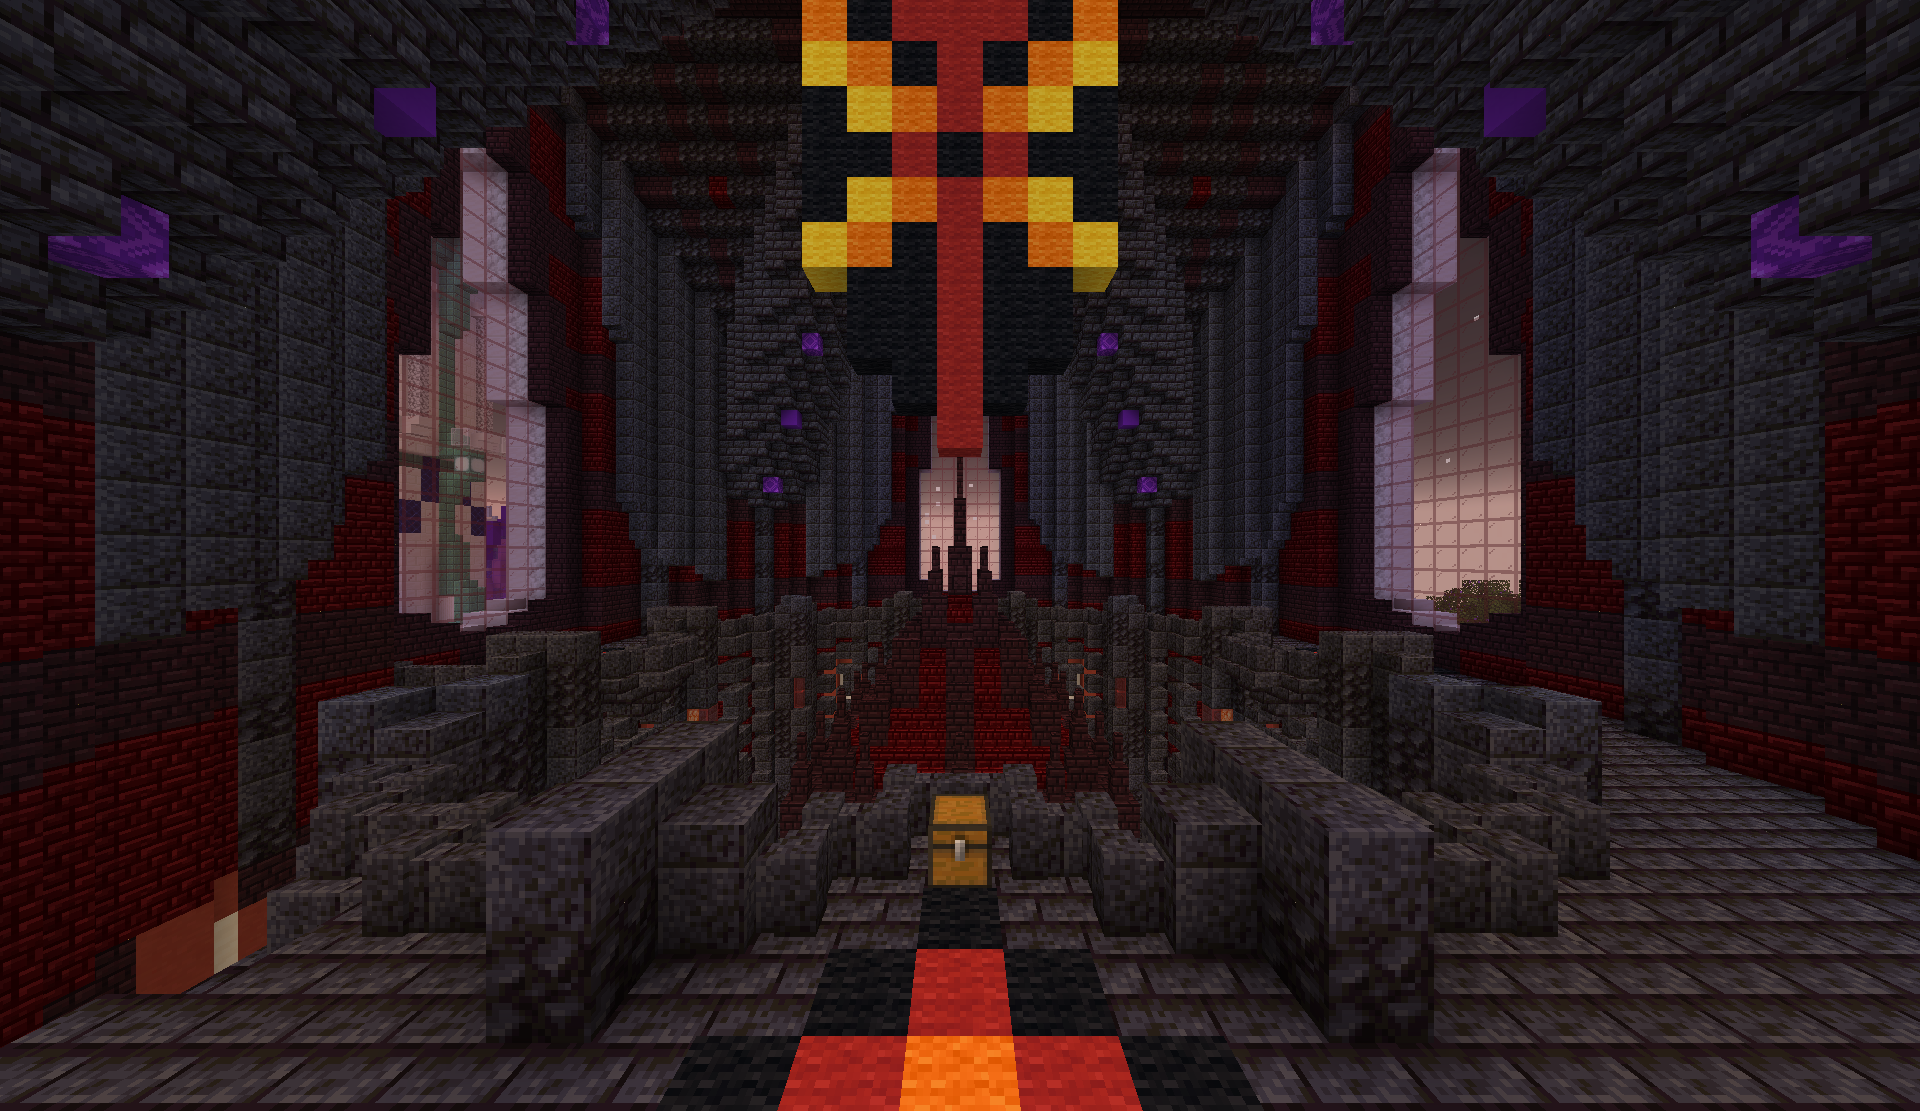
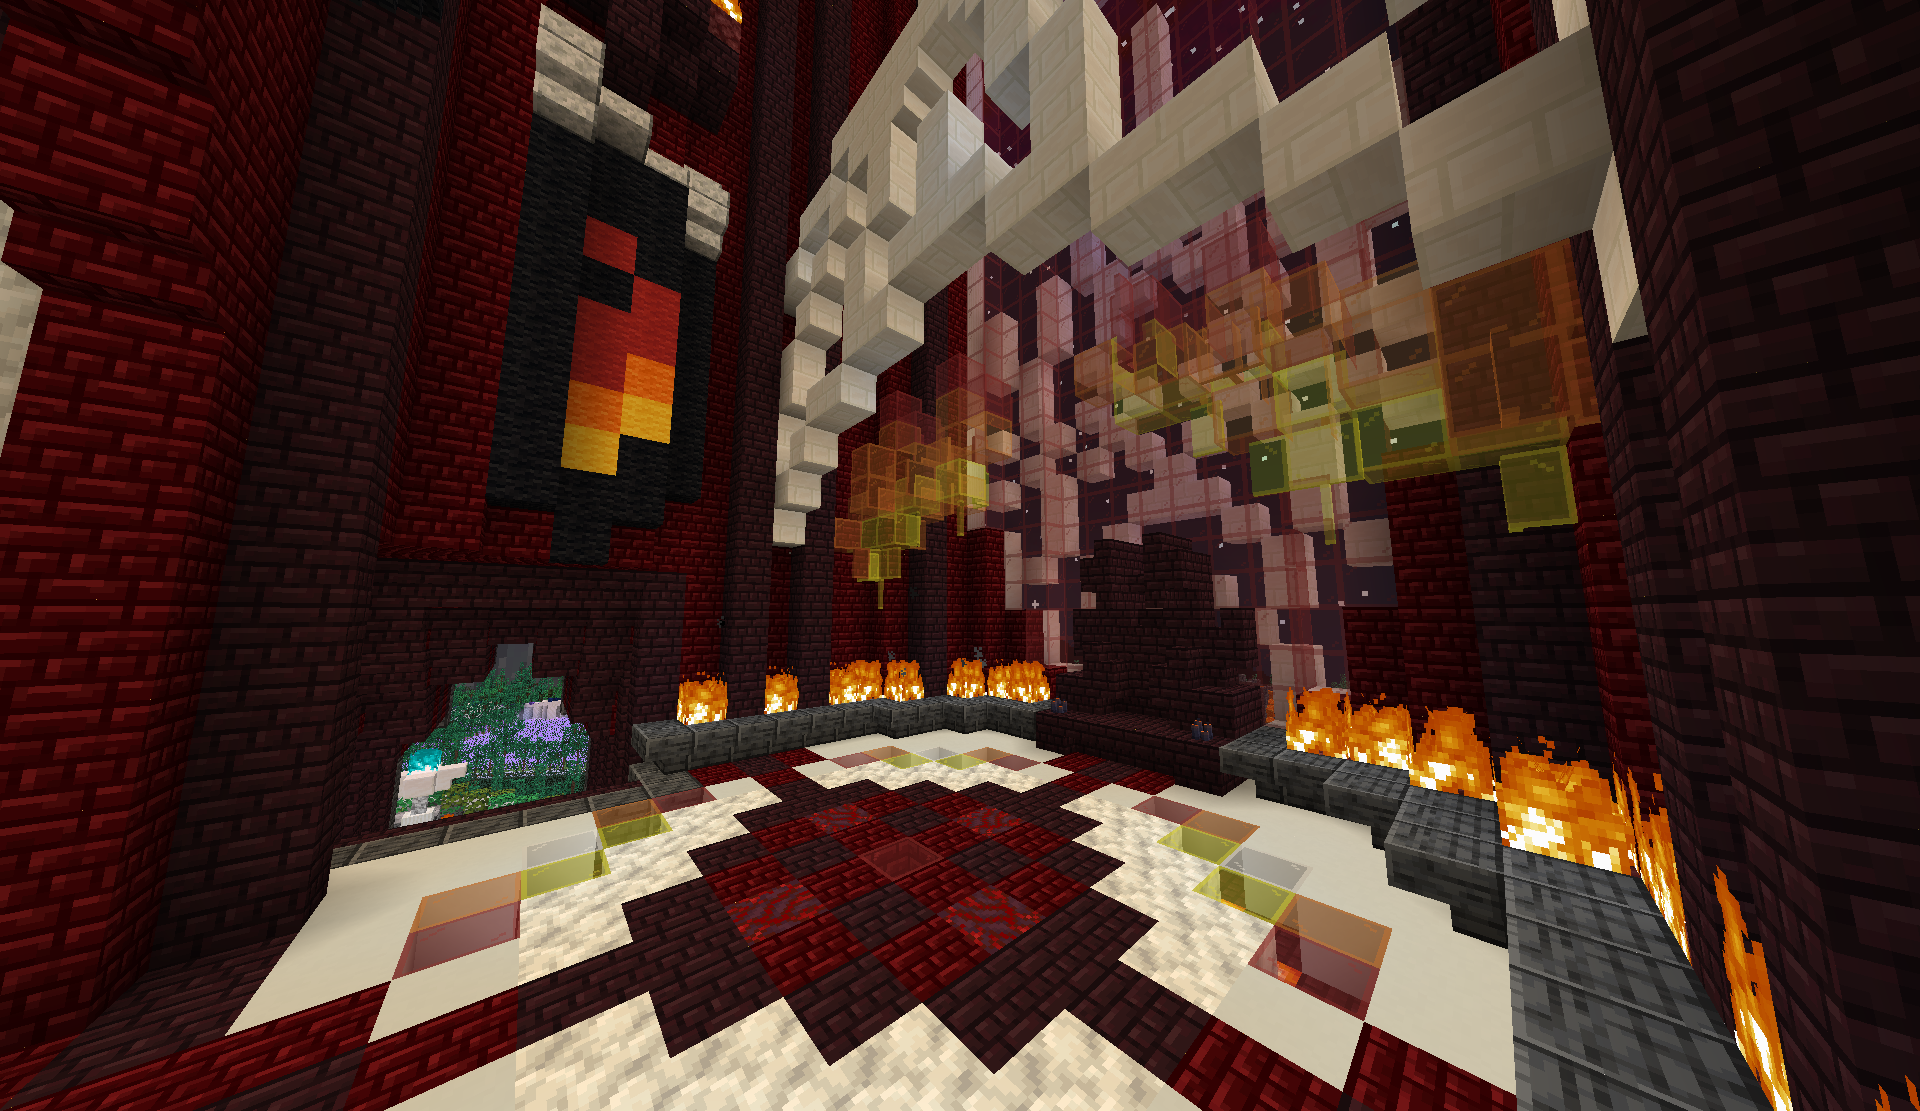
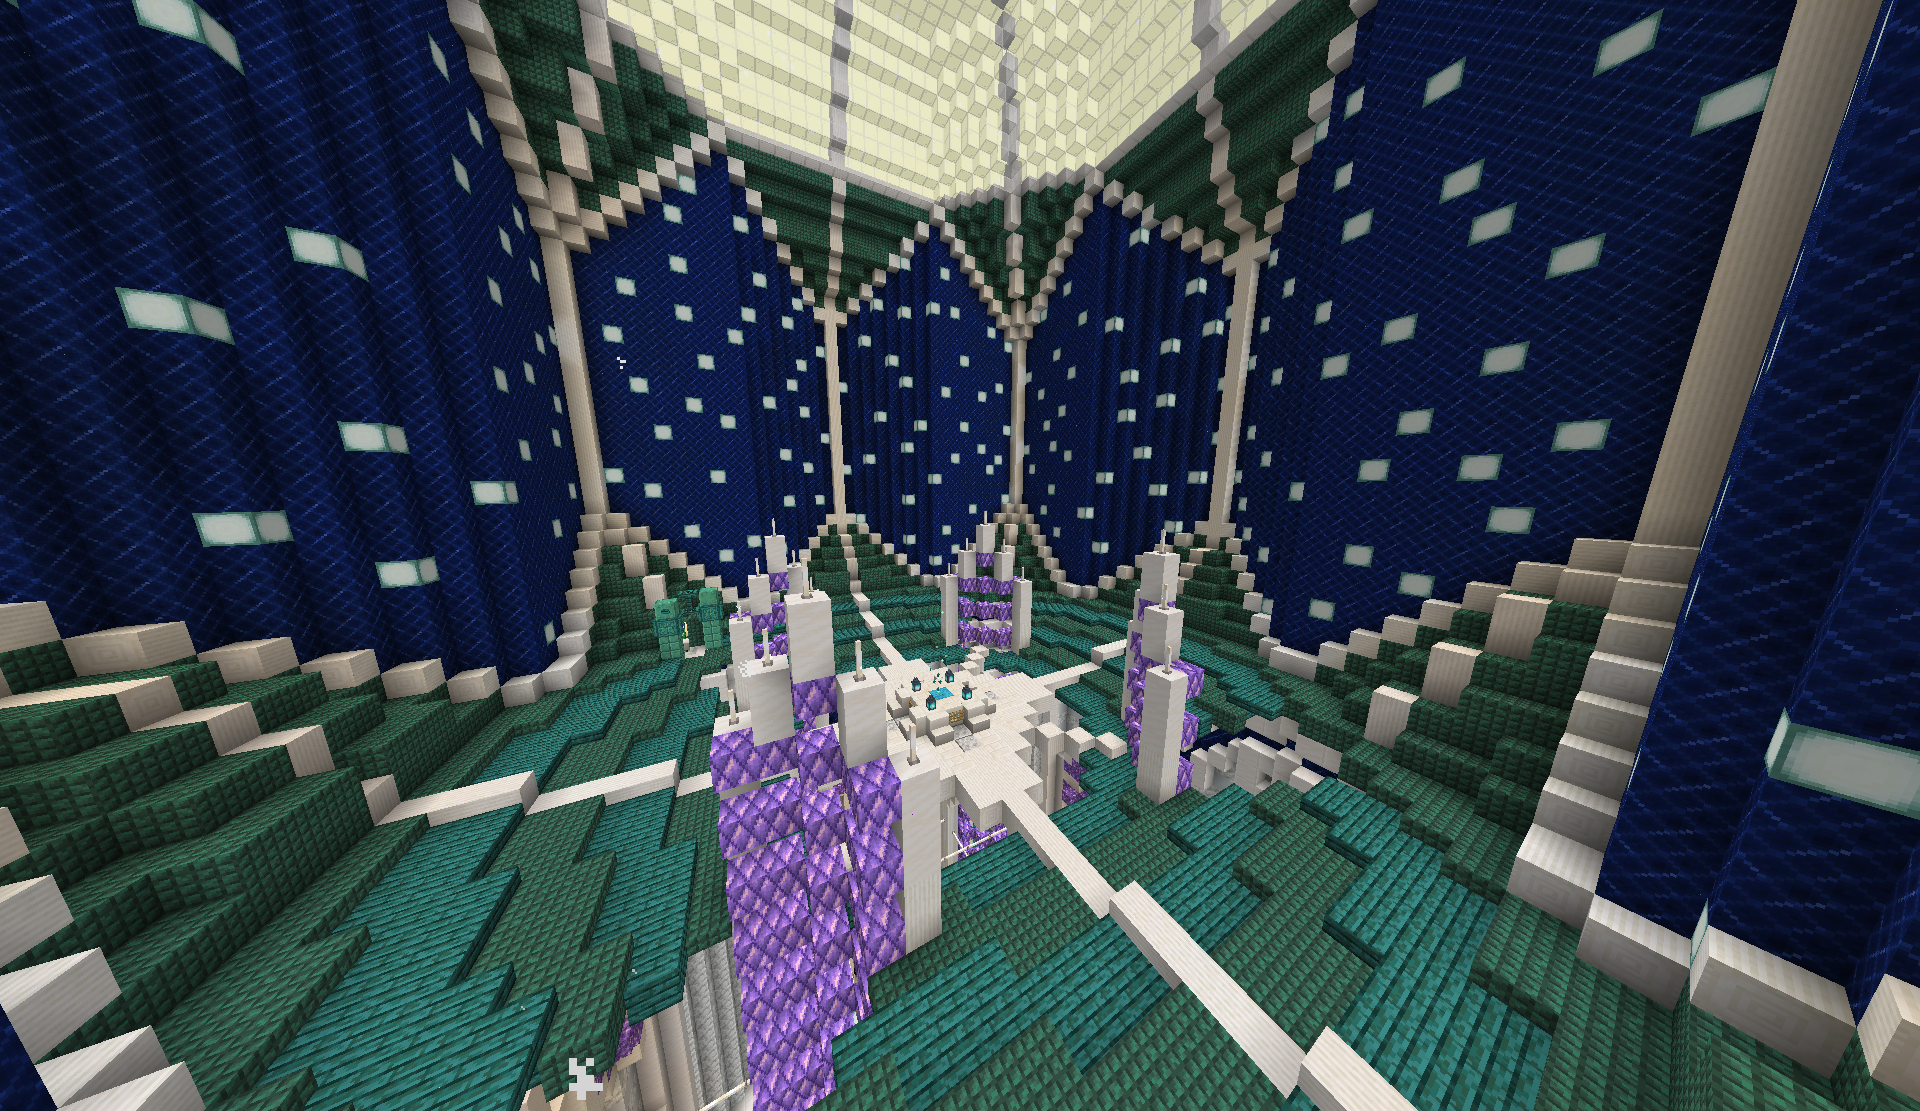
Lahrs' Room
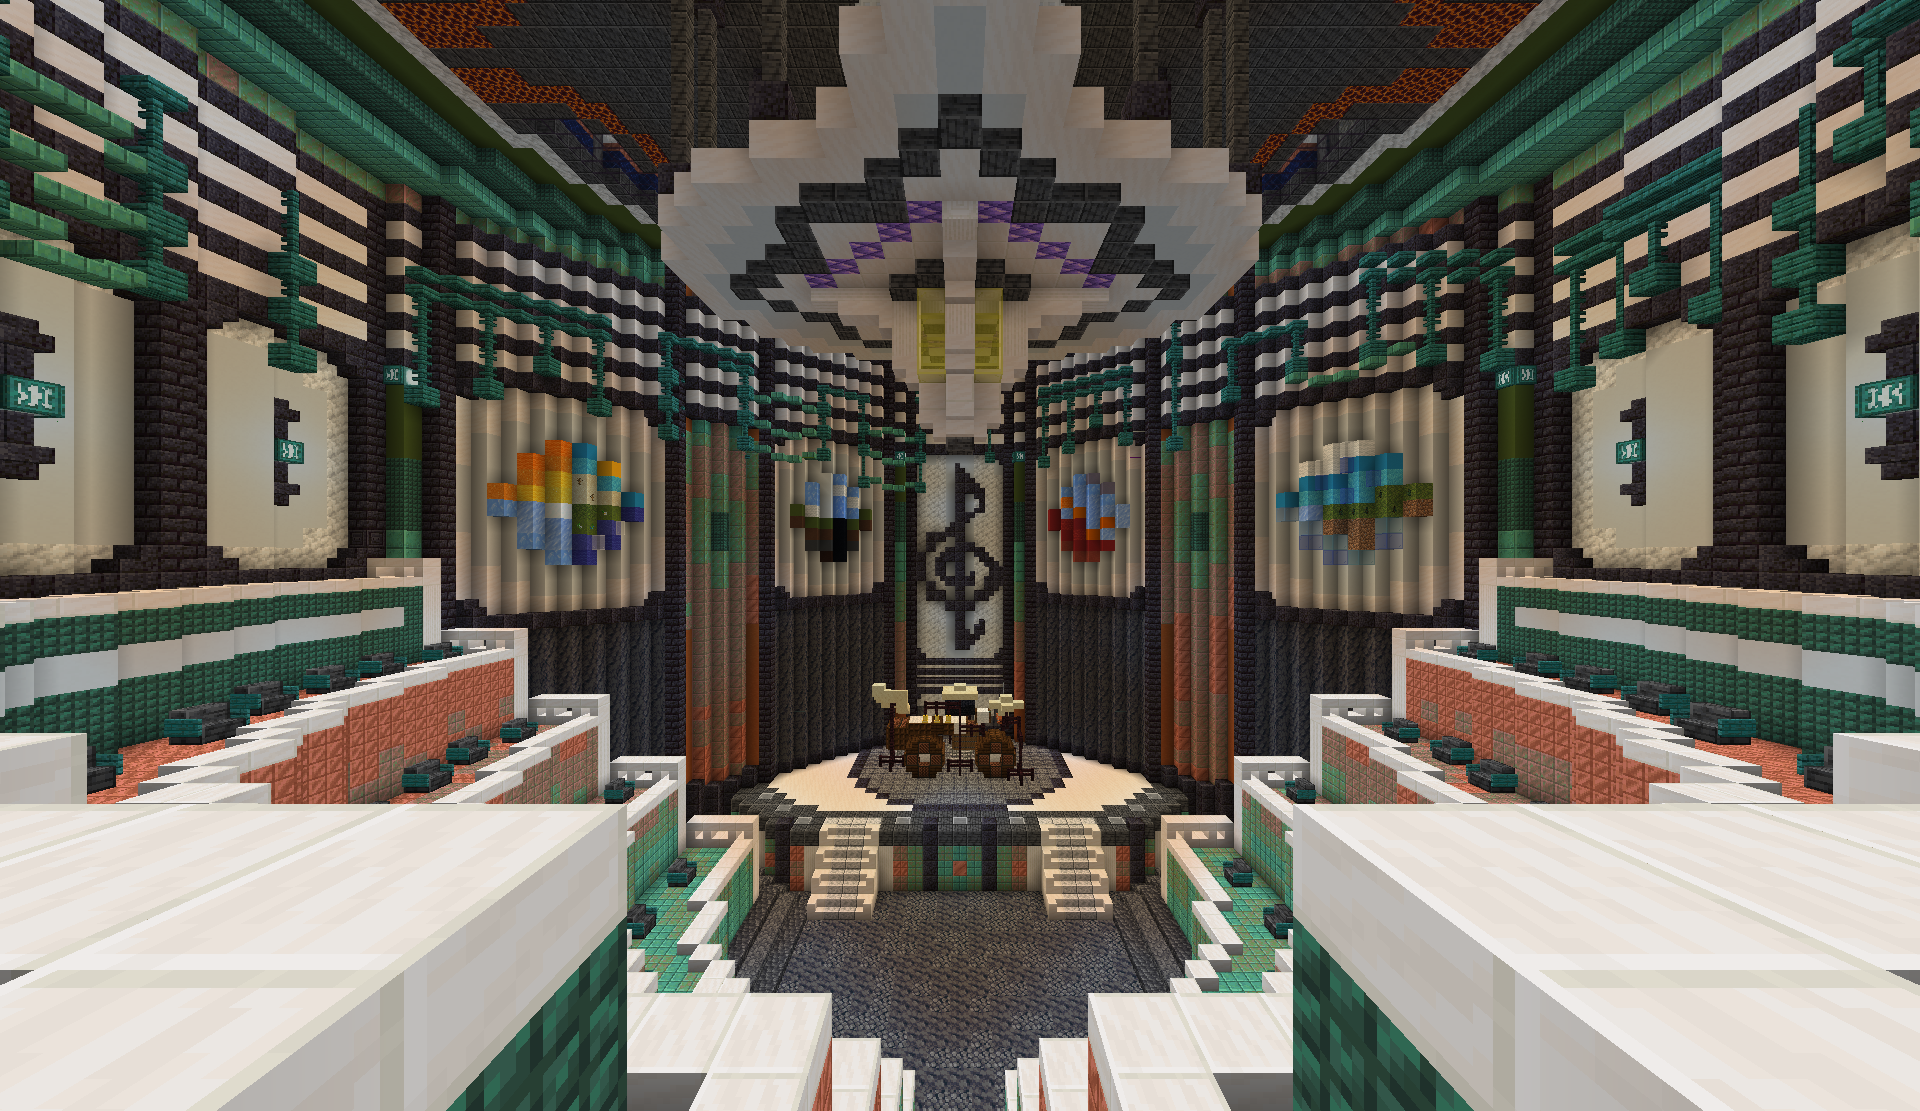
Lahrs' room is a large auditorium, located in the far east of Ytaj proper. The room features four rows of seats arranged in a semicircle around a central stage, which holds a massive drum set, presumably for Lahrs to play on. At the top of the room, a projector/spotlight apparatus angles down towards the stage. The room draws heavily on Lahrs' connection to music, but also plays into his fundamental role as the Aspect of Resonance, mediating the balance between all things. The circular murals on the walls seem to represent some of these delicate balances, with the two on the right representing the struggle between heat/cold and land/sea.
Nahyn's Room
Nahyn's room is located directly above Lahrs' room in eastern Ytaj, accessible via a small bridge from the intersection outside of Lai and Taihgel's rooms. The room itself contains a replica mini-mountain, complete with saplings, a small stream, and snow on its cap.
Koh's Room
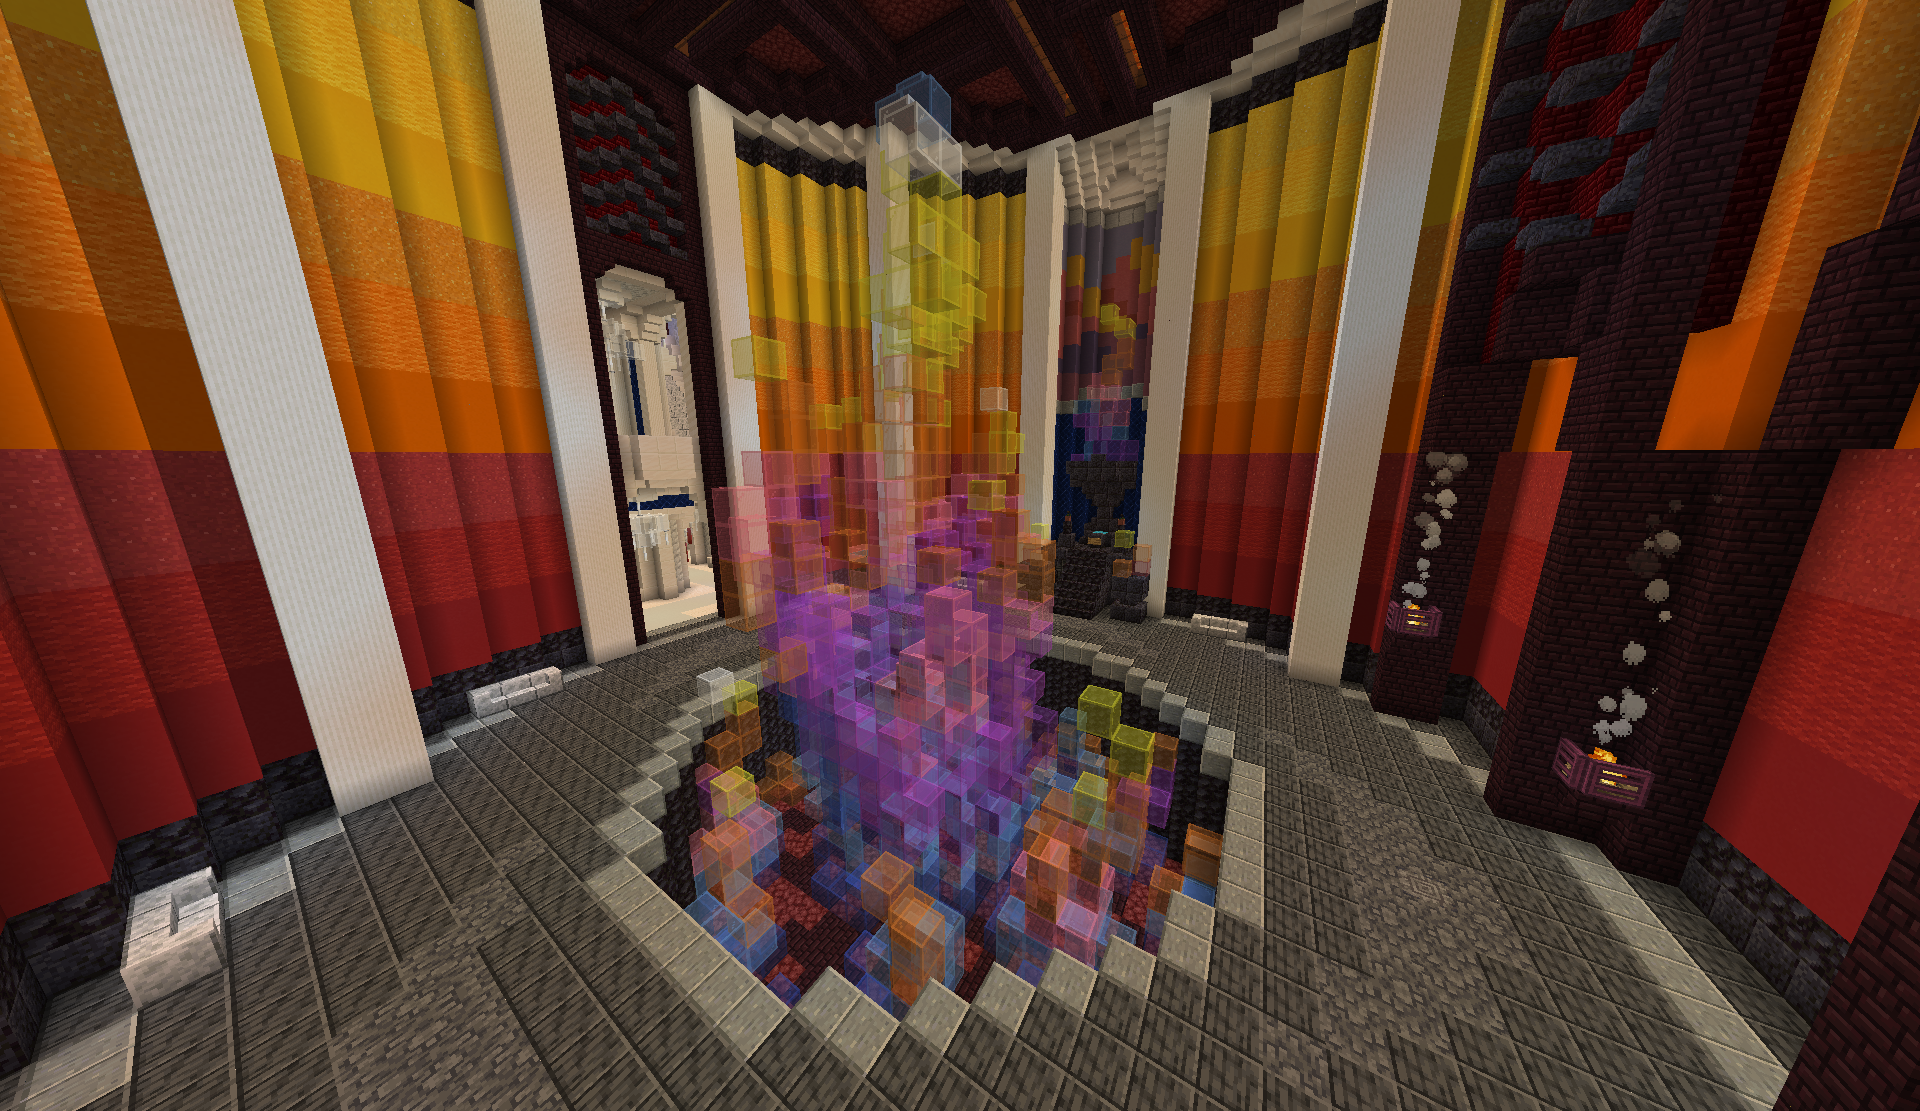
Koh's room is a direct offshoot of Nahyn's room, to its south. It resembles a cave, filled with magma blocks and lava. Different types of stone are displayed on the walls, with amethyst prominently featured in the ceiling and a sarcophagus-like structure made of obsidian and silent obsidian sitting at the end of the room.
Rihelma's Room
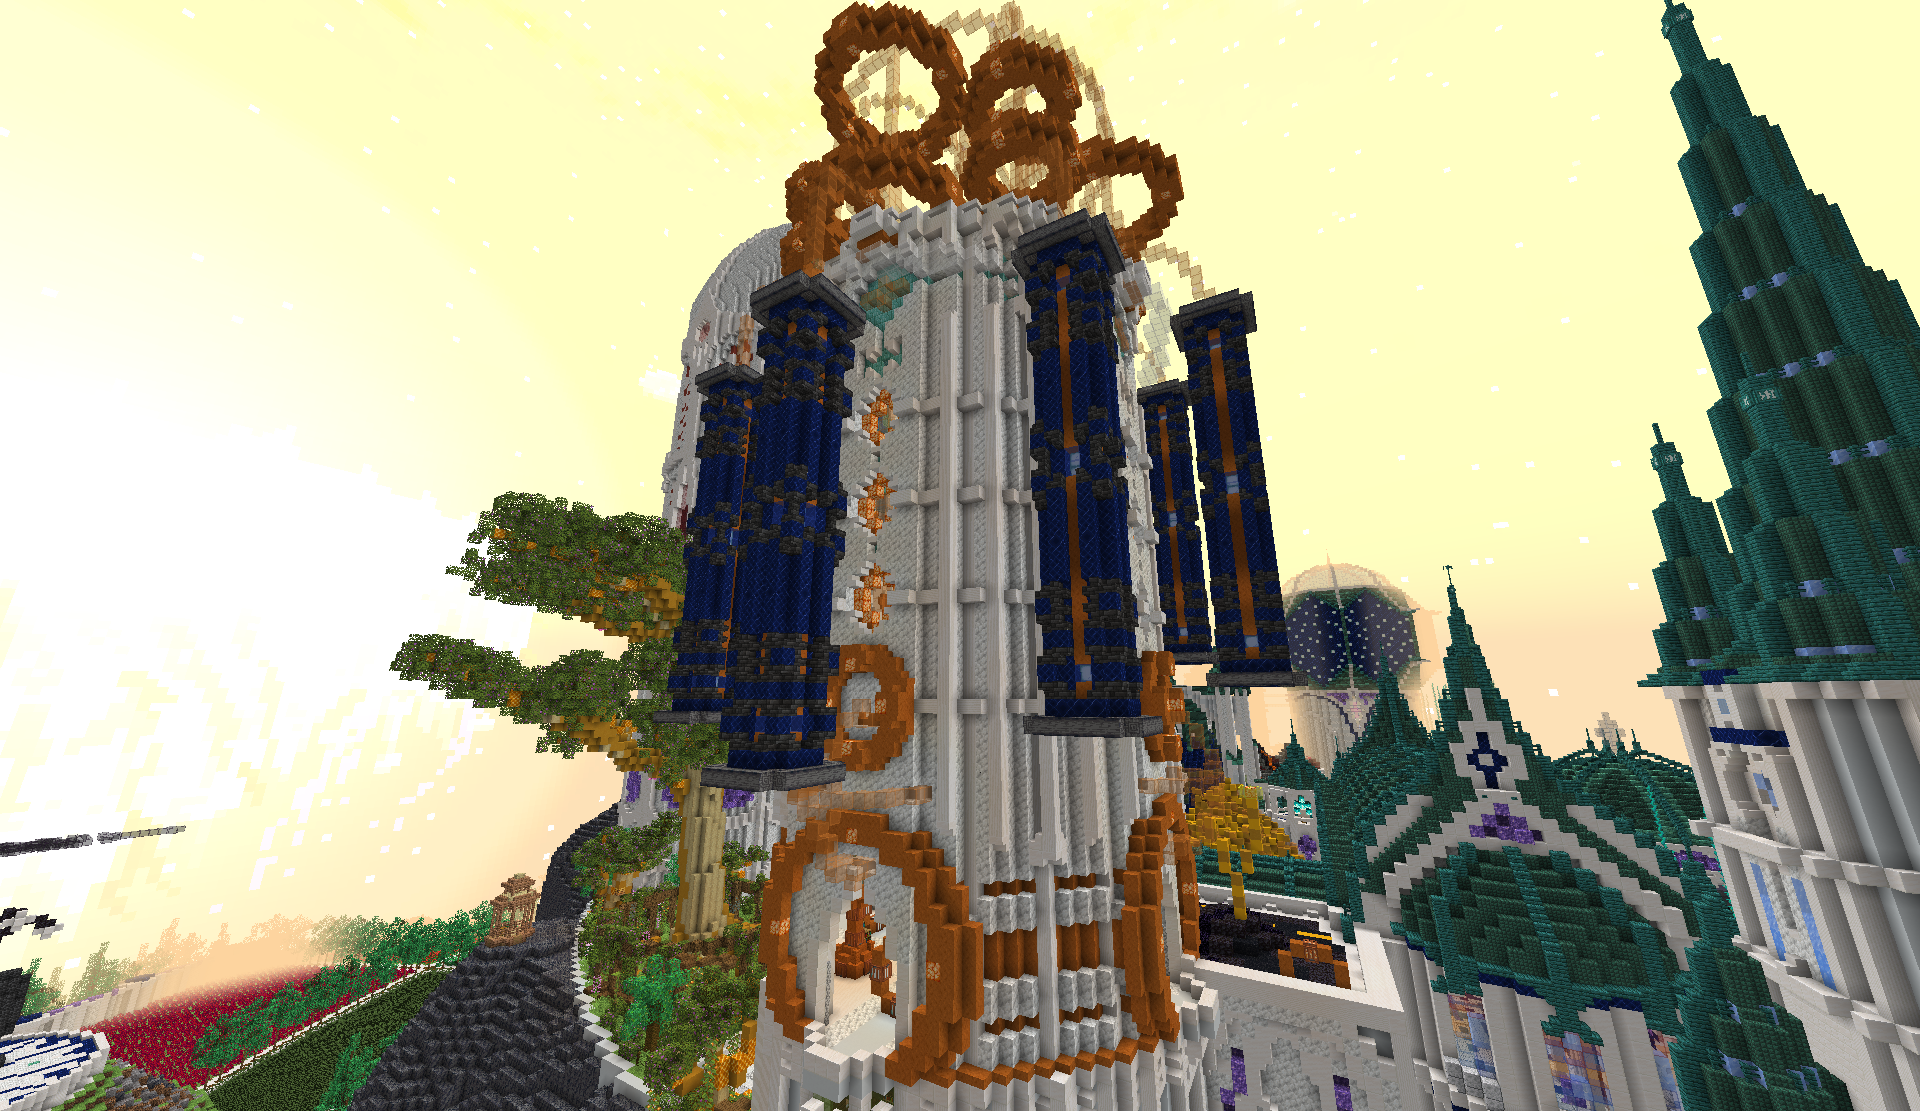
Rihelma's room is among the largest in Ytaj, comprising an entire tower in the southeast. This tower is capped off by a massive dark blue dome, and dotted with sea lanterns resembling stars. This room is located directly above the Tehrmari kitchen, and has special elevator columns in its corners, allowing for travel up to and down from the secondary devotion altar at the top level, at (17, 82, -1569).
Rihalae's Room
Rihalae does not appear to have a full "room," but the small, open-air tower that protrudes from the southeast corner of Rihelma's room is likely the closest thing she has to one. The only thing of note here is a chest containing a Divine Bauble and some other loot.
Worn Ironreed Rod Room
A hidden room in southeastern Ytaj, only accessible by swimming through the stream that flows south past Rihelma's room, appears to be the only possible room for Noha. This room consists of two chambers—the upper chamber appears to be the living quarters of a mortal, where the Worn Ironreed Rod artifact is found, which tells the story of a pair of thieves that grew up in Athrah and were separated, only being reunited decades later, presumably in Ytaj somehow.
The lower chamber is made up of red, green, yellow, and orange terracotta murals, mostly depicting flowers, with walls also lined in copper. An orange stained glass window looks out towards the Runic Blacksmith, and the stream drains out, creating an exit.
This room could be dedicated to Noha, with the imagery of flowers being connected to her. However, the combination of its relative inaccessibility and proximity to/continuity with Tehrmari living quarters makes this seem unlikely. Furthermore, the region of Casai, where the two people referenced by the artifact were from, has absolutely no known connection to Noha.
Voynahla's Room
Voynahla's room is located in southeastern Ytaj, just down the stairs to the right of Precocious Kinah in the main eastern hall. This room, like his domain, is dominated by black and red, with occasional white accents, and features a walkway that leads to his secondary devotion altar, at (1, 21, -1540). Behind the altar sits a large black skull, made out of coal blocks, which appears to be the real physical skull of the Aspect of Death, as it was known to have been exhumed using Sepelitem after his death.
Palaesida's Room

Palaesida's room is the final Aspect room using this ordering convention, and is located in the southeast of Ytaj, just to the east of the entrance. It is a circular room with a ceiling made out of gray wool and white/yellow stained glass, simulating storm clouds and lightning strikes. In the center of the room, a carpet pattern appears to show the color scheme of Palaesida's face when he was alive.
Palaesida's room is relatively unique, containing a series of stone tablets with signs around the room which tell the story of the Divine Schism. Palaesida played a central role in this conflict, and the tablets were likely erected as a memorial to the fallen Aspect after the Schism. These signs are the clearest tie between the Divine Schism and the Frostfang Catastrophe on Drehmal. The signs read as follows:
Palaesida Tablets Transcription
A meeting of the Prismatic Council commences,
And Palaesida, our dear hero, is on the agenda.
In prankish standard, he once again,
Ruined a plan of the hateful Abominate Maen.
Loe and Lai discuss, in turn, the Frostfang,
And Palaesida gets off without a single hitch.
Our motley crew is made of three, Sky, Wind, & Snow
All three are young, and quite immature, at that.
They discuss themselves, their duty, & their life.
Then Palaesida ruminates on what he heard,
Ideas of frost, impish desires; what can be done.
He still chafes against his limits, to push further.
Wind and Sky, dearest siblings, already agree
But Loeleyhn has her doubts, and is unsure.
She goes to Noha for advice, the wise and noble plain.
Noha considers for some time, but finally decides.
"Your friends are reckless, indeed they are."
"But you are all still young. Go out and enjoy that."
Thus, they all distract their lofty elders,
Rihalae stirs a gust within a roaring volcano.
Loeleyhn creates a flurry of snow, to distract Loe.
Warmth and Cold both preoccupied, Palaesida strikes.
He steals the Frostfang from its forge.
And gifts it to Homli Tahsgan, a Northern Lord
After the Catastrophe you all know:
Dear Loeleyhn and Palaesida grow closer.
With such vast swathes of new frozen tundra,
The Aspect of Snow is euphoric with her domain.
The Council blames the three young ones.
But they could all care less.
In furious rage the Great Sea King Dahr,
Shows up to punish Sky. But first!
The Sky confides: "I worry about my friend."
"She's different now, and while it's fun, I miss what she once was."
Dahr, surprised, confronts his son, and gives him sage advice.
"Talk it out, dear boy. Be honest how you feel."
A shock! Noha is dead. Heartbreak is the culprit.
Losing the lush steppe of the north was simply too much to bear.
Loeleyhn is still changed for the worst, but refuses to care.
Aspect of Death becomes inspired. A grisly ritual is performed.
The Aspects, shocked, break out in war.
The first amongst their kind.
Battle-lines were formed and fought, with kin against kin.
Lo'Dahr was shattered, its people astir.
A Divine Schism, to be sure.
Tehrmari rallied, soldiers unwilling in a terrible war.
Portals forged, warmongers beyond now brought to front.
Ytaj under siege, bodies tallied.
Long and hard fought, the schism draws to a close.
Dahr calls pause, gathering all in moon-barrens to the North!
Palaesida goes to speak, steeped in pride. He will not back down.
When suddenly, attacked by Maen! Still furious, after all this time.
Hate strikes Sky down, with a frozen bite, and leaves him to die.
Aspects in shock! Mortality realized, here our schism concludes.
Extras
An image of Ytaj in the early planning stages of the build.
Trivia
In addition to the Maelihs and Virtuo heads, a player head in the likeness of Thresa Vera can be found sandwiched in a nook between the western wall of Lai's room and the Prismatic Council Chamber, between Nahyn and Koh's thrones.
For the most part, Aspects who have a domain on the moon have a room which is on the same side (west-east) of Ytaj as their domain is, relative to Ytaj. The western regions are owned by Khive, Vayniklah, Dahr, Loe, and Maen, all of whom have rooms in the western half of Ytaj. Rihelma, Voynahla, Palaesida, Nahyn, Lai, Lahrs, and Taihgel own regions on the eastern side of the moon, and have rooms in eastern Ytaj.
There is one exception to this rule, as Moen's Domain falls just east of the midline, but her room in Ytaj is in the west. This is almost certainly to hold the Emotion Trio's rooms together, near their parent, Khive.
Noha does not appear to have a room, also technically being an exception, although the one spot that might belong to her is in the east of Ytaj.
Around the top of Lahrs' room, a musical staff is drawn on the walls, looping around the entire chamber. Musical notes are placed on the staff, and while these may seem like nonsensical decoration, they actually do serve a hidden purpose: playing these notes in the correct order reveals Lahrs' leitmotif, present in 5 different songs for seemingly unrelated areas.
Soundtrack
Ytaj's theme song is "Sacred Halls", by Drehmal composer Chris Nesja.
Merchant Respawn Commands
In the event that one of the custom merchants in Ytaj is turned into a witch or dies, the following commands can be used (through a command block) in order to respawn them. See this page for more information on these commands.
Ytaj Trader Respawn Commands
Runic Blacksmith
/summon minecraft:villager 35.50 29.00 -1535.50 {DeathTime: 0s, RestocksToday: 0, Xp: 0, LeftHanded: 0b, OnGround: 0b, AbsorptionAmount: 0.0f, FoodLevel: 0b, LastRestock: 0L, Attributes: [{Name: "minecraft:generic.movement_speed", Base: 0.5d}], Invulnerable: 1b, Brain: {memories: {}}, Age: 0, HandDropChances: [0.085f, 0.085f], ArmorDropChances: [0.085f, 0.085f, 0.085f, 0.085f], Rotation: [80.0f, 0.0f], HurtByTimestamp: 0, ForcedAge: 0, CustomName: '{"text":"Runic Blacksmith"}', ArmorItems: [{}, {}, {}, {}], Tags: ["lodahr_mob"], Air: 300s, HandItems: [{}, {}], NoAI: 1b, Offers: {Recipes: [{xp: 1, buy: {id: "minecraft:amethyst_shard", Count: 20b}, sell: {id: "minecraft:trident", tag: {Damage: 0, HideFlags: 2, display: {Name: '{"text":"Guard Trident","color":"yellow","italic":false,"underlined":true}', Lore: ['{"text":"To pay homage to Elder Dahr, it is customary for"}', '{"text":"Talon guarding a public place to speak softly"}', '{"text":"and carry a trident. "}', '{"text":" "}', '{"text":"When in main hand:","color":"gray","italic":false}', '{"text":"9 Attack Damage","color":"blue","italic":false}', '{"text":"1.1 Attack Speed","color":"blue","italic":false}', '{"text":" "}', '{"text":"Artisan","color":"yellow","italic":false}']}}, Count: 1b}, uses: 0, priceMultiplier: 0.0f, maxUses: 999999, rewardExp: 1b, demand: 0, specialPrice: 0, buyB: {id: "minecraft:air", Count: 0b}}, {xp: 1, buy: {id: "minecraft:amethyst_shard", Count: 18b}, sell: {id: "minecraft:diamond_sword", tag: {display: {Name: '{"text":"Compass Rapier","color":"yellow","italic":false,"underlined":true}', Lore: ['{"text":"To pay homage to Elder Rihelma, it is customary"}', '{"text":"for Wingmakers without any leads to spin a rapier"}', '{"text":"and go in the direction it points, no matter the"}', '{"text":"weather or climate."}', '{"text":" "}', '{"text":"When in main hand:","color":"gray","italic":false}', '{"text":"7 Attack Damage","color":"blue","italic":false}', '{"text":"2 Attack Speed","color":"blue","italic":false}', '{"text":" "}', '{"text":"Artisan","color":"yellow","italic":false}']}, HideFlags: 2, Damage: 0, AttributeModifiers: [{Amount: 6, Operation: 0, UUID: [I; 615149197, 2006011288, -2084422637, -412464322], Name: "generic.attack_damage", AttributeName: "generic.attack_damage"}, {Amount: -2, Operation: 0, UUID: [I; -276241942, 11943958, -1474278642, 1485974646], Name: "generic.attack_speed", AttributeName: "generic.attack_speed"}]}, Count: 1b}, uses: 0, priceMultiplier: 0.0f, maxUses: 999999, rewardExp: 1b, demand: 0, specialPrice: 0, buyB: {id: "minecraft:air", Count: 0b}}, {xp: 1, buy: {id: "minecraft:amethyst_shard", Count: 23b}, sell: {id: "minecraft:diamond_chestplate", tag: {display: {Name: '{"text":"Cloak of Office","color":"yellow","italic":false,"underlined":true}', Lore: ['{"text":"To pay homage to Elder Taihgel, it is customary"}', '{"text":"for Scalebound leaders addressing the public to"}', '{"text":"wear this shell-patterned cloak."}', '{"text":" "}', '{"text":"When on chest:","color":"gray","italic":false}', '{"text":"+6 Max Health","color":"blue","italic":false}', '{"text":"0.3 Knockback Resistance","color":"blue","italic":false}', '{"text":"+7 Armor","color":"blue","italic":false}', '{"text":"+2 Armor Toughness","color":"blue","italic":false}', '{"text":" "}', '{"text":"Artisan","color":"yellow","italic":false}']}, HideFlags: 2, Damage: 0, AttributeModifiers: [{Amount: 6, Operation: 0, UUID: [I; -1383544725, 74139477, -1142613492, 1435315359], Name: "generic.max_health", AttributeName: "generic.max_health"}, {Amount: 0.3d, Operation: 0, UUID: [I; 1710683284, 1096827598, -1770499588, 1572523787], Name: "generic.knockback_resistance", AttributeName: "generic.knockback_resistance"}, {Amount: 7, Operation: 0, UUID: [I; 1132470378, 1407665383, -1415818971, -932659062], Name: "generic.armor", AttributeName: "generic.armor"}, {Amount: 2, Operation: 0, UUID: [I; 799894896, -1250735247, -1416020471, -1927976174], Name: "generic.armor_toughness", AttributeName: "generic.armor_toughness"}]}, Count: 1b}, uses: 0, priceMultiplier: 0.0f, maxUses: 999999, rewardExp: 1b, demand: 0, specialPrice: 0, buyB: {id: "minecraft:magma_block", Count: 12b}}]}, Inventory: [], Gossips: [], FallDistance: 0.0f, NoGravity: 1b, Motion: [0.0d, 0.0d, 0.0d], VillagerData: {type: "minecraft:plains", profession: "minecraft:toolsmith", level: 99}, Fire: 0s, CanPickUpLoot: 1b, Health: 20.0f, HurtTime: 0s, FallFlying: 0b, PersistenceRequired: 1b, LastGossipDecay: 1137761729L, PortalCooldown: 0}
Precocious Kinah
Precocious Kinah, as she appears in-game, is actually two mobs: the visible cat, and an invisible wandering trader who stands directly over the cat, and actually has the trades. Spawning in both should restore Kinah to brand new form, but the full trade functionality is possible without the cat.
Cat
/summon minecraft:cat -25.50 30.50 -1568.50 {variant: "minecraft:white", DeathTime: 0s, LeftHanded: 0b, OnGround: 1b, AbsorptionAmount: 0.0f, Attributes: [{Name: "minecraft:generic.movement_speed", Base: 0.30000001192092896d}], Invulnerable: 1b, Brain: {memories: {}}, Sitting: 1b, Age: 0, HandDropChances: [0.085f, 0.085f], Rotation: [90.0f, 0.0f], ArmorDropChances: [0.085f, 0.085f, 0.085f, 0.085f], HurtByTimestamp: 0, ForcedAge: 0, ArmorItems: [{}, {}, {}, {}], Tags: ["lodahr_passive", "vt_immune", "lodahr_mob"], Air: 300s, HandItems: [{}, {}], NoAI: 1b, FallDistance: 0.0f, NoGravity: 1b, CollarColor: 14b, Motion: [2.738612828334328d, 0.0d, 0.0d], InLove: 0, Fire: 0s, CanPickUpLoot: 0b, Health: 10.0f, HurtTime: 0s, FallFlying: 0b, PersistenceRequired: 1b, PortalCooldown: 0}
Trader
/summon minecraft:wandering_trader -25.80 29.30 -1568.50 {Silent: 1b, DeathTime: 0s, DespawnDelay: 0, LeftHanded: 0b, OnGround: 1b, AbsorptionAmount: 0.0f, Attributes: [{Name: "minecraft:generic.movement_speed", Base: 0.699999988079071d}], Invulnerable: 1b, Brain: {memories: {}}, Age: 0, HandDropChances: [0.085f, 0.085f], ArmorDropChances: [0.085f, 0.085f, 0.085f, 0.085f], Rotation: [90.0f, 0.0f], HurtByTimestamp: 0, ForcedAge: 0, CustomName: '{"text":"Precocious Kinah"}', ArmorItems: [{}, {}, {}, {}], Air: 300s, HandItems: [{}, {}], NoAI: 1b, Offers: {Recipes: [{xp: 1, buy: {id: "minecraft:iron_nugget", tag: {display: {Name: '{"text":"Divine Bauble","color":"green","italic":false,"underlined":true}', Lore: ['{"text":"This long multicolored tassel seems to"}', '{"text":"enjoy wrapping itself around sturdy"}', '{"text":"objects and swaying, leaving small runes"}', '{"text":"in the air behind it as it moves."}', '{"text":" "}', '{"text":"Can be exchanged for valuables with"}', '{"text":"Precocious Kinah in Ytaj."}']}, CustomModelData: 3}, Count: 32b}, sell: {id: "minecraft:warped_fungus_on_a_stick", tag: {display: {Name: '{"text":"Call of the Council","color":"green","italic":false,"underlined":true}', Lore: ['{"text":"After the Divine Schism, the Prismatic"}', '{"text":"Council voted to tighten security around"}', '{"text":"Ytaj. Kinah, a noble housecat deemed "}', '{"text":"worthy of ascension, now serves as the"}', '{"text":"protector of the palace. This staff was"}', '{"text":"forged by Kinah to allow those she "}', '{"text":"trusts deeply to enter and leave with"}', '{"text":"ease, ostensibly to inform the Council of"}', '{"text":"dangers outside their perception."}', '{"text":" "}', '{"text":"Prismatic Calling","color":"green","italic":false}', '{"text":"Right click to answer the call and be","color":"dark_gray"}', '{"text":"summoned to Ytaj once per day.","color":"dark_gray"}', '{"text":" "}', '{"text":"This item is infinitely reusable.","color":"gray"}', '{"text":" "}', '{"text":"Trinket","color":"green","italic":false}']}, pris_mace: 1b, Damage: 0, CustomModelData: 4}, Count: 1b}, uses: 0, priceMultiplier: 0.0f, maxUses: 999999, rewardExp: 1b, demand: 0, specialPrice: 0, buyB: {id: "minecraft:air", Count: 0b}}, {xp: 1, buy: {id: "minecraft:iron_nugget", tag: {display: {Name: '{"text":"Divine Bauble","color":"green","italic":false,"underlined":true}', Lore: ['{"text":"This long multicolored tassel seems to"}', '{"text":"enjoy wrapping itself around sturdy"}', '{"text":"objects and swaying, leaving small runes"}', '{"text":"in the air behind it as it moves."}', '{"text":" "}', '{"text":"Can be exchanged for valuables with"}', '{"text":"Precocious Kinah in Ytaj."}']}, CustomModelData: 3}, Count: 5b}, sell: {id: "minecraft:wandering_trader_spawn_egg", tag: {WardStaff: 1b, EntityTag: {Tags: ["ward_staff_place"], id: "minecraft:marker"}, display: {Name: '{"text":"Aurastaff of Permafrost","color":"green","italic":false,"underlined":true}', Lore: ['{"text":"Loe and Lai were once the greatest of "}', '{"text":"friends, and together designed many powerful"}', '{"text":"devices for the Tehrmari with divine magic"}', '{"text":"from the fabled forge, Soletta. Though few in"}', '{"text":"number and no longer in production, these"}', '{"text":"staves are immaculately maintained and "}', '{"text":"priceless to the residents of Lo\'Dahr."}', '{"text":" "}', '{"text":"Selective Hypothermia","color":"green","italic":false}', '{"text":"When placed, prevents naturally spawning enemies","color":"dark_gray"}', '{"text":"from spawning within a 32-block around","color":"dark_gray"}', '{"text":"itself. Does not work in the overworld.","color":"dark_gray"}', '{"text":" "}', '{"text":"Trinket","color":"green","italic":false}']}, CustomModelData: 810001}, Count: 1b}, uses: 2, priceMultiplier: 0.0f, maxUses: 999999, rewardExp: 1b, demand: 0, specialPrice: 0, buyB: {id: "minecraft:air", Count: 0b}}, {xp: 1, buy: {id: "minecraft:iron_nugget", tag: {display: {Name: '{"text":"Divine Bauble","color":"green","italic":false,"underlined":true}', Lore: ['{"text":"This long multicolored tassel seems to"}', '{"text":"enjoy wrapping itself around sturdy"}', '{"text":"objects and swaying, leaving small runes"}', '{"text":"in the air behind it as it moves."}', '{"text":" "}', '{"text":"Can be exchanged for valuables with"}', '{"text":"Precocious Kinah in Ytaj."}']}, CustomModelData: 3}, Count: 3b}, sell: {id: "minecraft:warped_fungus_on_a_stick", tag: {RepairCost: 1000000, khive_scroll: 1b, Unbreakable: 1b, Damage: 0, HideFlags: 127, display: {Name: '{"text":"Khivian Scroll of Sanctuary","color":"green","italic":false,"underlined":true}', Lore: ['{"text":"While most Tehrmari now live in permanent homes,"}', '{"text":"all must, at some time in their lives, uphold the"}', '{"text":"nomadic tradition. Mystic Elder Khive taught"}', '{"text":"Scalebound artificers the method of constructing"}', '{"text":"these scrolls long ago, and to this day, few"}', '{"text":"Tehrmari travelers embark on a journey unless"}', '{"text":"one is within arm\'s reach."}', '{"text":" "}', '{"text":"Sanctuary","color":"green","italic":false}', '{"text":"Right click to consume this scroll and","color":"dark_gray"}', '{"text":"return to your spawnpoint.","color":"dark_gray"}', '{"text":" "}', '{"text":"This item is consumed on use.","color":"gray"}', '{"text":" "}', '{"text":"Trinket","color":"green","italic":false}']}, CustomModelData: 12}, Count: 1b}, uses: 0, priceMultiplier: 0.0f, maxUses: 999999, rewardExp: 1b, demand: 0, specialPrice: 0, buyB: {id: "minecraft:air", Count: 0b}}, {xp: 1, buy: {id: "minecraft:iron_nugget", tag: {display: {Name: '{"text":"Divine Bauble","color":"green","italic":false,"underlined":true}', Lore: ['{"text":"This long multicolored tassel seems to"}', '{"text":"enjoy wrapping itself around sturdy"}', '{"text":"objects and swaying, leaving small runes"}', '{"text":"in the air behind it as it moves."}', '{"text":" "}', '{"text":"Can be exchanged for valuables with"}', '{"text":"Precocious Kinah in Ytaj."}']}, CustomModelData: 3}, Count: 1b}, sell: {id: "minecraft:experience_bottle", Count: 2b}, uses: 0, priceMultiplier: 0.0f, maxUses: 999999, rewardExp: 1b, demand: 0, specialPrice: 0, buyB: {id: "minecraft:air", Count: 0b}}, {xp: 1, buy: {id: "minecraft:amethyst_shard", Count: 12b}, sell: {id: "minecraft:iron_nugget", tag: {display: {Name: '{"text":"Divine Bauble","color":"green","italic":false,"underlined":true}', Lore: ['{"text":"This long multicolored tassel seems to"}', '{"text":"enjoy wrapping itself around sturdy"}', '{"text":"objects and swaying, leaving small runes"}', '{"text":"in the air behind it as it moves."}', '{"text":" "}', '{"text":"Can be exchanged for valuables with"}', '{"text":"Precocious Kinah in Ytaj."}']}, CustomModelData: 3}, Count: 1b}, uses: 0, priceMultiplier: 0.0f, maxUses: 999999, rewardExp: 1b, demand: 0, specialPrice: 0, buyB: {id: "minecraft:diamond", Count: 1b}}, {xp: 1, buy: {id: "minecraft:amethyst_shard", Count: 12b}, sell: {id: "minecraft:iron_nugget", tag: {display: {Name: '{"text":"Divine Bauble","color":"green","italic":false,"underlined":true}', Lore: ['{"text":"This long multicolored tassel seems to"}', '{"text":"enjoy wrapping itself around sturdy"}', '{"text":"objects and swaying, leaving small runes"}', '{"text":"in the air behind it as it moves."}', '{"text":" "}', '{"text":"Can be exchanged for valuables with"}', '{"text":"Precocious Kinah in Ytaj."}']}, CustomModelData: 3}, Count: 3b}, uses: 0, priceMultiplier: 0.0f, maxUses: 999999, rewardExp: 1b, demand: 0, specialPrice: 0, buyB: {id: "minecraft:netherite_scrap", Count: 1b}}, {xp: 1, buy: {id: "minecraft:amethyst_shard", Count: 12b}, sell: {id: "minecraft:command_block", tag: {CustomModelData: 1000014, relic_vessel: 1b, display: {Name: '{"text":"Relic Vessel","color":"green","italic":false,"underlined":true}', Lore: ['{"text":"This simple vessel is made out of highly"}', '{"text":"malleable metal. Carried by the Wingmakers to"}', '{"text":"test the faith of Tehrmari aspirants, the"}', '{"text":"Aspects and Deities can easily mold it to"}', '{"text":"show their favor for the holder."}', '{"text":" "}', '{"text":"Divine Transformation","color":"green","italic":false}', '{"text":"Can be transformed into any Relic you have","color":"dark_gray"}', '{"text":"already unlocked with a being at their","color":"dark_gray"}', '{"text":"devotion altar.","color":"dark_gray"}', '{"text":" "}', '{"text":"Trinket","color":"green","italic":false}']}}, Count: 1b}, uses: 0, priceMultiplier: 0.0f, maxUses: 999999, rewardExp: 1b, demand: 0, specialPrice: 0, buyB: {id: "minecraft:gold_ingot", Count: 2b}}]}, Inventory: [], FallDistance: 0.0f, NoGravity: 1b, Motion: [-2.7112267000510064d, 0.0d, 0.0d], Fire: 0s, CanPickUpLoot: 0b, Health: 20.0f, HurtTime: 0s, FallFlying: 0b, PersistenceRequired: 1b, PortalCooldown: 0}
-
This mural has been disputed between Mari and Maen. It is most likely Mari, based on prototype versions of this build in the Dev Zone and the fact that Maen and Moen are across from one another in this interpretation. ↩